| Section |
Page |
| Table of ContentsUse and care manual |
3 |
| Safety DefinitionsSafety Definitions |
4 |
| 9 WARNING |
4 |
| 9 CAUTION |
4 |
| NOTICE: |
4 |
| Note: |
4 |
| IMPORTANT SAFETY INSTRUCTIONS |
5 |
| READ AND SAVE THESE INSTRUCTIONS |
5 |
| WARNING |
5 |
| Proper Installation and Maintenance |
5 |
| WARNING |
5 |
| WARNING |
5 |
| WARNING |
5 |
| WARNING |
5 |
| Fire Safety |
5 |
| WARNING |
5 |
| WARNING |
5 |
| WARNING |
6 |
| TO REDUCE THE RISK OF INJURY TO PERSONS IN THE EVENT OF A GREASE FIRE, OBSERVE THE FOLLOWING: |
6 |
| a. SMOTHER FLAMES with a close-fitting lid, cookie sheet, or metal tray, then turn off the burner. BE CAREFUL TO PREVENT BURNS. If the flames do not go out immediately, EVACUATE AND CALL THE FIRE DEPARTMENT. |
6 |
| b. NEVER PICK UP A FLAMING PAN – You may be burned. |
6 |
| c. DO NOT USE WATER, including wet dishcloths or towels – a violent steam explosion will result. |
6 |
| d. Use an extinguisher ONLY if: |
6 |
| Burn Prevention |
6 |
| CAUTION |
6 |
| WARNING |
6 |
| Scalding hazard |
6 |
| WARNING |
6 |
| Risk of scalding |
6 |
| WARNING |
6 |
| Risk of scalding |
6 |
| WARNING |
6 |
| Risk of burns |
6 |
| WARNING |
6 |
| Risk of scalding |
6 |
| Child Safety |
7 |
| WARNING |
7 |
| Cleaning Safety |
7 |
| WARNING |
7 |
| Risk of injury |
7 |
| WARNING |
7 |
| Risk of electrical shock |
7 |
| Cookware Safety |
7 |
| WARNING |
7 |
| Risk of electric shock |
7 |
| State of California Proposition 65 Warning: |
7 |
| WARNING |
7 |
| Causes of Damage |
8 |
| NOTICES |
8 |
| Protecting the Environment |
8 |
| Saving Energy |
8 |
| Accessories |
9 |
| 9 CAUTION |
9 |
| Accessories Included - Steam Oven |
9 |
| Note: |
9 |
| Special Accessories - Steam Oven |
9 |
| Accessories Included - Conventional Oven |
10 |
| Note: |
10 |
| Special Accessories - Conventional Oven |
10 |
| Getting to Know the Appliance |
11 |
| Note: |
11 |
| Oven Overview |
11 |
| Oven Cavities |
11 |
| Upper Oven Cavity - Steam Oven |
11 |
| 9 CAUTION |
11 |
| 9 CAUTION |
11 |
| Lower Oven Cavity - Conventional Oven |
12 |
| 9 CAUTION |
12 |
| Oven Bottom |
12 |
| 9 WARNING |
12 |
| NOTICE: |
12 |
| 9 WARNING |
12 |
| Oven Cavity Features |
12 |
| Oven Vent |
12 |
| Cooling Fan |
12 |
| Convection Fan |
12 |
| Oven Light |
12 |
| Water Tank |
12 |
| Control Panel |
13 |
| Operating Controls |
13 |
| Touch Buttons |
13 |
| Full Touch Color Display |
13 |
| Basic way of operating the display: |
13 |
| In some instances you have further options to navigate through the menu: |
14 |
| Main Menu |
14 |
| Heating Modes Menu |
15 |
| Heating Mode Availability |
15 |
| Conventional Oven |
15 |
| Lower Cavity |
15 |
| Ø |
15 |
| Ø |
15 |
| Ø |
15 |
| Ø |
15 |
| Ø |
15 |
| Ø |
15 |
| Ø |
15 |
| Ø |
15 |
| Ø |
15 |
| Ø |
15 |
| Ø |
15 |
| Ø |
15 |
| Ø |
15 |
| Þ |
15 |
| Ø |
15 |
| Þ |
15 |
| Ø |
15 |
| Ø |
15 |
| Ø |
15 |
| Ø |
15 |
| Ø |
15 |
| Ø |
15 |
| Ø |
15 |
| Ø |
15 |
| Ø |
15 |
| Þ |
15 |
| Ø |
15 |
| Ø |
15 |
| Ø |
15 |
| Ø |
15 |
| Ø |
15 |
| Ø |
15 |
| Þ |
15 |
| Ø |
15 |
| Þ |
15 |
| Ø |
15 |
| Þ |
15 |
| Ø |
15 |
| Þ |
15 |
| Ø |
15 |
| Ø |
15 |
| Þ |
15 |
| Ø |
15 |
| Ø |
15 |
| Þ |
15 |
| Ø |
15 |
| Þ |
15 |
| Ø |
15 |
| Ø |
15 |
| Ø |
15 |
| Ø |
15 |
| Heating Modes Menu Steam Oven |
15 |
| -------- |
16 |
| Heating Modes Menu Conventional Oven |
17 |
| -------- |
17 |
| General Tips-Conventional Oven |
18 |
| Pan Placement |
18 |
| Note: |
18 |
| 2 Cakes, Rack Level 4 |
18 |
| Multiple Rack Baking for Cakes |
18 |
| 4 Cakes, Rack Placement 3 and 5 |
18 |
| Aluminum Foil |
18 |
| 9 WARNING |
18 |
| Preheating the Oven |
18 |
| Preheat Reminders |
18 |
| For Best Results |
18 |
| Baking Pans and Dishes |
19 |
| High Altitude Baking |
19 |
| Condensation |
19 |
| Before First Use |
19 |
| Before Using the Appliance for the First Time |
19 |
| Water Hardness |
19 |
| NOTICES |
19 |
| Initial Use |
19 |
| Setting the time of day |
19 |
| 1. Touch the bottom line. |
19 |
| 2. Touch the “Hours” touch field and swipe to the left or right to select the current hour. |
19 |
| 3. Touch the \ |
19 |
| 4. Touch the 8 symbol to apply the settings. |
19 |
| Setting the language |
20 |
| 1. Touch the bottom line. |
20 |
| 2. Swipe to the left or right to select the required language. |
20 |
| 3. Touch the top line. |
20 |
| Setting the Clock Display |
20 |
| 1. Touch \ |
20 |
| 2. Touch the bottom line. |
20 |
| 3. Swipe to the left or right to select “digital” or “analogue”. |
20 |
| 4. Touch the top line. |
20 |
| Setting the water hardness |
20 |
| 1. Touch \ |
20 |
| 2. Touch the bottom line. |
20 |
| 3. Swipe to the left or right to select the appropriate water hardness. |
20 |
| 4. Touch the top line. |
20 |
| Setting up Home Connect |
20 |
| 1. Touch “Home Connect”. |
20 |
| 2. Touch “Start assistant”. |
20 |
| 3. Follow the instructions in the chapter “Home Connect”.~ \ |
20 |
| Note: |
20 |
| Notes |
20 |
| Calibrating the Appliance and Cleaning the Oven Cavity |
20 |
| Preparing the Appliance for Calibration |
20 |
| 1. Remove the accessories from the oven cavity. |
20 |
| 2. Remove any remaining packaging, such as polystyrene pellets, from the oven cavity. |
20 |
| 3. Before calibrating the appliance, wipe the smooth surfaces in the oven cavity with a soft, wet cloth. |
20 |
| Notes |
20 |
| NOTICE: |
20 |
| 1. Fill the water tank. |
20 |
| 2. Press the ON l OFF touch button to switch on the appliance. |
20 |
| 3. The oven will calibrate automatically after running a Steam heating mode at 212° F (100 °C) for 30 minutes. Set the heating mode, temperature and duration for the calibration. Press START to begin the appliance operation. |
20 |
| 4. After calibration, allow the appliance to cool down. |
20 |
| 5. Dry the oven cavity bottom floor. |
20 |
| 6. Set Bake to 475° F (245°C). |
20 |
| 7. Keep the kitchen ventilated while the appliance is heating. |
20 |
| 8. Stop the appliance operation after the indicated duration. Use the ON l OFF touch button to switch off the appliance. |
20 |
| 9. Wait until the oven cavity has cooled down. |
21 |
| 10. Clean the smooth surfaces with soapy water and a dish cloth. |
21 |
| 11. Empty the water tank and dry the oven cavity. |
21 |
| Note: |
21 |
| Cleaning the Accessories |
21 |
| Adjust Basic Settings |
21 |
| Changing the Settings |
21 |
| 1. Touch the ON l OFF touch button. |
21 |
| 2. Touch the MENU touch button. |
21 |
| 3. Swipe to the left or right to select \ |
21 |
| 4. Touch “Continue”. |
21 |
| 5. Swipe to the left or right to select the desired setting. |
21 |
| 6. Touch the bottom touch field. |
21 |
| 7. Swipe to the left or right to select the desired setting. |
21 |
| 8. Touch the 8 icon (where applicable) to apply the setting. |
21 |
| 9. Touch the MENU touch button. |
21 |
| 10. Touch \ |
21 |
| Available Settings |
21 |
| General Operation |
22 |
| High Altitude Baking |
22 |
| Switching the Appliance On and Off |
22 |
| Notes |
22 |
| Timer Options |
22 |
| Displaying and hiding timer options |
22 |
| Note: |
22 |
| Oven Timer |
22 |
| 1. Touch the ON l OFF touch button. |
22 |
| 2. Set the heating mode and temperature. |
22 |
| 3. Touch the TIMERS touch button. |
22 |
| 4. Touch the “+ Oven Timer” touch field. |
22 |
| 5. Touch the required field and swipe to the left or right to set the oven timer. |
22 |
| 6. Touch the 8 symbol. |
22 |
| 7. Touch the START l STOP touch button. |
22 |
| Note: |
22 |
| Kitchen Timer |
23 |
| 1. Touch the TIMERS touch button. |
23 |
| 2. Swipe to the left or right to select the timer value. You can set hours, minutes and seconds. |
23 |
| 3. Touch the 8 icon. |
23 |
| Note: |
23 |
| Delayed Operation - \ |
23 |
| Notes |
23 |
| 9 CAUTION |
23 |
| 1. Place the food onto the appropriate accessory in the oven cavity and close the appliance door. |
23 |
| 2. Touch the ON l OFF touch button. |
23 |
| 3. Set the heating mode. |
23 |
| 4. Touch the TIMERS touch button. The timer options are shown in the display. |
23 |
| 5. Select Oven Timer and set a cook time. Touch the 8 icon. |
23 |
| 6. Select TIMERS again and set End Time. Touch the 8 icon. |
23 |
| 7. Touch the START l STOP touch button. |
23 |
| Checking, changing or deleting settings |
23 |
| 1. Touch the TIMERS touch button. |
23 |
| 2. Touch the required timer option. |
23 |
| 3. Swipe to the left or right on the touch display to change the settings. |
23 |
| Setting a Heating Mode |
23 |
| 1. Touch the ON l OFF touch button to switch on the appliance. |
23 |
| 2. Swipe to the left in the top line of the display to select “True Convection” ‚. |
23 |
| 3. Swipe to the left or right in the bottom line of the display to select the temperature. |
23 |
| 4. Touch the START l STOP touch button to start the appliance operation. |
24 |
| Setting double oven |
24 |
| 1. Select the upper or lower compartment by touching the q or r symbol to select the upper or lower oven cavity. |
24 |
| 2. Make your settings as usual. |
24 |
| 3. When you have finished the settings for the first oven cavity, touch the q or r symbol to select the other compartment. |
24 |
| Note: |
24 |
| Default Values |
24 |
| Preheating Bar |
24 |
| INFO Touch Button |
24 |
| Sounds |
24 |
| Changing or Cancelling the Appliance Operation |
24 |
| Note: |
24 |
| Changing the appliance operation |
24 |
| 1. Use the START l STOP touch button to stop the operation. |
24 |
| 2. Touch the area for the setting that should be changed. |
24 |
| 3. Swipe to the left or right to change the setting. |
24 |
| 4. Use the START l STOP touch button to start the changed operation. |
24 |
| Notes |
24 |
| Cancelling the appliance operation |
24 |
| Note: |
24 |
| Fast Preheat |
25 |
| Notes |
25 |
| Activating the \ |
25 |
| 1. Set a heating mode and temperature. |
25 |
| 2. Touch the START l STOP touch button to start the heating mode. |
25 |
| 3. Touch the FAST PREHEAT touch button to activate the function. |
25 |
| 4. Once the set temperature has been reached, the \ |
25 |
| Panel Lock |
25 |
| Activating and Deactivating |
25 |
| 1. Touch and hold the TIMERS touch button for approximately 4 seconds until \ |
25 |
| 2. Touch and hold the TIMERS touch button for approximately 4 seconds until \ |
25 |
| Auto Convection Conversion |
25 |
| To turn on this feature: |
25 |
| 1. Go to Settings |
25 |
| 2. Press the ON|OFF touch button to turn the oven on. |
25 |
| 3. Press the MENU touch button. |
25 |
| 4. Scroll over to Settings on the touch screen. |
25 |
| 5. Select Conv. Conversion and press ON. |
25 |
| 6. Exit Settings and select “Save” to save your settings. |
25 |
| Temperature Offset |
25 |
| Note: |
25 |
| Note: |
25 |
| Meat Probe |
25 |
| Suitable Heating Modes |
25 |
| Notes |
25 |
| Inserting the Meat Probe into the Food |
26 |
| Steam Oven Cavity: |
26 |
| Conventional Oven Cavity: |
26 |
| NOTICE: |
26 |
| Setting and Starting Appliance Operation |
26 |
| 9 WARNING |
26 |
| Risk of burns |
26 |
| 9 WARNING |
26 |
| Risk of electric shock |
26 |
| Notes |
26 |
| 1. Insert the meat probe into the socket on the left-hand side of the oven cavity. |
26 |
| Note: |
26 |
| 2. Close the appliance door. |
26 |
| NOTICE: |
26 |
| 3. Touch the ON l OFF touch button. |
26 |
| 4. Set the heating mode. |
26 |
| Note: |
26 |
| 5. Touch the oven cavity temperature on the left in the bottom line. |
26 |
| 6. Swipe to the left or right to select the required oven cavity temperature. |
26 |
| 7. Touch the 8 symbol to apply the setting. |
26 |
| 8. Touch the ¥ core temperature on the right in the bottom line. |
26 |
| 9. Swipe to the left or right to select the required core temperature. |
26 |
| 10. Touch the START l STOP touch button. |
26 |
| Changing or Stopping the Appliance Operation |
27 |
| 1. Touch the oven cavity temperature or meat probe temperature. |
27 |
| 2. Swipe to the left or right to change the temperature. |
27 |
| 3. Touch the 8 symbol to apply the setting. |
27 |
| 1. Use the ON l OFF touch button to switch off the appliance. |
27 |
| 2. Using an oven glove, unplug the meat probe from the socket. |
27 |
| Core Temperatures of Different Foods |
27 |
| Sabbath Mode |
27 |
| Note: |
27 |
| Note: |
27 |
| Starting |
27 |
| 1. Touch the ON l OFF touch button. |
27 |
| 2. Swipe to the left or right to select \ |
27 |
| 3. Touch the temperature in the bottom line. |
27 |
| 4. Swipe to the left or the right to select the required temperature. |
27 |
| 5. Touch the 8 icon to apply the setting. |
27 |
| 6. Touch the cooking time + in the bottom line. |
27 |
| 7. Swipe to the left or the right to select the required duration. |
27 |
| 8. Touch the 8 symbol to apply the setting. |
27 |
| 9. Touch the START l STOP touch button. |
27 |
| Notes |
27 |
| Cancelling |
27 |
| Yom Tov Mode |
28 |
| Note: |
28 |
| Note: |
28 |
| Starting |
28 |
| 1. Touch the ON l OFF touch button. |
28 |
| 2. Swipe to the left or right to select \ |
28 |
| 3. Touch the temperature in the bottom touch field. |
28 |
| 4. Swipe to the left or the right to select the required temperature. |
28 |
| 5. Touch the 8 icon to apply the setting. |
28 |
| 6. Touch the cooking time + in the bottom touch field. |
28 |
| 7. Swipe to the left or the right to select the required duration. |
28 |
| 8. Touch the 8 icon to apply the setting. |
28 |
| 9. Touch the START l STOP touch button. |
28 |
| Notes |
28 |
| Cancelling |
28 |
| Home Connect |
28 |
| Notes |
28 |
| Setting Up |
28 |
| Connecting Your Oven to Home Connect |
28 |
| 1. Install the Home Connect app. |
28 |
| 2. Connect your oven to the Wi-Fi network. |
28 |
| 3. Connect your oven to the app. |
28 |
| 1. Install the Home Connect app. |
28 |
| 2. Connect your oven to the Wi-Fi network. |
28 |
| Automatic Registration in the Home Network |
29 |
| Notes |
29 |
| 1. Touch the MENU touch button. |
29 |
| 2. Swipe to the left or right to select “Settings”. |
29 |
| 3. Swipe to the left or right to select “Home Connect”. |
29 |
| 4. Touch “Start assistant”. |
29 |
| 5. Touch “Continue”. |
29 |
| 6. Within 2 minutes press the WPS button on the router. Wait until “Network connection successful” is shown in the display. |
29 |
| 7. The appliance is ready to connect to the app. |
29 |
| 8. Follow the instructions of the app on your mobile device for automatic network registration. |
29 |
| Manual Registration in the Home Network |
29 |
| Note: |
29 |
| 1. Touch the MENU touch button. |
29 |
| 2. Swipe to the left or right to select \ |
29 |
| 3. Swipe to the left or right to select \ |
29 |
| 4. Touch “Start assistant”. |
29 |
| 5. Touch “Continue”. |
29 |
| 6. Touch \ |
29 |
| 7. Touch “Continue”. |
29 |
| 8. Use the \ |
29 |
| 9. Wait until \ |
30 |
| 10. The appliance is ready to connect to the app. |
30 |
| 11. Follow the instructions of the app on your mobile device for manual network registration. |
30 |
| Remote Start |
30 |
| Notes |
30 |
| 1. Touch the MENU touch button. |
30 |
| 2. Touch “Remote start”. |
30 |
| Home Connect Settings |
30 |
| Note: |
30 |
| Wi-Fi |
30 |
| 1. Touch the MENU touch button. |
30 |
| 2. Swipe to the left or right to select \ |
30 |
| 3. Swipe to the left or right to select \ |
30 |
| 4. Touch “Open settings”. |
30 |
| 5. Swipe to the left or right to select \ |
30 |
| 6. Touch the bottom line to select “On” or “Off”. |
30 |
| 7. Touch the ; field to return to the Home Connect settings menu. |
30 |
| Disconnecting from the Network |
30 |
| Note: |
30 |
| 1. Touch the MENU touch button. |
30 |
| 2. Swipe to the left or right to select \ |
30 |
| 3. Swipe to the left or right to select \ |
30 |
| 4. Touch “Open settings”. |
30 |
| 5. Swipe to the left or right to select \ |
30 |
| 6. Touch “Disconnect from network”. |
30 |
| 7. Confirm by touching “Disconnect”. |
30 |
| Note: |
30 |
| Connecting to the networkConnecting to the network |
31 |
| 1. Touch the MENU touch button. |
31 |
| 2. Swipe to the left or right to select \ |
31 |
| 3. Swipe to the left or right to select \ |
31 |
| 4. Touch “Open settings”. |
31 |
| 5. Swipe to the left or right to select \ |
31 |
| 6. Touch “Start assistant”. |
31 |
| 7. Follow the instructions in the section entitled “Manual registration in the home network” or “Automatic registration in the home network”. |
31 |
| Connect to App |
31 |
| Note: |
31 |
| 1. Touch the MENU touch button. |
31 |
| 2. Swipe to the left or right to select \ |
31 |
| 3. Swipe to the left or right to select \ |
31 |
| 4. Touch “Open settings”. |
31 |
| 5. Swipe to the left or right to select \ |
31 |
| 6. Touch the bottom line to select “Start”. |
31 |
| Remote control |
31 |
| Notes |
31 |
| 1. Touch the MENU touch button. |
31 |
| 2. Swipe to the left or right to select \ |
31 |
| 3. Swipe to the left or right to select \ |
31 |
| 4. Touch “Open settings”. |
31 |
| 5. Swipe to the left or right to select \ |
31 |
| 6. Touch the bottom line to select “On” or “Off”. |
31 |
| 7. Touch the ; field to return to the Home Connect settings menu. |
31 |
| Software Update |
31 |
| Notes |
31 |
| Information on Data Protection |
31 |
| Note: |
31 |
| Wi-Fi® Module |
32 |
| FCC COMPLIANCE STATEMENT |
32 |
| 9 CAUTION |
32 |
| 1. This device may not cause harmful interference, and |
32 |
| 2. This device must accept any interference received, including interference that may cause undesired operation. |
32 |
| INDUSTRY CANADA STATEMENT |
32 |
| 1. This device may not cause interference, and |
32 |
| 2. This device must accept any interference, including interference that may cause undesired operation of the device. |
32 |
| Steam Operation |
32 |
| 9 WARNING |
32 |
| Risk of scalding |
32 |
| Noises |
32 |
| Inserting Accessories |
32 |
| Note: |
32 |
| 9 WARNING |
32 |
| Risk of Burns |
32 |
| 9 CAUTION |
32 |
| NOTICE: |
32 |
| Note: |
33 |
| Example in the picture: Universal pan |
33 |
| Example in the picture: Rack |
33 |
| Stop Function |
33 |
| Steam Cooking |
33 |
| Note: |
33 |
| Setting |
33 |
| 1. Refill water tank. |
33 |
| Note: |
33 |
| 2. Touch the ON l OFF touch button. |
33 |
| 3. Swipe to the left or right to select \ |
33 |
| 4. Touch the temperature field. |
34 |
| 5. Swipe to the left or the right to select the required temperature. |
34 |
| 6. Touch the timer field +. |
34 |
| 7. Swipe to the left or the right to select the required duration. |
34 |
| 8. Touch the START l STOP touch button. |
34 |
| Cancelling |
34 |
| Note: |
34 |
| Exit |
34 |
| Steam Assisted Cooking |
34 |
| Steam Intensity |
34 |
| Suitable Heating Modes |
34 |
| Start |
34 |
| 1. Refill water tank. |
34 |
| Note: |
34 |
| 2. Touch the ON l OFF touch button. |
34 |
| 3. Set the heating mode and temperature. |
34 |
| 4. Touch the ADD STEAM touch button to switch on steam assistance. |
34 |
| 5. On the display, swipe to the left or right to select the steam intensity. |
34 |
| 6. Touch the 8 symbol to apply the setting. |
34 |
| 7. Touch the START l STOP touch button. |
34 |
| Note: |
34 |
| Cancelling Steam Addition |
34 |
| 1. Touch the ADD STEAM touch button to cancel the addition of steam early. |
34 |
| 2. Touch the steam intensity in the bottom right corner of the display. |
34 |
| 3. Swipe to the left or right to select \ |
34 |
| 4. Touch the 8 symbol to apply the setting. |
34 |
| Note: |
34 |
| Cancelling |
34 |
| Note: |
34 |
| Exit |
34 |
| Proof |
35 |
| Note: |
35 |
| Start |
35 |
| 1. Refill water tank. |
35 |
| Note: |
35 |
| 2. Touch the ON l OFF touch button. |
35 |
| 3. Swipe to the left or right to select \ |
35 |
| 4. Touch \ |
35 |
| 5. Swipe to the left or right to select the required setting. |
35 |
| 6. Touch the 8 symbol to apply the setting. |
35 |
| 7. Touch \ |
35 |
| 8. Swipe to the left or the right to select the required duration. |
35 |
| 9. Touch the 8 symbol to apply the setting. |
35 |
| 10. Touch the START l STOP touch button. |
35 |
| Cancelling |
35 |
| Note: |
35 |
| Exit |
35 |
| Defrost |
35 |
| Note: |
35 |
| Start |
35 |
| 1. Refill water tank. |
35 |
| Note: |
35 |
| 2. Touch the ON l OFF touch button. |
35 |
| 3. Swipe to the left or right to select \ |
35 |
| 4. Touch the temperature in the bottom line. |
35 |
| 5. Swipe to the left or the right to select the required temperature. |
35 |
| 6. Touch the 8 icon to apply the setting. |
35 |
| 7. Touch \ |
35 |
| 8. Swipe to the left or the right to select the required duration. |
35 |
| 9. Touch the 8 icon to apply the setting. |
35 |
| 10. Touch the START l STOP touch button. |
35 |
| Cancelling |
35 |
| Note: |
35 |
| Exit |
35 |
| Reheating |
35 |
| Note: |
35 |
| Start |
35 |
| 1. Refill water tank. |
35 |
| Note: |
35 |
| 2. Touch the ON l OFF touch button. |
35 |
| 3. Swipe to the left or right to select \ |
35 |
| 4. Touch the temperature in the bottom touch field. |
35 |
| 5. Swipe to the left or the right to select the required temperature. |
35 |
| 6. Touch the 8 icon to apply the setting. |
35 |
| 7. Touch \ |
35 |
| 8. Swipe to the left or the right to select the required duration. |
36 |
| 9. Touch the 8 icon to apply the setting. |
36 |
| 10. Touch the START l STOP touch button. |
36 |
| Cancelling |
36 |
| Note: |
36 |
| Exit |
36 |
| Refill Water Tank |
36 |
| 9 WARNING |
36 |
| Risk of injury and fire |
36 |
| 9 WARNING |
36 |
| Risk of Burns |
36 |
| NOTICE: |
36 |
| Notes |
36 |
| 1. Open the appliance door. |
36 |
| 2. Pull out the water tank from the right side of the oven cavity (figure !). |
36 |
| 3. Fill the water tank with cold water up to the “max.” mark (figure \ |
36 |
| 4. Fully close the tank cover until it locks. |
36 |
| 5. Insert the filled water tank (figure #). |
36 |
| 6. Ensure that the water tank has been pushed in all the way. The water tank should be level with the tank cavity (figure $). |
36 |
| 7. Close the appliance door. |
36 |
| After Every Steam Operation |
37 |
| 9 WARNING |
37 |
| Risk of scalding |
37 |
| 9 WARNING |
37 |
| Risk of burns |
37 |
| NOTICE: |
37 |
| Notes |
37 |
| Empty Water Tank |
37 |
| NOTICE: |
37 |
| 1. Open the appliance door. |
37 |
| 2. Remove the water tank. |
37 |
| 3. Empty the water tank, clean it with detergent and then rinse it thoroughly with clean water. |
37 |
| 4. Dry all parts with a soft cloth. |
37 |
| 5. Rub the seal on the cover until dry. |
37 |
| 6. Leave to dry with the cover open. |
37 |
| 7. Close the cover on the water tank and push it down. |
37 |
| 8. Insert the water tank and close the appliance door. |
37 |
| Starting Drying |
37 |
| 1. Let the appliance cool down. |
37 |
| 2. Remove the worst of the food remnants from the oven cavity immediately and use a sponge to wipe away moisture from the oven cavity floor. |
37 |
| 3. If necessary, touch the ON l OFF touch button to switch the appliance on. |
37 |
| 4. Touch the MENU touch button to display the operating modes. |
37 |
| 5. On the touch display, swipe to the left or right to select \ |
37 |
| 6. Touch the bottom touch field. |
37 |
| 7. Touch the bottom touch field. |
37 |
| 8. Touch the START l STOP touch button. |
37 |
| 9. Open the appliance door and leave it open for 1 to 2 minutes so that the moisture in the oven cavity can escape. |
37 |
| Drying the Oven Cavity by Hand |
37 |
| 1. Let the appliance cool down. |
37 |
| 2. Remove any soil from the oven cavity. |
37 |
| 3. Dry the oven cavity with a sponge. |
37 |
| 4. Leave the appliance door open for 1 hour so that the oven cavity dries completely. |
37 |
| Steam Programs |
37 |
| 9 WARNING |
37 |
| Risk of scalding |
37 |
| Information on the Settings |
38 |
| Selecting a Dish |
38 |
| Setting a Program |
38 |
| 1. Touch the ON l OFF touch button to switch on the appliance. |
38 |
| 2. Touch the MENU touch button. |
38 |
| 3. Swipe to the left or right to select \ |
38 |
| 4. Touch the bottom line. |
38 |
| 5. Touch the required category. |
38 |
| 6. Swipe to the left or right to select the required steam program. |
38 |
| 7. Touch the required steam program. |
38 |
| Note: |
38 |
| 8. Some programs require a weight. Press the weight and scroll to adjust. |
38 |
| 9. Touch the START l STOP touch button to start the appliance operation. |
38 |
| Note: |
38 |
| Continue cooking |
39 |
| 1. Touch \ |
39 |
| 2. If necessary, adjust the recommended setting or time amount. |
39 |
| 3. Touch the START l STOP touch button to start \ |
39 |
| Cancelling |
39 |
| Note: |
39 |
| Exit |
39 |
| Cleaning Your Steam Oven |
39 |
| Suitable Cleaning Agents |
39 |
| NOTICE: |
39 |
| Tip: |
39 |
| 9 WARNING |
39 |
| Risk of burns |
39 |
| Notes |
39 |
| Cleaning Guide |
39 |
| Notes |
40 |
| Surfaces in the Oven Cavity |
40 |
| Cleaning Enamel Surfaces |
40 |
| Note: |
40 |
| Keeping the Appliance Clean |
40 |
| Cleaning Functions Steam Oven |
41 |
| NOTICE: |
41 |
| Ecolytic Clean |
41 |
| Note: |
41 |
| Before Running the Ecolytic Clean Function |
41 |
| Cleaning the Oven Bottom and the Inside of the Appliance Door |
41 |
| NOTICE: |
41 |
| Start |
41 |
| 1. Touch the ON l OFF touch button. |
41 |
| 2. Touch the MENU touch button. |
41 |
| 3. Swipe to the left or right to select \ |
41 |
| 4. Touch the bottom line. |
41 |
| 5. Touch the bottom line. |
41 |
| 6. Touch the START l STOP touch button. |
41 |
| Once the Cleaning Function has Ended |
41 |
| Note: |
41 |
| Easy Clean |
42 |
| 9 WARNING |
42 |
| Risk of scalding |
42 |
| Setting |
42 |
| 1. Remove the accessories and racks from the oven cavity. |
42 |
| 2. Touch the ON l OFF touch button. |
42 |
| 3. Touch the MENU touch button. |
42 |
| 4. Swipe to the left or right to select \ |
42 |
| 5. Touch the bottom line. |
42 |
| 6. Touch the START l STOP touch button. |
42 |
| Exit |
42 |
| Subsequent Cleaning |
42 |
| 1. Open the appliance door and remove the remaining water with an absorbent sponge cloth. |
42 |
| 2. Clean the smooth surfaces in the oven cavity with a dish cloth or a soft brush. Stubborn residues can be removed using a soft scouring pad. |
42 |
| 3. Remove limescale with a cloth soaked in vinegar. Then wipe with clean water and rub dry with a soft cloth (including under the door seal). |
42 |
| 4. Use the ON l OFF touch button to switch off the appliance. |
42 |
| 5. Leave the appliance door ajar in the stop position (approx. 30°) for approx. one hour to allow the enamel surfaces in the oven cavity to dry thoroughly. Alternatively, you can also run the Drying function for the oven cavity. |
42 |
| Running the Drying Function for the Oven Cavity |
42 |
| 1. Touch the ON l OFF touch button. |
42 |
| 2. Touch the MENU touch button. |
42 |
| 3. Swipe to the left or right to select \ |
42 |
| 4. Touch the bottom line. |
42 |
| 5. Touch the START l STOP touch button. |
42 |
| Removing Heavy Food Deposits |
42 |
| Descale |
42 |
| Start |
43 |
| NOTICES |
43 |
| 1. Touch the ON l OFF touch button. |
43 |
| 2. Touch the MENU touch button. |
43 |
| 3. Swipe to the left or right to select \ |
43 |
| 4. Touch continue. |
43 |
| 5. Touch continue again. |
43 |
| 6. Remove the water tank and fill it with descaling solution. |
43 |
| 7. Mix 32 fluid oz. (950 ml) of water with 1/2 bottle (approximately 200 ml) of descale solution. |
43 |
| 8. Once the water tank has been filled with descaling solution, push it back in again fully. |
43 |
| 9. Follow the on-screen instructions. |
43 |
| First Rinsing Cycle |
43 |
| 1. The display will prompt to open the appliance door. Remove the water tank and rinse thoroughly. Fill the tank with fresh water and reinsert. |
43 |
| 2. Close the appliance door. |
43 |
| Second Rinsing Cycle |
43 |
| 1. The display will prompt to open the appliance door. Remove the water tank and rinse throughly. Fill the tank with fresh water and reinsert. |
43 |
| 2. Close the appliance door. |
43 |
| Completing Descale |
43 |
| 1. Open the appliance door. |
43 |
| 2. Empty water tank. Rinse thoroughly. Dry and reinsert. |
43 |
| 3. Descaling is complete and the appliance is ready for use again. |
43 |
| Conventional Oven Operation |
44 |
| Rack Positions |
44 |
| Inserting Racks |
44 |
| 9 CAUTION |
44 |
| Flat Rack |
44 |
| 1. Grasp rack firmly on both sides. |
44 |
| 2. Insert rack (see picture). |
44 |
| 3. Tilt rack up to allow stop into rack guide. |
44 |
| 4. Bring rack to a horizontal position and push the rest of the way in. |
44 |
| 1. Grasp rack firmly on both sides and pull rack toward you. |
44 |
| 2. When the stop is reached, tilt rack up and pull the rest of the way out. |
44 |
| Telescopic Rack |
45 |
| 1. Hold the rack at a slight angle. |
45 |
| 2. Engage the rear hooks in the accessory brackets. |
45 |
| 3. Hold the rack straight to allow second tab to rest over rack guide. |
45 |
| 4. Push the rack in until it is even with the front hooks. |
45 |
| 5. Lift the rack up to lock the last hook into place. |
45 |
| 6. Push the rack in completely. |
45 |
| 7. Engage the rack’s front hooks in the accessory brackets. |
45 |
| 9 CAUTION |
45 |
| Rotisserie |
45 |
| Assembling the Rotisserie: |
46 |
| 1. Insert the rotisserie rack half way into the oven on rack position 5. |
46 |
| 2. Slide the left fork into the skewer and tighten the screw. |
46 |
| 3. Slide meat or poultry for roasting onto the skewer and tighten the screw. |
46 |
| 4. Slide the right fork onto the skewer and tighten the screw. |
46 |
| 5. Check the balance of the food on the skewer by rolling the skewer in the palms of your hands. Food that is not evenly balanced on the skewer will not cook evenly. |
46 |
| 6. Place the rotisserie skewer onto the rack. |
46 |
| 7. Place the skewer rack into the oven and insert the drive shaft into the opening on the back oven wall. |
46 |
| 8. If necessary, turn the rotisserie skewer slightly so that the drive shaft fits properly into the opening. |
46 |
| 9. Insert flat rack on position 1 and insert broil pan to catch drippings. |
46 |
| Trussing Poultry for the Rotisserie |
46 |
| 1. Slip one of the forks on the skewer with the tines pointing to the tip of the skewer. Loosely tighten the screw to keep it from slipping. |
46 |
| 2. Insert the skewer through the poultry securing with the fork. |
46 |
| 3. Cut 24\ |
46 |
| 4. Wrap each end of the string around each of the wings; catch each wing tip as the string is brought tightly together at the top and knotted. Do not cut off the extra string. |
46 |
| 5. Cut another 24\ |
47 |
| 6. Pull legs forward; cross them on top of the skewer, bring string around and tie a knot. |
47 |
| 7. Connect the string holding the legs to the string holding the wings; then knot. Add the other fork and push tines into the drumsticks to secure. |
47 |
| 8. Check the balance by rolling the skewer in your palms. Poultry should not rotate or be loose in any way. If so, redo the trussing. The poultry will not cook evenly if it is not balanced on the skewer. |
47 |
| Start |
47 |
| Cooking Chart for Rotisserie |
47 |
| Cleaning Your Conventional Oven |
48 |
| Suitable Cleaning Agents |
48 |
| NOTICE: |
48 |
| Tip: |
48 |
| 9 WARNING |
48 |
| Risk of burns |
48 |
| Cleaning Guide |
48 |
| Notes |
49 |
| Surfaces in the Oven Cavity |
49 |
| Cleaning Enamel Surfaces |
49 |
| Note: |
49 |
| Keeping the Appliance Clean |
49 |
| Easy Clean |
49 |
| 9 WARNING |
49 |
| Risk of scalding |
49 |
| Setting |
49 |
| 1. Leave rack 3 and remove all other racks and accessories from the oven cavity. |
49 |
| 2. Mix 2 cups water and 1/2 cup vinegar and place in broil pan tray on rack 3. |
49 |
| 3. Touch the ON l OFF touch button. |
49 |
| 4. Touch the MENU touch button. |
49 |
| 5. Swipe to the left or right to select \ |
49 |
| 6. Touch the bottom line. |
49 |
| 7. Touch the START l STOP touch button. |
49 |
| Exit |
49 |
| Subsequent Cleaning |
49 |
| 1. Open the appliance door and remove the remaining water with an absorbent sponge cloth. |
49 |
| 2. Clean the smooth surfaces in the oven cavity with a dish cloth or a soft brush. Stubborn residues can be removed using a soft scouring pad. |
49 |
| 3. Remove limescale with a cloth soaked in vinegar. Then wipe with clean water and rub dry with a soft cloth. |
49 |
| 4. Use the ON l OFF touch button to switch off the appliance. |
49 |
| 5. Leave the appliance door ajar in the stop position (approx. 30°) for approx. one hour to allow the enamel surfaces in the oven cavity to dry thoroughly. |
49 |
| Removing Heavy Food Deposits |
50 |
| Self Clean |
50 |
| 9 WARNING |
50 |
| When using the Self Clean feature |
50 |
| NOTICE: |
50 |
| Preparing the pyrolytic self-cleaning feature |
50 |
| 9 CAUTION |
50 |
| Setting |
50 |
| 1. Remove the accessories from the oven cavity. |
50 |
| 2. Touch the ON l OFF touch button. |
50 |
| 3. Touch the MENU touch button. |
50 |
| 4. Swipe to the left or right to select \ |
50 |
| 5. Select a cleaning intensity. |
50 |
| 6. Touch “Continue”. |
50 |
| 7. Confirm that you have removed heavy soil and accessories from the oven cavity. |
50 |
| 8. Touch the START l STOP touch button. |
50 |
| Note: |
50 |
| When Self Clean is Completed |
51 |
| Avoid These Cleaners |
51 |
| Service |
51 |
| 9 WARNING |
51 |
| Risk of electric shock |
51 |
| 9 WARNING |
51 |
| Risk of electric shock |
51 |
| Troubleshooting Chart |
51 |
| -------- |
52 |
| Oven Light |
52 |
| Steam Oven Cavity Bulbs |
52 |
| Conventional Oven Cavity Bulbs |
52 |
| 1. Turn off power to the oven at the main power supply (fuse or breaker box). |
53 |
| 2. Remove three screws from oven cavity holding the rack in place. |
53 |
| 3. Remove oven rack to provide access to the bulb housing. |
53 |
| 4. Remove screw from top of bulb housing. |
53 |
| 5. Insert the tip of a narrow flat blade screwdriver between the metal clips at about a 40° angle. The screwdriver blade must be able to pass between the metal clips to reach the inner catch. |
53 |
| 6. Push the screwdriver blade inward to disengage the catch from the slot in the bulb housing. Gently pry the lens off by moving the screwdriver handle away from the oven wall. |
53 |
| 7. Support the glass lens cover to prevent it from falling.The lens should detach easily. Do not attempt to force it. |
53 |
| 8. Pull the halogen bulb from its socket. |
53 |
| 9. Replace the halogen bulb. Grasp the new bulb with a clean, dry cloth. Align the bulb prongs with the socket holes and press into place. |
54 |
| Note: |
54 |
| 10. Put the glass cover back on by inserting it into the mounting clip and pressing the end nearest you into the housing until it locks into place. Insert screw through glass cover and tighten. |
54 |
| 11. Reinstall the oven rack. |
54 |
| 12. Turn power back on at the main power supply (fuse or breaker box). |
54 |
| Product Rating Label |
54 |
| How to Obtain Service or Parts |
54 |
| STATEMENT OF LIMITED PRODUCT WARRANTY |
55 |
| What this Warranty Covers & Who it Applies to |
55 |
| How Long the Warranty Lasts |
55 |
| Repair/Replace as Your Exclusive Remedy |
55 |
| Out of Warranty Product |
55 |
| Warranty Exclusions |
55 |
| THERMADOR® Support |
56 |
| Service |
56 |
| Parts and Accessories |
56 |
| Table des MatièresNotice d’utilisation |
57 |
| Définitions de sécuritéDéfinitions de sécurité |
58 |
| 9 AVERTISSEMENT |
58 |
| 9 ATTENTION |
58 |
| AVIS : |
58 |
| Remarque : |
58 |
| IMPORTANTES CONSIGNES DE SÉCURITÉ |
59 |
| LIRE ET CONSERVER CES INSTRUCTIONS |
59 |
| AVERTISSEMENT |
59 |
| Installation et entretien corrects |
59 |
| AVERTISSEMENT |
59 |
| AVERTISSEMENT |
59 |
| AVERTISSEMENT |
59 |
| AVERTISSEMENT |
59 |
| Sécurité-incendie |
59 |
| AVERTISSEMENT |
59 |
| AVERTISSEMENT |
60 |
| AVERTISSEMENT |
60 |
| POUR RÉDUIRE LE RISQUE DE LÉSIONS CORPORELLES DANS L'ÉVENTUALITÉ D'UN FEU DE GRAISSE, OBSERVER LES CONSIGNES SUIVANTES : |
60 |
| a. ÉTOUFFER LES FLAMMES à l'aide d'un couvercle bien hermétique, d'une tôle à biscuits ou d'un plateau en métal, puis éteindre l'appareil. FAIRE ATTENTION À NE PAS SE BRÛLER. Si les flammes ne s'éteignent pas immédiatement, ÉVACUER LES LI... |
60 |
| b. NE JAMAIS SAISIR UN RÉCIPIENT QUI BRÛLE. Vous pourriez vous brûler. |
60 |
| c. NE PAS UTILISER D'EAU, y compris les chiffons ou serviettes mouillées. Une violente explosion de vapeur risque de se produire. |
60 |
| d. Utiliser un extincteur uniquement si : |
60 |
| Prévention des brûlures |
60 |
| ATTENTION |
60 |
| AVERTISSEMENT |
60 |
| Risques de brûlures |
60 |
| AVERTISSEMENT |
61 |
| Risque de brûlure |
61 |
| AVERTISSEMENT |
61 |
| Risque d'ébouillantement |
61 |
| AVERTISSEMENT |
61 |
| Risque de brûlure |
61 |
| AVERTISSEMENT |
61 |
| Risque de brûlures |
61 |
| Sécurité des enfants |
61 |
| AVERTISSEMENT |
61 |
| Consignes en matière de nettoyage |
61 |
| AVERTISSEMENT |
61 |
| Risque de blessure |
61 |
| AVERTISSEMENT |
61 |
| Risque de choc électrique |
61 |
| Sécurité pour la batterie de cuisine |
62 |
| AVERTISSEMENT |
62 |
| Risque de choc électrique |
62 |
| Avertissement issue de la proposition 65 de l’État de la Californie : |
62 |
| AVERTISSEMENT |
62 |
| Causes des dommages |
63 |
| AVIS |
63 |
| Protection de l'Environnement |
63 |
| Économie d’énergie |
63 |
| Accessoires |
64 |
| 9 ATTENTION |
64 |
| Accessoires inclus - Four à vapeur |
64 |
| Remarque : |
64 |
| Accessoires spéciaux - Four à vapeur |
64 |
| Accessoires inclus - Four conventionnel |
65 |
| Remarque : |
65 |
| Accessoires spéciaux- Four conventionnel |
65 |
| Familiarisation avec l'appareil |
66 |
| Remarque : |
66 |
| Vue d’ensemble du four |
66 |
| Cavités du four |
66 |
| Cavité du four supérieur - Four à vapeur |
66 |
| 9 ATTENTION |
66 |
| 9 ATTENTION |
66 |
| Cavité du four inférieur - Four conventionnel |
67 |
| 9 ATTENTION |
67 |
| Sole du four |
67 |
| 9 AVERTISSEMENT |
67 |
| AVIS : |
67 |
| 9 AVERTISSEMENT |
67 |
| Caractéristiques de la cavité du four |
67 |
| Évent de four |
67 |
| Ventilateur de refroidissement |
67 |
| Ventilateur à convection |
67 |
| Éclairage de four |
67 |
| Réservoir d’eau |
67 |
| Panneau de commande |
68 |
| Commandes |
68 |
| Touches tactiles |
68 |
| Écran tactile en couleur |
68 |
| Éléments de base de fonctionnement de l’écran : |
69 |
| Dans certains cas, on vous offre d’autres options de navigation dans le menu : |
69 |
| Menu principal |
69 |
| Menu Modes de cuisson |
70 |
| Disponibilité du mode de cuisson |
70 |
| Four conventionnel |
70 |
| Cavité inférieure |
70 |
| Ø |
70 |
| Ø |
70 |
| Ø |
70 |
| Ø |
70 |
| Ø |
70 |
| Ø |
70 |
| Ø |
70 |
| Ø |
70 |
| Ø |
70 |
| Ø |
70 |
| Ø |
70 |
| Ø |
70 |
| Ø |
70 |
| Þ |
70 |
| Ø |
70 |
| Þ |
70 |
| Ø |
70 |
| Ø |
70 |
| Ø |
70 |
| Ø |
70 |
| Ø |
70 |
| Ø |
70 |
| Ø |
70 |
| Ø |
70 |
| Ø |
70 |
| Þ |
70 |
| Ø |
70 |
| Ø |
70 |
| Ø |
70 |
| Ø |
70 |
| Ø |
70 |
| Ø |
70 |
| Þ |
70 |
| Ø |
70 |
| Þ |
70 |
| Ø |
70 |
| Þ |
70 |
| Ø |
70 |
| Þ |
70 |
| Ø |
70 |
| Ø |
70 |
| Þ |
70 |
| Ø |
70 |
| Ø |
70 |
| Þ |
70 |
| Ø |
70 |
| Þ |
70 |
| Ø |
70 |
| Ø |
70 |
| Ø |
70 |
| Ø |
70 |
| Menu Modes de cuisson- Four à vapeur |
70 |
| -------- |
71 |
| Menu des modes conventionnels de cuisson au four |
72 |
| -------- |
73 |
| Positionnement de plats de cuisson |
73 |
| Remarque : |
73 |
| Deux moules à gâteau, grille niveau 4 |
73 |
| Cuisson sur plusieurs grilles pour les gâteaux |
73 |
| Gâteau 4 étages Grilles aux niveaux 3 et 5 |
73 |
| Papier aluminium |
73 |
| 9 AVERTISSEMENT |
73 |
| Préchauffage du four |
74 |
| Rappels concernant le préchauffage |
74 |
| Pour de meilleurs résultats |
74 |
| Casseroles et plats allant au four |
74 |
| Cuisson à haute altitude |
74 |
| Condensation |
74 |
| Avant la première utilisation |
75 |
| Avant la première utilisation |
75 |
| Dureté de l’eau |
75 |
| AVIS |
75 |
| Première mise en service |
75 |
| Réglage de l’heure du jour |
75 |
| 1. Effleurez la ligne du bas. |
75 |
| 2. Effleurez le champ tactile « Heure » et glissez vers la gauche ou la droite pour sélectionner l’heure actuelle. |
75 |
| 3. Effleurez le champ tactile « Minute » et glissez vers la gauche ou la droite pour sélectionner les minutes actuelles. |
75 |
| 4. Effleurez le symbole 8 pour confirmer les réglages. |
75 |
| Réglage de la langue |
75 |
| 1. Effleurez la ligne du bas. |
75 |
| 2. Glissez vers la gauche ou la droite pour sélectionner la langue requise. |
75 |
| 3. Effleurez la ligne du haut. |
75 |
| Réglages de l’affichage de l’heure |
75 |
| 1. Effleurez « Affichage de l’heure ». |
75 |
| 2. Effleurez la ligne du bas. |
75 |
| 3. Glissez vers la gauche ou la droite pour sélectionner « Numérique » ou « Analogue ». |
75 |
| 4. Effleurez la ligne du haut. |
75 |
| Réglage de la dureté de l'eau |
76 |
| 1. Effleurez « Dureté de l’eau ». |
76 |
| 2. Effleurez la ligne du bas. |
76 |
| 3. Glissez vers la gauche ou la droite pour sélectionner la bonne dureté de l’eau. |
76 |
| 4. Effleurez la ligne du haut. |
76 |
| Réglage de Home Connect |
76 |
| 1. Effleurez « Home Connect ». |
76 |
| 2. Effleurez « Démarrer assistant ». |
76 |
| 3. Respectez les directives du chapitre « Home Connect ».~ \ |
76 |
| Remarque : |
76 |
| Remarques |
76 |
| Étalonnage de l’appareil électroménager et nettoyage la cavité du four |
76 |
| Préparation de l’appareil électroménager pour étalonnage |
76 |
| 1. Retirez les accessoires de la cavité du four. |
76 |
| 2. Retirez toutes pièces restantes de l’emballage de la cavité du four notamment le granulé de polystyrène. |
76 |
| 3. Avant d’étalonner l’appareil électroménager, essuyez les surfaces lisses de la cavité du four avec un chiffon doux et humide. |
76 |
| Remarques |
76 |
| AVIS : |
76 |
| 1. Remplissez le réservoir d’eau. |
76 |
| 2. Effleurez la touche tactile ON l OFF pour mettre l’appareil électroménager sous tension. |
76 |
| 3. Le four s’étalonne automatiquement après un cycle en mode de chauffage vapeur à 212 °F (100 °C) pendant 30 minutes. Réglez le mode de cuisson, la température et la durée pour l’étalonnage. Effleurez START pour lancer la commande. |
76 |
| 4. Après l’étalonnage, laissez l’appareil électroménager refroidir. |
76 |
| 5. Séchez la sole de la cavité du four. |
76 |
| 6. Réglez la cuisson à 475 °F (245 °C). |
76 |
| 7. Maintenez la cuisine aérée lorsque l’appareil électroménager chauffe. |
76 |
| 8. Éteignez l’appareil électroménager après la durée indiquée. Utilisez la touche tactile ON l OFF pour éteindre l’appareil électroménager. |
76 |
| 9. Attendez le refroidissement de la cavité du four. |
76 |
| 10. Nettoyez les surfaces lisses avec un torchon à vaisselle et de l’eau savonneuse. |
76 |
| 11. Videz le réservoir d’eau et séchez la cavité du four. |
76 |
| Remarque : |
76 |
| Nettoyer les accessoires |
76 |
| Réglages de base |
76 |
| Modification des paramètres |
76 |
| 1. Effleurez la touche tactile ON l OFF (Marche l Arrêt). |
76 |
| 2. Effleurez la touche tactile MENU. |
76 |
| 3. Glissez vers la gauche ou la droite pour sélectionner « Paramètres 4 ». |
76 |
| 4. Effleurez « Continuer ». |
76 |
| 5. Glissez vers la gauche ou la droite pour sélectionner le réglage désiré. |
76 |
| 6. Effleurez le champ tactile inférieur. |
77 |
| 7. Glissez vers la gauche ou la droite pour sélectionner le réglage désiré. |
77 |
| 8. Effleurez l’icône 8 (le cas échéant) pour activer le réglage. |
77 |
| 9. Effleurez la touche tactile MENU. |
77 |
| 10. Effleurez « Sauvegarder » pour conserver les modifications. |
77 |
| Réglages Offerts |
77 |
| Généralités sur le fonctionnement |
77 |
| Cuisson à haute altitude |
77 |
| Mise sous tension ou hors tension de l'appareil |
77 |
| Remarques |
77 |
| Options de minuterie |
78 |
| Affichage et dissimulation des options de minuterie |
78 |
| Remarque : |
78 |
| Minuterie du four |
78 |
| 1. Effleurez la touche tactile ON l OFF. |
78 |
| 2. Réglez le mode de cuisson et la température. |
78 |
| 3. Effleurez la touche tactile TIMERS. |
78 |
| 4. Effleurez le champ tactile « + Minuterie de four ». |
78 |
| 5. Effleurez le champ requis et glissez vers la gauche ou la droite pour régler la minuterie de four. |
78 |
| 6. Effleurez le symbole 8. |
78 |
| 7. Effleurez la touche tactile START l STOP. |
78 |
| Remarque : |
78 |
| Minuterie de cuisine |
78 |
| 1. Effleurez la touche tactile TIMERS. |
78 |
| 2. Glissez vers la gauche ou la droite pour sélectionner la valeur de la minuterie. Vous pouvez régler les heures, les minutes et les secondes. |
78 |
| 3. Effleurez l’icône 8. |
78 |
| Remarque : |
78 |
| Opération reportée - « Heure de fin » |
79 |
| Remarques |
79 |
| 9 ATTENTION |
79 |
| 1. Placez les aliments dans le bon accessoire et glissez- le dans la cavité du four. Fermez la porte de l’appareil électroménager. |
79 |
| 2. Effleurez la touche tactile ON l OFF. |
79 |
| 3. Réglez le mode de cuisson. |
79 |
| 4. Effleurez la touche tactile TIMERS. Les options de minuterie s’affichent à l’écran. |
79 |
| 5. Sélectionnez la minuterie du four et réglez un temps de cuisson. Effleurez l’icône 8. |
79 |
| 6. Sélectionnez de nouveau les TIMERS et réglez l’heure de fin de cuisson. Effleurez l’icône 8. |
79 |
| 7. Effleurez la touche tactile START l STOP. |
79 |
| Vérification, modification ou annulation des réglages |
79 |
| 1. Effleurez la touche tactile TIMERS. |
79 |
| 2. Effleurez l’option de minuterie requise. |
79 |
| 3. Glisser vers la gauche ou la droite sur l’écran tactile pour modifier les réglages. |
79 |
| Réglage d’un mode de cuisson |
79 |
| 1. Effleurez la touche tactile ON l OFF pour mettre l’appareil électroménager sous tension. |
79 |
| 2. Glissez vers la gauche sur la ligne supérieure de l’écran pour sélectionner « Convection réelle » ‚. |
79 |
| 3. Glissez vers la gauche ou la droite sur la ligne inférieure de l’écran pour sélectionner la température. |
79 |
| 4. Effleurez la touche tactile START l STOP pour lancer la commande. |
79 |
| Réglage du four double |
80 |
| 1. Effleurez le symbole q ou r pour sélectionner la cavité du four inférieur ou supérieur. |
80 |
| 2. Procédez aux réglages comme d’habitude. |
80 |
| 3. Une fois les réglages terminés pour la première cavité du four, effleurez le symbole q ou r pour sélectionner l’autre compartiment. |
80 |
| Remarque : |
80 |
| Valeurs par défaut |
80 |
| Barre de préchauffage |
80 |
| Touche Tactile INFO |
80 |
| Sons |
80 |
| Modification ou annulation du fonctionnement de l’appareil électroménager |
80 |
| Remarque : |
80 |
| Modification du fonctionnement de l’appareil électroménager |
80 |
| 1. Effleurez la touche tactile START l STOP pour interrompre la cuisson. |
80 |
| 2. Effleurez la zone de l’écran du réglage à modifier. |
80 |
| 3. Glissez vers la gauche ou la droite pour modifier le réglage. |
80 |
| 4. Effleurez la touche tactile START l STOP pour lancer le changement de commande. |
80 |
| Remarques |
80 |
| Annulation du fonctionnement de l’appareil électroménager |
80 |
| Remarque : |
80 |
| Préchauffage rapide |
81 |
| Remarques |
81 |
| Activation de la fonction « Préchauffage rapide » |
81 |
| 1. Réglez un mode de cuisson et la température. |
81 |
| 2. Effleurez la touche tactile START l STOP pour lancer le mode de cuisson. |
81 |
| 3. Effleurez la touche tactile FAST PREHEAT pour activer la fonction. |
81 |
| 4. Une fois la température réglée atteinte, la fonction « Préchauffage rapide » s’éteint automatiquement. Le symbole ° disparaît de l’écran. Placez les aliments dans la cavité du four. |
81 |
| Verrouillage du Panneau de Commande |
81 |
| Activation et désactivation |
81 |
| 1. Appuyer et maintenez la touche tactile TIMERS enfoncée pendant près de quatre secondes jusqu’à ce que « Verrouillage du panneau activé » s’affiche. Le verrouillage du panneau est activé. Le symbole 1 est affiché dans le coin supérieur... |
81 |
| 2. Appuyer et maintenez la touche tactile TIMERS enfoncée pendant près de quatre secondes jusqu’à ce que « Verrouillage du panneau désactivé » s’affiche. |
81 |
| Conversion Convection Auto |
81 |
| Pour activer cette fonction : |
81 |
| 1. Passez à Réglages |
81 |
| 2. Effleurez la touche tactile MARCHE l ARRÊT (ON l OFF) pour mettre le four sous tension. |
81 |
| 3. Effleurez la touche tactile MENU. |
81 |
| 4. Défilez vers Réglages sur l’écran tactile. |
81 |
| 5. Sélectionnez Conversion convection et effleurez MARCHE (ON). |
81 |
| 6. Quittez les réglages et sélectionnez « Enregistrer » pour les conserver. |
81 |
| Écart de température |
81 |
| Remarque : |
81 |
| Remarque : |
81 |
| Sonde à viande |
82 |
| Modes de cuisson convenables |
82 |
| Remarques |
82 |
| Insertion de la sonde thermométrique dans les aliments |
82 |
| Cavité du four à vapeur : |
82 |
| Cavité du four conventionnel : |
82 |
| AVIS : |
82 |
| Démarrer et arrêter l'appareil |
83 |
| 9 AVERTISSEMENT |
83 |
| Risque de brûlures |
83 |
| 9 AVERTISSEMENT |
83 |
| Risque de choc électrique |
83 |
| Remarques |
83 |
| 1. Insérez la sonde thermométrique dans la douille du côté gauche de la cavité du four. |
83 |
| Remarque : |
83 |
| 2. Fermez la porte de l’appareil électroménager. |
83 |
| AVIS : |
83 |
| 3. Effleurez la touche tactile ON l OFF. |
83 |
| 4. Réglez le mode de cuisson. |
83 |
| Remarque : |
83 |
| 5. Effleurez la température de la cavité du four à gauche sur la ligne inférieure. |
83 |
| 6. Glissez vers la gauche ou la droite pour sélectionner la température requise pour la cavité du four. |
83 |
| 7. Effleurez le symbole 8 pour activer le réglage. |
83 |
| 8. Effleurez la température interne ¥ à droite sur la ligne inférieure. |
83 |
| 9. Glissez vers la gauche ou la droite pour sélectionner la température interne requise. |
83 |
| 10. Effleurez la touche tactile START l STOP. |
83 |
| Modification ou arrêt du fonctionnement de l’appareil |
83 |
| 1. Effleurez la température de la cavité du four ou la température interne. |
83 |
| 2. Glissez vers la gauche ou la droite pour modifier la température. |
83 |
| 3. Effleurez le symbole 8 pour activer le réglage. |
83 |
| 1. Utilisez la touche tactile ON l OFF pour éteindre l’appareil électroménager. |
83 |
| 2. Portez un gant de four pour débrancher la sonde thermométrique de la douille. |
83 |
| Températures internes de différents aliments |
83 |
| Mode Sabbat |
84 |
| Remarque : |
84 |
| Remarque : |
84 |
| Démarrage |
84 |
| 1. Effleurez la touche tactile ON l OFF. |
84 |
| 2. Glissez vers la gauche ou la droite pour sélectionner « Sabbat › ». |
84 |
| 3. Effleurez la température sur la ligne inférieure. |
84 |
| 4. Glissez vers la gauche ou la droite pour sélectionner la température requise. |
84 |
| 5. Effleurez l’icône 8 pour activer le réglage. |
84 |
| 6. Effleurez le temps de cuisson + sur la ligne du bas. |
84 |
| 7. Glissez vers la gauche ou la droite pour sélectionner la durée requise. |
84 |
| 8. Effleurez le symbole 8 pour activer le réglage. |
84 |
| 9. Effleurez la touche tactile START l STOP. |
84 |
| Remarques |
84 |
| Annulation |
84 |
| Mode Yom Tov |
84 |
| Remarque : |
84 |
| Remarque : |
84 |
| Démarrage |
84 |
| 1. Effleurez la touche tactile ON l OFF. |
84 |
| 2. Glissez vers la gauche ou la droite pour sélectionner « Yom Tov › ». |
84 |
| 3. Effleurez la température dans le champ tactile inférieur. |
84 |
| 4. Glissez vers la gauche ou la droite pour sélectionner la température requise. |
84 |
| 5. Effleurez l’icône 8 pour activer le réglage. |
84 |
| 6. Effleurez le temps de cuisson + dans le champ tactile inférieur. |
84 |
| 7. Glissez vers la gauche ou la droite pour sélectionner la durée requise. |
84 |
| 8. Effleurez l’icône 8 pour activer le réglage. |
84 |
| 9. Effleurez la touche tactile START l STOP. |
84 |
| Remarques |
84 |
| Annulation |
84 |
| Home Connect |
85 |
| Remarques |
85 |
| Configuration |
85 |
| Connexion du four à Home Connect |
85 |
| 1. Installez l’appli Home Connect. |
85 |
| 2. Connectez le four au réseau Wi-Fi. |
85 |
| 3. Connectez le four à l’appli. |
85 |
| 1. Installez l’appli Home Connect. |
85 |
| 2. Connectez le four au réseau Wi-Fi. |
85 |
| Connexion automatique au réseau domestique |
85 |
| Remarques |
85 |
| 1. Effleurez la touche tactile MENU. |
85 |
| 2. Glissez vers la gauche ou la droite pour sélectionner « Réglages ». |
85 |
| 3. Glissez vers la gauche ou la droite pour sélectionner « Home Connect ». |
85 |
| 4. Effleurez « Démarrer assistant ». |
85 |
| 5. Effleurez « Continuer ». |
85 |
| 6. Dans les deux minutes, appuyez sur le bouton WPS du routeur. Attendez que « Connexion réseau réussie » s’affiche à l’écran. |
86 |
| 7. L’appareil électroménager est prêt à se connecter à l’appli. |
86 |
| 8. Respectez les directives de l’appli sur l’appareil mobile pour une inscription automatique au réseau. |
86 |
| Connexion manuelle au réseau domestique |
86 |
| Remarque : |
86 |
| 1. Effleurez la touche tactile MENU. |
86 |
| 2. Faites défiler vers la gauche ou la droite pour sélectionner « Réglages ». |
86 |
| 3. Faites défiler vers la gauche ou la droite pour sélectionner « Home Connect ». |
86 |
| 4. Effleurez « Démarrer assistant ». |
86 |
| 5. Effleurez « Continuer ». |
86 |
| 6. Effleurez « Connexion manuelle ». |
86 |
| 7. Effleurez « Continuer ». |
86 |
| 8. Utilisez le SSID « HomeConnect » et la clé « HomeConnect » pour enregistrer l’appareil mobile au réseau du four. |
86 |
| 9. Attendez que « Connexion réseau réussie » s’affiche à l’écran. |
87 |
| 10. L’appareil électroménager est prêt à se connecter à l’appli. |
87 |
| 11. Respectez les directives de l’appli sur l’appareil mobile pour une inscription manuelle au réseau. |
87 |
| Démarrage à distance |
87 |
| Remarques |
87 |
| 1. Effleurez la touche tactile MENU. |
87 |
| 2. Effleurez « Démarrage à distance ». |
87 |
| Réglages Home Connect |
87 |
| Remarque : |
87 |
| WiFi |
87 |
| 1. Effleurez la touche tactile MENU. |
87 |
| 2. Glissez vers la gauche ou la droite pour sélectionner « Réglages ». |
87 |
| 3. Glissez vers la gauche ou la droite pour sélectionner « Home Connect ». |
87 |
| 4. Effleurez « Ouvrir réglages ». |
87 |
| 5. Glissez vers la gauche ou la droite pour sélectionner « Wi-Fi ». |
87 |
| 6. Effleurez la ligne du bas pour sélectionner « Activé » ou « Désactivé ». |
87 |
| 7. Effleurez le champ ; pour revenir au menu de réglages de Home Connect. |
87 |
| Se déconnecter du réseauSe déconnecter du réseau |
87 |
| Remarque : |
87 |
| 1. Effleurez la touche tactile MENU. |
87 |
| 2. Glissez vers la gauche ou la droite pour sélectionner « Réglages ». |
87 |
| 3. Glissez vers la gauche ou la droite pour sélectionner « Home Connect ». |
87 |
| 4. Effleurez « Ouvrir réglages ». |
87 |
| 5. Glissez vers la gauche ou la droite pour sélectionner « Déconnexion ». |
87 |
| 6. Effleurez « Déconnexion du réseau ». |
88 |
| 7. Confirmez le choix en effleurant « Déconnexion ». |
88 |
| Remarque : |
88 |
| Se connecter au réseauSe connecter au réseau |
88 |
| 1. Effleurez la touche tactile MENU. |
88 |
| 2. Glissez vers la gauche ou la droite pour sélectionner « Réglages ». |
88 |
| 3. Glissez vers la gauche ou la droite pour sélectionner « Home Connect ». |
88 |
| 4. Effleurez « Ouvrir réglages ». |
88 |
| 5. Glissez vers la gauche ou la droite pour sélectionner « Connexion au réseau ». |
88 |
| 6. Effleurez « Démarrer assistant ». |
88 |
| 7. Respectez les directives de la section intitulée « Inscription manuelle au réseau domestique » ou « Inscription automatique au réseau domestique ». |
88 |
| Connexion avec l'appli |
88 |
| Remarque : |
88 |
| 1. Effleurez la touche tactile MENU. |
88 |
| 2. Glissez vers la gauche ou la droite pour sélectionner « Réglages ». |
88 |
| 3. Glissez vers la gauche ou la droite pour sélectionner « Home Connect ». |
88 |
| 4. Effleurez « Ouvrir réglages ». |
88 |
| 5. Glissez vers la gauche ou la droite pour sélectionner « Connexion à l’appli ». |
88 |
| 6. Effleurez la ligne du bas pour sélectionner « Démarrer ». |
88 |
| Télécommande |
88 |
| Remarques |
88 |
| 1. Effleurez la touche tactile MENU. |
88 |
| 2. Glissez vers la gauche ou la droite pour sélectionner « Réglages ». |
88 |
| 3. Glissez vers la gauche ou la droite pour sélectionner « Home Connect ». |
88 |
| 4. Effleurez « Ouvrir réglages ». |
88 |
| 5. Glissez vers la gauche ou la droite pour sélectionner « Télécommande ». |
88 |
| 6. Effleurez la ligne du bas pour sélectionner « Activée » ou « Désactivée ». |
88 |
| 7. Effleurez le champ ; pour revenir au menu de réglages de Home Connect. |
88 |
| Mise à jour du logiciel |
88 |
| Remarques |
89 |
| Remarque liée à la protection des données |
89 |
| Remarque : |
89 |
| Module Wi-FiMD |
89 |
| DÉCLARATION DE CONFORMITÉ DE LA FCC |
89 |
| 9 ATTENTION |
89 |
| 1. cet appareil ne peut causer d’interférences nuisibles; et |
89 |
| 2. cet appareil doit accepter toute interférence reçue, notamment celle pouvant entraîner un dysfonctionnement. |
89 |
| AVIS D’INDUSTRIE CANADA |
89 |
| 1. L'appareil ne doit pas produire de brouillage, et |
89 |
| 2. L'utilisateur de l'appareil doit accepter tout brouillage radioélectrique subi, même si le brouillage est susceptible d'en compromettre le fonctionnement. |
89 |
| Commande de vapeur |
90 |
| 9 AVERTISSEMENT |
90 |
| Risque de brûlures |
90 |
| Bruits |
90 |
| Insertion des accessoires |
90 |
| Remarque : |
90 |
| 9 AVERTISSEMENT |
90 |
| Risque de brûlures |
90 |
| 9 ATTENTION |
90 |
| AVIS : |
90 |
| Remarque : |
90 |
| Exemple sur la photo : poêle universelle |
90 |
| Exemple sur la photo : grille |
91 |
| Système de butée |
91 |
| Cuisson à la vapeur |
91 |
| Remarque : |
91 |
| Réglage |
91 |
| 1. Remplissez le réservoir d’eau. |
91 |
| Remarque : |
91 |
| 2. Effleurez la touche tactile ON l OFF. |
91 |
| 3. Glissez vers la gauche ou la droite pour sélectionner « Vapeur ‹ ». |
91 |
| 4. Effleurez le champ tactile de la température. |
91 |
| 5. Glissez vers la gauche ou la droite pour sélectionner la température requise. |
91 |
| 6. Effleurez le champ + de la minuterie. |
91 |
| 7. Glissez vers la gauche ou la droite pour sélectionner la durée requise. |
91 |
| 8. Effleurez la touche tactile START l STOP. |
91 |
| Annulation |
91 |
| Remarque : |
91 |
| Quitter |
91 |
| Cuisson à l’aide de vapeur |
92 |
| Intensité de la vapeur |
92 |
| Modes de cuisson convenables |
92 |
| Démarrer |
92 |
| 1. Remplissez le réservoir d’eau. |
92 |
| Remarque : |
92 |
| 2. Effleurez la touche tactile ON l OFF. |
92 |
| 3. Réglez le mode de cuisson et la température. |
92 |
| 4. Effleurez la touche tactile ADD STEAM pour utiliser la vapeur. |
92 |
| 5. À l’écran, glissez vers la gauche ou la droite pour sélectionner l’intensité de la vapeur. |
92 |
| 6. Effleurez le symbole 8 pour activer le réglage. |
92 |
| 7. Effleurez la touche tactile START l STOP. |
92 |
| Remarque : |
92 |
| Annulation de l’ajout de vapeur |
92 |
| 1. Effleurez la touche tactile ADD STEAM pour annuler l’ajout de vapeur tôt dans le processus. |
92 |
| 2. Effleurez l’intensité de la vapeur dans le coin inférieur droit de l’écran. |
92 |
| 3. Glissez vers la gauche ou la droite pour sélectionner « Arrêt » (Off). |
92 |
| 4. Effleurez le symbole 8 pour activer le réglage. |
92 |
| Remarque : |
92 |
| Annulation |
92 |
| Remarque : |
92 |
| Quitter |
92 |
| Levée de Pâte |
92 |
| Remarque : |
92 |
| Démarrer |
92 |
| 1. Remplissez le réservoir d’eau. |
92 |
| Remarque : |
92 |
| 2. Effleurez la touche tactile ON l OFF. |
92 |
| 3. Glissez vers la gauche ou la droite pour sélectionner « Levée de pâte ». |
92 |
| 4. Effleurez « 1 » dans le champ tactile inférieur. |
92 |
| 5. Glissez vers la gauche ou la droite pour sélectionner le réglage requis. |
92 |
| 6. Effleurez le symbole 8 pour activer le réglage. |
92 |
| 7. Effleurez « + » dans le champ tactile inférieur. |
92 |
| 8. Glissez vers la gauche ou la droite pour sélectionner la durée requise. |
92 |
| 9. Effleurez le symbole 8 pour activer le réglage. |
93 |
| 10. Effleurez la touche tactile START l STOP. |
93 |
| Annulation |
93 |
| Remarque : |
93 |
| Quitter |
93 |
| Décongeler |
93 |
| Remarque : |
93 |
| Démarrer |
93 |
| 1. Remplissez le réservoir d’eau. |
93 |
| Remarque : |
93 |
| 2. Effleurez la touche tactile ON l OFF. |
93 |
| 3. Glissez vers la gauche ou la droite pour sélectionner « Décongeler “ ». |
93 |
| 4. Effleurez la température sur la ligne inférieure. |
93 |
| 5. Glissez vers la gauche ou la droite pour sélectionner la température requise. |
93 |
| 6. Effleurez l’icône 8 pour activer le réglage. |
93 |
| 7. Effleurez « + » dans le champ tactile inférieur. |
93 |
| 8. Glissez vers la gauche ou la droite pour sélectionner la durée requise. |
93 |
| 9. Effleurez l’icône 8 pour activer le réglage. |
93 |
| 10. Effleurez la touche tactile START l STOP. |
93 |
| Annulation |
93 |
| Remarque : |
93 |
| Quitter |
93 |
| Réchauffage |
93 |
| Remarque : |
93 |
| Démarrer |
93 |
| 1. Remplissez le réservoir d’eau. |
93 |
| Remarque : |
93 |
| 2. Effleurez la touche tactile ON l OFF. |
93 |
| 3. Glissez vers la gauche ou la droite pour sélectionner « Réchauffer ¨ ». |
93 |
| 4. Effleurez la température dans le champ tactile inférieur. |
93 |
| 5. Glissez vers la gauche ou la droite pour sélectionner la température requise. |
93 |
| 6. Effleurez l’icône 8 pour activer le réglage. |
93 |
| 7. Effleurez « + » dans le champ tactile inférieur. |
93 |
| 8. Glissez vers la gauche ou la droite pour sélectionner la durée requise. |
93 |
| 9. Effleurez l’icône 8 pour activer le réglage. |
93 |
| 10. Effleurez la touche tactile START l STOP. |
93 |
| Annulation |
93 |
| Remarque : |
93 |
| Quitter |
93 |
| Remplissage du réservoir d’eau |
94 |
| 9 AVERTISSEMENT |
94 |
| Risque de blessures et d’incendie |
94 |
| 9 AVERTISSEMENT |
94 |
| Risque de brûlures |
94 |
| AVIS : |
94 |
| Remarques |
94 |
| 1. Ouvrez la porte de l’appareil électroménager. |
94 |
| 2. Retirez le réservoir d’eau du côté droit de la cavité du four (figure !). |
94 |
| 3. Remplissez le réservoir d’eau avec de l’eau froide jusqu’à la marque « max » (figure \ |
94 |
| 4. Fermez bien le couvercle du réservoir jusqu’à ce qu’il se verrouille. |
94 |
| 5. Insérez le réservoir d’eau remplie (figure #). |
94 |
| 6. Assurez-vous que le réservoir est entièrement enfoncé dans sa niche. Il doit être de niveau avec la cavité du réservoir (figure $). |
94 |
| 7. Fermez la porte de l’appareil électroménager. |
94 |
| Après chaque utilisation de la vapeur |
94 |
| 9 AVERTISSEMENT |
94 |
| Risque de brûlures |
94 |
| 9 AVERTISSEMENT |
94 |
| Risque de brûlures |
94 |
| AVIS : |
95 |
| Remarques |
95 |
| Vidange du réservoir d’eau |
95 |
| AVIS : |
95 |
| 1. Ouvrez la porte de l’appareil électroménager. |
95 |
| 2. Retirez le réservoir d’eau. |
95 |
| 3. Videz-le, nettoyez le réservoir d’eau avec du détergent puis rincez-le à fond à l’eau propre. |
95 |
| 4. Séchez toutes les pièces avec un chiffon doux. |
95 |
| 5. Frottez le joint du couvercle jusqu’à ce qu’il soit sec. |
95 |
| 6. Laissez sécher le réservoir avec le couvercle ouvert. |
95 |
| 7. Fermez le couvercle du réservoir d’eau et enfoncez-le. |
95 |
| 8. Insérez le réservoir d’eau et fermez la porte de l’appareil électroménager. |
95 |
| Lancement du séchage |
95 |
| 1. Laissez l’appareil électroménager refroidir. |
95 |
| 2. Délogez les plus gros morceaux de restants d’aliments de la cavité du four immédiatement et utilisez une éponge pour essuyer toute trace d’humidité de la sole. |
95 |
| 3. Au besoin, effleurez la touche tactile ON l OFF pour mettre l’appareil électroménager sous tension. |
95 |
| 4. Effleurez la touche tactile MENU pour afficher les modes de fonctionnement. |
95 |
| 5. À l’écran tactile, glissez vers la gauche ou la droite pour sélectionner « Séchage ª ». |
95 |
| 6. Effleurez le champ tactile inférieur. |
95 |
| 7. Effleurez le champ tactile inférieur. |
95 |
| 8. Effleurez la touche tactile START l STOP. |
95 |
| 9. Ouvrez la porte de l’appareil électroménager. Laissez- la ouverte entre une et deux minutes pour laisser l’humidité s’échapper de la cavité du four. |
95 |
| Séchage manuel de la cavité du four |
95 |
| 1. Laissez l’appareil électroménager refroidir. |
95 |
| 2. Retirez toute salissure de la cavité du four. |
95 |
| 3. Séchez la cavité du four avec une éponge. |
95 |
| 4. Laissez la porte de l’appareil électroménager ouverte pendant une heure pour sécher complètement la cavité du four. |
95 |
| Programmes à vapeur |
95 |
| 9 AVERTISSEMENT |
95 |
| Risque d'ébouillantement |
95 |
| Renseignements à propos des réglages |
95 |
| Sélection d’un plat |
96 |
| Réglage d’un programme |
96 |
| 1. Effleurez la touche tactile ON l OFF pour mettre l’appareil électroménager sous tension. |
96 |
| 2. Effleurez la touche tactile MENU. |
96 |
| 3. Glissez vers la gauche ou la droite pour sélectionner « Programmes vapeur ». |
96 |
| 4. Effleurez la ligne du bas. |
96 |
| 5. Effleurez la catégorie requise. |
96 |
| 6. Glissez vers la gauche ou la droite pour sélectionner le programme de cuisson à la vapeur requis. |
96 |
| 7. Effleurez le programme vapeur requis. |
96 |
| Remarque : |
96 |
| 8. Certains programmes demandent le poids de l’aliment. Appuyez sur Poids et faites défiler pour le régler. |
97 |
| 9. Effleurez la touche tactile START l STOP pour lancer la commande. |
97 |
| Remarque : |
97 |
| Poursuite de la cuisson |
97 |
| 1. Effleurez « Poursuivre la cuisson ». |
97 |
| 2. Au besoin, réglez l’appareil à la durée ou au réglage recommandé. |
97 |
| 3. Effleurez la touche tactile START l STOP pour lancer la commande « Poursuive la cuisson ». |
97 |
| Annulation |
97 |
| Remarque : |
97 |
| Quitter |
97 |
| Nettoyage du four à vapeur |
97 |
| Produits de nettoyage appropriés |
97 |
| AVIS : |
97 |
| Conseil : |
97 |
| 9 AVERTISSEMENT |
97 |
| Risque de brûlures |
97 |
| Remarques |
97 |
| Guide de nettoyage |
97 |
| Remarques |
98 |
| Surfaces de la cavité du four |
99 |
| Nettoyage de surfaces émaillées |
99 |
| Remarque : |
99 |
| Nettoyage de l’appareil électroménager |
99 |
| Fonctions de nettoyage du four à vapeur |
99 |
| AVIS : |
99 |
| Nettoyage Écolyse |
99 |
| Remarque : |
99 |
| Avant le nettoyage par écolyse |
99 |
| Nettoyage de la sole du four et de la partie interne de la porte de l’appareil électroménager |
99 |
| AVIS : |
99 |
| Démarrer |
99 |
| 1. Effleurez la touche tactile ON l OFF. |
99 |
| 2. Effleurez la touche tactile MENU. |
99 |
| 3. Glissez vers la gauche ou la droite pour sélectionner « Nettoyage par écolyse ™ ». |
100 |
| 4. Effleurez la ligne du bas. |
100 |
| 5. Effleurez la ligne du bas. |
100 |
| 6. Effleurez la touche tactile START l STOP. |
100 |
| À la fin de la fonction Nettoyage |
100 |
| Remarque : |
100 |
| Nettoyage facile |
100 |
| 9 AVERTISSEMENT |
100 |
| Risque de brûlures |
100 |
| Réglage |
100 |
| 1. Retirez les accessoires et les grilles de la cavité du four. |
100 |
| 2. Effleurez la touche tactile MARCHE l ARRÊT (ON l OFF). |
100 |
| 3. Effleurez la touche tactile MENU. |
100 |
| 4. Glissez vers la gauche ou la droite pour sélectionner « Nettoyage facile š ». |
100 |
| 5. Effleurez la ligne du bas. |
100 |
| 6. Effleurez la touche tactile DÉMARRAGE l ARRÊT (START l STOP). |
100 |
| Quitter |
100 |
| Nettoyage subséquent |
100 |
| 1. Ouvrez la porte de l’appareil électroménager et retirez l’eau restante avec un chiffon absorbant. |
100 |
| 2. Nettoyez les surfaces lisses de la cavité du four avec un torchon à vaisselle ou une brosse à soies douces. Les résidus tenaces peuvent être éliminés avec un tampon à récurer doux. |
100 |
| 3. Éliminez le tartre avec un chiffon humecté de vinaigre. Puis rincez à l’eau propre et essuyez avec un chiffon doux (y compris sous le joint de la porte). |
100 |
| 4. Utilisez la touche tactile ON l OFF pour éteindre l’appareil électroménager. |
100 |
| 5. Laissez la porte de l’appareil électroménager entrouverte à la position d’arrêt (environ 30 degrés), pendant environ une heure pour permettre aux surfaces émaillées de la cavité du four de bien sécher. Sinon, vous pouvez également la... |
100 |
| Exécution de la fonction de séchage de la cavité du four |
100 |
| 1. Effleurez la touche tactile MARCHE l ARRÊT (ON l OFF). |
100 |
| 2. Effleurez la touche tactile MENU. |
100 |
| 3. Glissez vers la gauche ou la droite pour sélectionner « Séchage ª ». |
100 |
| 4. Effleurez la ligne du bas. |
100 |
| 5. Effleurez la touche tactile DÉMARRAGE l ARRÊT (START l STOP). |
100 |
| Élimination des dépôts alimentaires importants |
100 |
| Détartrage |
101 |
| Démarrer |
101 |
| AVIS |
101 |
| 1. Effleurez la touche tactile MARCHE l ARRÊT (ON l OFF). |
101 |
| 2. Effleurez la touche tactile MENU. |
101 |
| 3. Faites défiler vers la gauche ou la droite pour sélectionner « Détratrer , ». |
101 |
| 4. Effleurez « Continuer ». |
101 |
| 5. Effleurez de nouveau « Continuer ». |
101 |
| 6. Retirez le réservoir d’eau et remplissez-le avec la solution de détartrage. |
101 |
| 7. Mélangez 32 oz liquides (950 ml) d’eau avec une demi-bouteille de solution de détartrage (près de 200 ml). |
101 |
| 8. Une fois le réservoir rempli de solution de détartrage, réinsérez-le complètement. |
101 |
| 9. Respectez les directives à l’écran. |
101 |
| Premier cycle de rinçage |
101 |
| 1. Un message apparaît à l’écran vous demandant d’ouvrir la porte de l’appareil électroménager. Retirez le réservoir d’eau et rincez-le complètement. Remplissez-le d’eau fraîche puis réinsérez le réservoir. |
101 |
| 2. Fermez la porte de l’appareil électroménager. |
101 |
| Deuxième cycle de rinçage |
101 |
| 1. Un message apparaît à l’écran vous demandant d’ouvrir la porte de l’appareil électroménager. Retirez le réservoir d’eau et rincez-le complètement. Remplissez-le d’eau fraîche puis réinsérez le réservoir. |
101 |
| 2. Fermez la porte de l’appareil électroménager. |
101 |
| Finalisation du détartrage |
101 |
| 1. Ouvrez la porte de l’appareil électroménager. |
101 |
| 2. Videz le réservoir d’eau, rincez complètement, séchez et réinsérez le réservoir. |
101 |
| 3. Le détartrage est terminé et l’appareil électroménager est de nouveau prêt à être utilisé. |
101 |
| Fonctionnement du four conventionnel |
102 |
| Positions des grilles |
102 |
| Mise en place de la grille |
102 |
| 9 ATTENTION |
102 |
| Grille plate |
102 |
| 1. Saisir fermement la grille par les côtés. |
102 |
| 2. Installer la grille (voir illustration). |
102 |
| 3. Incliner la grille vers le haut pour mettre la butée dans le guide. |
102 |
| 4. Amener la grille en position horizontale et pousser jusqu'au fond. |
102 |
| 1. Saisir fermement la grille par les côtés et tirer vers soi. |
102 |
| 2. Lorsque la butée est atteinte, incliner vers le haut et tirer complètement vers soi. |
102 |
| Grille télescopique |
103 |
| 1. Inclinez légèrement la grille. |
103 |
| 2. Insérez les crochets arrière dans les équerres de fixation accessoires. |
103 |
| 3. Remettez la grille à l’horizontale pour permettre à la deuxième languette de reposer contre la glissière. |
103 |
| 4. Poussez la grille jusqu’à ce qu’elle soit de niveau avec les crochets avant. |
103 |
| 5. Levez la grille pour verrouiller la dernière languette en position. |
103 |
| 6. Enfoncez complètement la grille. |
103 |
| 7. Insérez les crochets avant dans les équerres de fixation accessoires. |
103 |
| 9 ATTENTION |
103 |
| Tournebroche |
103 |
| Montage du rôtisserie : |
104 |
| 1. Insérez à moitié la grille du rôtisserie dans le four au niveau 5. |
104 |
| 2. Coulissez l’attache gauche sur la broche et serrez la vis. |
104 |
| 3. Glissez la viande ou la volaille à rôtir sur la broche et serrez la vis. |
104 |
| 4. Coulissez l’attache droite sur la broche et serrez la vis. |
104 |
| 5. Vérifiez l’équilibre de l’aliment sur la broche en la tournant dans la paume de vos mains. La cuisson d’un aliment mal équilibré sur la broche ne sera pas uniforme. |
104 |
| 6. Placez la broche du rôtisserie sur la grille. |
104 |
| 7. Insérez la grille de la broche dans le four et insérez l’arbre d’entraînement dans l’orifice de la paroi arrière du four. |
104 |
| 8. Au besoin, tournez légèrement la broche pour bien l’insérer dans l’orifice. |
104 |
| 9. Insérez la grille plate au niveau 1 et le plat à rôtir pour recueillir la graisse. |
104 |
| Brider la volaille pour la rôtisserie |
104 |
| 1. Glissez une attache sur la broche, les dents pointant vers l’extrémité de la broche. Serrez légèrement la vis pour l’empêcher de glisser. |
104 |
| 2. Insérez la broche dans la volaille et fixez avec l’attache. |
104 |
| 3. Coupez 24 po (61 cm) de corde de cuisine. Déposez la corde sous la volaille, poitrine vers le haut, en gardant les deux bouts égaux de chaque côté. |
104 |
| 4. Enroulez les extrémités de la corde autour des ailes. Ramenez bien la pointe des ailes en serrant les cordes sur le haut. Faites un nœud. Ne coupez pas la corde restante. |
104 |
| 5. Coupez un autre bout de corde de cuisine de 24 po (61 cm) et déposez-la sur le dos. Enroulez la corde autour de la queue puis de la broche. Serrez bien. |
105 |
| 6. Amenez les pattes vers l’avant. Croisez-les sur le dessus de la broche. Enroulez avec la corde et faites un nœud. |
105 |
| 7. Reliez la corde des pattes à la corde restante des ailes. Faites un nœud. Glissez l’autre attache et enfoncez les dents dans les pilons de la volaille pour les fixer solidement. |
105 |
| 8. Vérifiez l’équilibre tournant la broche dans la paume de vos mains. La volaille ne devrait pas tourner sur la broche ni être lâche à un endroit quelconque. Si la volaille glisse, bridez-la de nouveau. La cuisson d’une volaille mal équili... |
105 |
| Démarrer |
105 |
| Tableau de cuisson á la Rôtisserie |
105 |
| Nettoyage du four conventionnel |
105 |
| Produits de nettoyage appropriés |
105 |
| AVIS : |
106 |
| Conseil : |
106 |
| 9 AVERTISSEMENT |
106 |
| Risque de brûlures |
106 |
| Guide de nettoyage |
106 |
| Remarques |
107 |
| Surfaces de la cavité du four |
107 |
| Nettoyage de surfaces émaillées |
107 |
| Remarque : |
107 |
| Nettoyage de l’appareil électroménager |
107 |
| Nettoyage facile |
107 |
| 9 AVERTISSEMENT |
107 |
| Risque de brûlures |
107 |
| Réglage |
107 |
| 1. Laissez la grille au niveau 3 et retirez tous les accessoires et toutes les autres grilles de la cavité du four. |
107 |
| 2. Mélangez deux tasses d’eau et 1/2 tasse de vinaigre. Placez sur le plateau du gril, sur la grille du niveau 3. |
107 |
| 3. Effleurez la touche tactile ON l OFF. |
107 |
| 4. Effleurez la touche tactile MENU. |
107 |
| 5. Glissez vers la gauche ou la droite pour sélectionner « Nettoyage facile š ». |
107 |
| 6. Effleurez la ligne du bas. |
107 |
| 7. Effleurez la touche tactile START l STOP. |
107 |
| Quitter |
108 |
| Nettoyage subséquent |
108 |
| 1. Ouvrez la porte de l’appareil électroménager et retirez l’eau restante avec un chiffon absorbant. |
108 |
| 2. Nettoyez les surfaces lisses de la cavité du four avec un torchon à vaisselle ou une brosse à soies douces. Les résidus tenaces peuvent être éliminés avec un tampon à récurer doux. |
108 |
| 3. Éliminez le tartre avec un chiffon humecté de vinaigre. Puis rincez à l’eau propre et essuyez avec un chiffon doux. |
108 |
| 4. Utilisez la touche tactile ON l OFF pour éteindre l’appareil électroménager. |
108 |
| 5. Laissez la porte de l’appareil électroménager entrouverte à la position d’arrêt (environ 30 degrés), pendant environ une heure pour permettre à la surface émaillée de sécher entièrement. |
108 |
| Élimination des dépôts alimentaires importants |
108 |
| Nettoyage Auto |
108 |
| 9 AVERTISSEMENT |
108 |
| Lors de l’utilisation de la fonctionnalité autonettoyage |
108 |
| AVIS : |
108 |
| Préparation de la fonctionnalité Nettoyage Auto par pyrolyse |
108 |
| 9 ATTENTION |
108 |
| Réglage |
109 |
| 1. Retirez les accessoires de la cavité du four. |
109 |
| 2. Effleurez la touche tactile ON l OFF. |
109 |
| 3. Effleurez la touche tactile MENU. |
109 |
| 4. Glissez vers la gauche ou la droite pour sélectionner « Nettoyage Auto ˜ ». |
109 |
| 5. Sélectionnez une puissance de nettoyage. |
109 |
| 6. Effleurez « Continuer ». |
109 |
| 7. Confirmez que vous avez retiré les souillures importantes et les accessoires de la cavité du four. |
109 |
| 8. Effleurez la touche tactile START l STOP. |
109 |
| Remarque : |
109 |
| Autonettoyage terminé |
109 |
| Éviter ces produits nettoyants |
109 |
| Dépannage |
109 |
| 9 AVERTISSEMENT |
109 |
| Risque de choc électrique |
109 |
| 9 AVERTISSEMENT |
109 |
| Risque de choc électrique |
109 |
| Tableau de dépannage |
110 |
| -------- |
111 |
| Éclairage de four |
111 |
| Ampoules de la cavité du four à vapeur |
111 |
| Ampoules pour cavité du four conventionnel |
111 |
| 1. Coupez l’alimentation du four au tableau de distribution principal (boîte à fusibles ou boîtier de disjoncteurs). |
112 |
| 2. Retirez les trois vis qui retiennent la grille en position dans la cavité du four. |
112 |
| 3. Retirez la grille du four pour accéder au boîtier de l’ampoule. |
112 |
| 4. Retirez la vis du haut du boîtier de l’ampoule. |
112 |
| 5. Insérez l’extrémité du tournevis à lame plate étroite à un angle de 40 degrés entre les clips de métal. La lame du tournevis doit être en mesure de passer entre les clips de métal pour atteindre le loquet interne. |
112 |
| 6. Enfoncez la lame du tournevis pour dégager loquet de la fente dans le boîtier de l’ampoule. Soulever délicatement la lentille en éloignant la poignée du tournevis de la paroi du four. |
112 |
| 7. Soutenez le couvercle (lentille) de verre pour l’empêcher de tomber. Elle devrait se détacher facilement. Ne essayez pas de le décoller de force. |
112 |
| 8. Retirez l’ampoule halogène de sa douille. |
112 |
| 9. Remplacez l’ampoule halogène. Saisissez l’ampoule neuve avec un chiffon propre et sec. Alignez les broches de l’ampoule avec les trous de la douille et enfoncez-les. |
113 |
| Remarque : |
113 |
| 10. Remettez le couvercle de verre en place en l’insérant sur les brides de fixation. Appuyez sur l’extrémité la plus proche de vous pour l’enfoncer sur le boîtier jusqu’à ce que le couvercle s’enclenche. Insérez la vis dans le couver... |
113 |
| 11. Remettez la grille du four. |
113 |
| 12. Remettez l’alimentation du four au tableau de distribution principal (boîte à fusibles ou boîtier de disjoncteurs). |
113 |
| Plaque signalétique du produit |
113 |
| Comment obtenir des services de dépannage ou des pièces |
113 |
| DÉCLARATION DE GARANTIE LIMITÉE DU PRODUIT |
114 |
| Couverture de la garantie limitée |
114 |
| Durée de la garantie |
114 |
| Réparation ou remplacement : votre recours exclusif |
114 |
| Produit hors garantie |
114 |
| Exclusions de garantie |
115 |
| Soutien THERMADOR® |
116 |
| Dépannage |
116 |
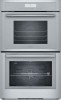
 1
1 111
111 112
112 113
113 114
114 115
115 116
116 117
117 118
118 119
119 120
120

