Thermador MEDS302WS Instruction manual - Page 49
Notes, Surfaces in the Oven Cavity, Cleaning Enamel Surfaces, Keeping the Appliance Clean, Easy
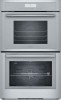 |
View all Thermador MEDS302WS manuals
Add to My Manuals
Save this manual to your list of manuals |
Page 49 highlights
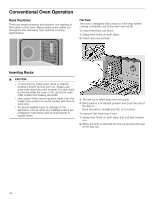
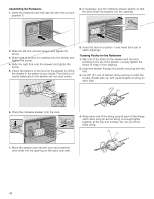
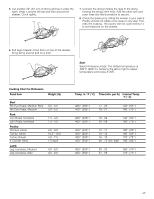
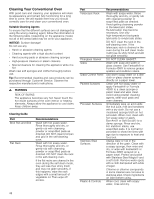
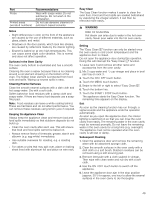
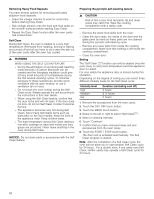
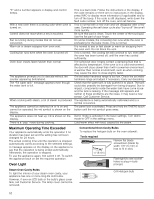
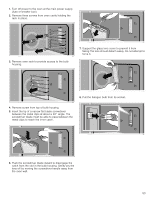
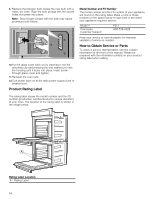
Part Probe Printed areas (words & numbers) Recommendations Wipe with soapy water. Do not submerge. Do not wash in the dishwasher. Do not use abrasive cleaners or petroleum based solvents. Notes ▯ Slight differences in color on the front of the appliance are caused by the use of different materials, such as glass, plastic and metal. ▯ Shadows on the door panels, which look like streaks, are caused by reflections made by the interior lighting. ▯ Enamel is baked on at very high temperatures. This can cause some slight color variation. This is normal and does not affect operation. Surfaces in the Oven Cavity The oven cavity bottom is enameled and has a smooth surface. Cleaning the oven is easier because there is no cleaning around a coil element showing on the bottom of the oven. The hidden lower element is protected from food soils and spills. Wiping up excess spills is easy. Cleaning Enamel Surfaces Clean the smooth enamel surfaces with a dish cloth and hot soapy water. Dry with a soft cloth. Soften baked-on food residues with a damp cloth and soapy water. If there are heavy food deposits use a soapfilled pad. Note: Food residues can leave a white coating behind. These are harmless and do not affect performance. You can remove these residues using lemon juice if required. Keeping the Appliance Clean Always keep the appliance clean and remove food and food spills immediately so that stubborn deposits do not build up. ▯ Clean the oven cavity after each use. This will ensure that food and food spills cannot be baked on. ▯ Always remove flecks of limescale, grease, starch and albumin (e.g. egg white) immediately. ▯ Use suitable ovenware for roasting, e.g. a roasting dish. ▯ For cakes or pies that may spill over, place on baking sheet lined with aluminum foil and place on wire rack. Easy Clean The Easy Clean function makes it easier to clean the oven floor. Food and food spills are soaked beforehand by vaporizing the vinegar solution. It can then be removed more easily. 9 WARNING RISK OF SCALDING Hot steam can arise due to water in the hot oven cavity. Never pour water into the hot oven cavity. Setting The "Easy Clean š" function can only be started once the oven cavity is cold (room temperature) and the appliance door is closed. Do not open the appliance door during this operation. Doing this will interrupt the "Easy Clean š" function. 1. Leave rack 3 and remove all other racks and accessories from the oven cavity. 2. Mix 2 cups water and 1/2 cup vinegar and place in broil pan tray on rack 3. 3. Touch the ON l OFF touch button. 4. Touch the MENU touch button. 5. Swipe to the left or right to select "Easy Clean š". 6. Touch the bottom line. 7. Touch the START l STOP touch button. The appliance starts the Easy Clean function. The remaining time appears on the display. Exit As soon as the cleaning function has run through, a signal sounds and the appliance ends the operation automatically. As soon as you open the appliance door, the interior lighting is switched on so that you can rinse the oven cavity more easily. The remaining water in the oven cavity must be removed promptly. Do not leave the remaining water in the oven cavity for a long time (e.g. overnight). The appliance must not be operated when the oven cavity is still wet or damp. Subsequent Cleaning 1. Open the appliance door and remove the remaining water with an absorbent sponge cloth. 2. Clean the smooth surfaces in the oven cavity with a dish cloth or a soft brush. Stubborn residues can be removed using a soft scouring pad. 3. Remove limescale with a cloth soaked in vinegar. Then wipe with clean water and rub dry with a soft cloth. 4. Use the ON l OFF touch button to switch off the appliance. 5. Leave the appliance door ajar in the stop position (approx. 30°) for approx. one hour to allow the enamel surfaces in the oven cavity to dry thoroughly. 49
-
 1
1 -
2
-
3
-
4
-
5
-
6
-
7
-
8
-
9
-
10
-
11
-
12
-
13
-
14
-
15
-
16
-
17
-
18
-
19
-
20
-
21
-
22
-
23
-
24
-
25
-
26
-
27
-
28
-
29
-
30
-
31
-
32
-
33
-
34
-
35
-
36
-
37
-
38
-
39
-
40
-
41
-
42
-
43
-
 44
44 -
 45
45 -
 46
46 -
 47
47 -
 48
48 -
 49
49 -
 50
50 -
 51
51 -
 52
52 -
 53
53 -
 54
54 -
55
-
56
-
57
-
58
-
59
-
60
-
61
-
62
-
63
-
64
-
65
-
66
-
67
-
68
-
69
-
70
-
71
-
72
-
73
-
74
-
75
-
76
-
77
-
78
-
79
-
80
-
81
-
82
-
83
-
84
-
85
-
86
-
87
-
88
-
89
-
90
-
91
-
92
-
93
-
94
-
95
-
96
-
97
-
98
-
99
-
100
-
101
-
102
-
103
-
104
-
105
-
106
-
107
-
108
-
109
-
110
-
111
-
112
-
113
-
114
-
115
-
116
-
117
-
118
-
119
-
120
 |
 |
