Thermador MEDS302WS Instruction manual - Page 50
When Using The Self Clean Feature
 |
View all Thermador MEDS302WS manuals
Add to My Manuals
Save this manual to your list of manuals |
Page 50 highlights
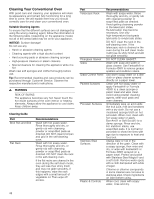
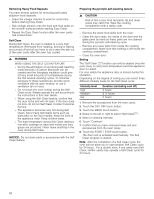
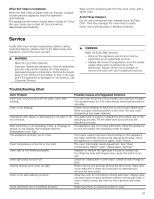
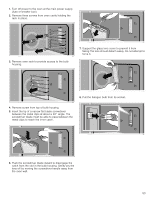
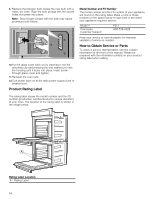
Removing Heavy Food Deposits You have several options for removing particularly stubborn food deposits. ▯ Leave the vinegar solution to work for some time before starting Easy Clean. ▯ Rub vinegar solution onto the food and food spills on the smooth surfaces before starting Easy Clean. ▯ Repeat the Easy Clean function after the oven cavity has cooled down. Self Clean During Self Clean, the oven is heated to a very high temperature. Remnants from roasting, broiling or baking are burned off and all you have to do is wipe the ash out of the oven cavity after the oven has cooled. 9 WARNING WHEN USING THE SELF CLEAN FEATURE ▯ During the elimination of soil during self-cleaning, small amounts of Carbon Monoxide can be created and the fiberglass insulation could give off very small amounts of formaldehyde during the first several cleaning cycles. To minimize exposure to these substances, provide good ventilation with an open window, or use a ventilation fan or hood. ▯ Do not block the oven vent(s) during the Self Clean cycle. Always operate the unit according to the instructions in this User Guide. ▯ When using the Self Clean feature, confirm that the door locks and will not open. If the door does not lock, do not run Self Clean. Contact Customer Service. ▯ The appliance becomes very hot during Self Clean. Never hang flammable items such as dishcloths on the door handle. Keep the front of the appliance clear. Keep children away. ▯ The high temperature during Self Clean destroys non-stick coatings on trays and molds and toxic gases are produced. Never leave anything in the oven during Self Clean. NOTICE: Do not clean parts or accessories with the Self Clean feature. Preparing the pyrolytic self-cleaning feature 9 CAUTION Risk of fire! Loose food remnants, fat and meat juices may catch fire. Wipe the cooking compartment with a damp cloth. ▯ Remove the worst food spills from the oven. ▯ Clean the door seals, the inside of the door and the glass pane by hand as these parts are not cleaned during the pyrolytic self-cleaning cycle. ▯ Remove any loose parts from inside the cooking compartment. Make sure that nothing is left inside the cooking compartment. ▯ Close the oven door. Setting The "Self Clean ˜" function can only be started once the oven cavity is cold (room temperature) and the appliance door is closed. For your safety the appliance door is locked during this operation. Depending on the degree of soiling you can select three different intensity levels for the Self Clean cycle: Intensity level high medium low Duration (excluding cool off) 3 hours 2 ½ hours 2 hours 1. Remove the accessories from the oven cavity. 2. Touch the ON l OFF touch button. 3. Touch the MENU touch button. 4. Swipe to the left or right to select "Self Clean˜". 5. Select a cleaning intensity. 6. Touch "Continue". 7. Confirm that you have removed heavy soil and accessories from the oven cavity. 8. Touch the START l STOP touch button. The door lock is activated automatically. The Self Clean program is started. Note: After the completion of a Self Clean cycle, the oven will not allow you to start another Self Clean cycle for 24 hours. For a double oven, if one cavity runs Self Clean, neither cavity may operate a Self Clean cycle for 24 hours. 50
-
 1
1 -
2
-
3
-
4
-
5
-
6
-
7
-
8
-
9
-
10
-
11
-
12
-
13
-
14
-
15
-
16
-
17
-
18
-
19
-
20
-
21
-
22
-
23
-
24
-
25
-
26
-
27
-
28
-
29
-
30
-
31
-
32
-
33
-
34
-
35
-
36
-
37
-
38
-
39
-
40
-
41
-
42
-
43
-
44
-
 45
45 -
 46
46 -
 47
47 -
 48
48 -
 49
49 -
 50
50 -
 51
51 -
 52
52 -
 53
53 -
 54
54 -
 55
55 -
56
-
57
-
58
-
59
-
60
-
61
-
62
-
63
-
64
-
65
-
66
-
67
-
68
-
69
-
70
-
71
-
72
-
73
-
74
-
75
-
76
-
77
-
78
-
79
-
80
-
81
-
82
-
83
-
84
-
85
-
86
-
87
-
88
-
89
-
90
-
91
-
92
-
93
-
94
-
95
-
96
-
97
-
98
-
99
-
100
-
101
-
102
-
103
-
104
-
105
-
106
-
107
-
108
-
109
-
110
-
111
-
112
-
113
-
114
-
115
-
116
-
117
-
118
-
119
-
120
 |
 |
