| Section |
Page |
| CARE AND USE MANUAL |
1 |
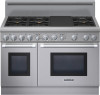
| For Thermador Professional® PRO-HARMONY™ Dual Fuel Ranges |
1 |
| Guide d'utilisation et d'entretien |
1 |
| Pour cuisinière à combustion jumelée Professional® PRO-HARMONY™ de Thermador |
1 |
| MANUAL DE USO Y CUIDADO |
1 |
| Para Estufas de Todo Tipo de Gas Professional® PRO-HARMONY™ de Thermador |
1 |
| About This Manual 1 |
2 |
| How This Manual Is Organized 1 |
2 |
| Introduction 1 |
2 |
| Safety 2 |
2 |
| Before You Begin 6 |
2 |
| Before Using Your Range for the First Time 6 |
2 |
| Description 7 |
2 |
| Model and Parts Identification — 48” Range 7 |
2 |
| Model and Parts Identification — 36” Range 8 |
2 |
| Model and Parts Identification — 30” Range 9 |
2 |
| Using The Cooktop 10 |
2 |
| Cookware Recommendations 14 |
2 |
| Specialty Cookware 15 |
2 |
| Cooking Recommendations 16 |
2 |
| Surface Burner Cooking Recommendations 16 |
2 |
| About the Griddle 19 |
2 |
| Griddle Cooking Recommendations 20 |
2 |
| Using the Oven 20 |
2 |
| Bake 20 |
2 |
| Convection 22 |
2 |
| Setting Bake/Convection Bake/ Extended Bake 23 |
2 |
| Other Uses of Bake 25 |
2 |
| Warm (Secondary Oven) 26 |
2 |
| Proof (Secondary Oven) 27 |
2 |
| Baking Recommendations 28 |
2 |
| Broil/Convection Broil 28 |
2 |
| Setting Broil or Convection Broil 29 |
2 |
| Broiling and Roasting Recommendations 30 |
2 |
| Care and Maintenance 31 |
2 |
| Self-Cleaning the Oven 31 |
2 |
| Range Cleaning 32 |
2 |
| Cleaning Recommendations 33 |
2 |
| Do-It-Yourself Maintenance 37 |
2 |
| Before Calling For Service 38 |
2 |
| STATEMENT OF LIMITED PRODUCT WARRANTY 39 |
2 |
| About This Manual |
3 |
| How This Manual Is Organized |
3 |
| Introduction |
3 |
| WARNING: |
3 |
| Gas Type Verification |
3 |
| CAUTION: |
3 |
| Important: |
3 |
| Safety |
4 |
| IMPORTANT SAFETY INSTRUCTIONS |
4 |
| READ AND SAVE THESE INSTRUCTIONS |
4 |
| Gas and Electrical Requirements and Grounding Instructions |
4 |
| PLEASE READ CAREFULLY |
4 |
| 30\ |
4 |
| 36\ |
4 |
| 48\ |
4 |
| WARNING: |
4 |
| CAUTION: |
4 |
| WARNING: |
4 |
| CAUTION — ALL MODELS: |
4 |
| TESTED IN ACCORDANCE WITH: |
5 |
| Safety Practices to Avoid Personal Injury |
5 |
| CAUTION: |
5 |
| WARNING: |
5 |
| WARNING — RANGE TIPPING HAZARD: |
6 |
| Safety Precautions |
6 |
| WARNING: |
6 |
| WARNING: |
6 |
| WARNING: |
7 |
| WARNING: |
7 |
| 1. Providing good ventilation when cooking with gas. |
7 |
| 2. Providing good ventilation during and immediately after self cleaning the oven. |
7 |
| 3. Operating the unit according to the instructions in this manual. |
7 |
| Before using your range for the first time, check that you have these items: |
8 |
| Table 1: Range Accessories and Parts |
8 |
| Before You Begin |
8 |
| Before Using Your Range for the First Time |
8 |
| Remove all packaging materials and temporary labels from oven and cooktop. |
8 |
| 1. Check that you have the items listed in Table 1. |
8 |
| 2. Record the Model and Serial number on page 38. See \ |
8 |
| 3. Optional Accessories. Grill Plate, Black Knob Kit, Chopping Board, Griddle Cover, Wok Support Ring and other accessories are available from your Thermador Dealer. |
8 |
| 4. Position the racks correctly in the oven. The correct rack position depends on the recipe and the cooking mode. The rack positions are numbered from the bottom of the oven, like an elevator. Rack position 3 is the most frequently used position. Pl... |
8 |
| a) Hold the rack with the back rail in the up position towards the rear of the oven. Slip it into the oven so the rack slides are between the rack and the rack guides. |
8 |
| b) Tip the front of the rack up slightly as it slides into the oven so that the safety stops clear the rack slides. The safety stops on the back of the rack will keep it from sliding out of the oven when it is pulled forward. |
8 |
| 5. Ensure that the burner caps are correctly seated on the burner bases of the range's cooktop. Turn on each burner to check for proper flame color. See page 14 for details. |
8 |
| Figure 1: Oven Rack Positions |
9 |
| CAUTION: |
9 |
| Description |
9 |
| Model and Parts Identification — 48” Range |
9 |
| Key for 48\ |
9 |
| 1. 22\ |
9 |
| 2. Burner Grates & Burners |
9 |
| 3. Electric Griddle |
9 |
| 4. Control Knobs, ExtraLow® Burners (2) |
9 |
| 5. Control Knobs, Standard Burners (4) |
9 |
| 6. Control Knob, Griddle (1) |
9 |
| 7. Oven Temperature Selectors, Main and Secondary Ovens |
9 |
| 8. Selector Switches, Main and Secondary Ovens |
9 |
| 9. Oven Door |
9 |
| 10. Viewing Window |
9 |
| 11. Secondary Oven (2 gliding racks included) |
9 |
| 12. Kick Panel |
9 |
| 13. Range Feet (4) |
9 |
| Figure 2: 48\ |
9 |
| WARNING: |
9 |
| Electric Oven Interior |
10 |
| 14. Oven Interior Light |
10 |
| 15. Broil Element |
10 |
| 16. Oven Thermostat |
10 |
| 17. Rack Guides |
10 |
| 18. Gliding Oven Racks (3 included, not shown) |
10 |
| 19. Bake Element (hidden) |
10 |
| 20. Convection Fan Cover |
10 |
| Figure 3: Oven Interior |
10 |
| Model and Parts Identification — 36” Range |
10 |
| Key for 36\ |
10 |
| 1. 22\ |
10 |
| 2. Burner Grates & Burners |
10 |
| 3. Control Knobs, ExtraLow® Burners (2) |
10 |
| 4. Control Knobs, Standard Burners (4) |
10 |
| 5. Oven Temperature Selector |
10 |
| 6. Oven Mode Selector |
10 |
| 7. Oven Door |
10 |
| 8. Viewing Window |
10 |
| 9. Kick Panel |
10 |
| 10. Range Feet (4) |
10 |
| Figure 4: 36\ |
10 |
| WARNING: |
10 |
| Model and Parts Identification — 30” Range |
11 |
| Key for 30\ |
11 |
| 1. 6\ |
11 |
| 2. Burner Grates & Burners |
11 |
| 3. Center Grate |
11 |
| 4. Control Knobs, ExtraLow® Burners (2) |
11 |
| 5. Control Knobs, Standard Burners (2) |
11 |
| 6. Oven Temperature Selector |
11 |
| 7. Oven Mode Selector |
11 |
| 8. Oven Door |
11 |
| 9. Viewing Window |
11 |
| 10. Kick Panel |
11 |
| 11. Range Feet (4) |
11 |
| Figure 5: 30\ |
11 |
| WARNING: |
11 |
| Electric Oven Interior |
11 |
| Using The Cooktop |
12 |
| Sealed Star® Burners |
12 |
| Figure 6: Star® Brass Burner Base |
12 |
| Control Knobs |
12 |
| Figure 7: Standard Burner Control Knob |
12 |
| Operation of the Burners |
13 |
| BTU for Standard Burners |
13 |
| BTU for ExtraLow® Burner |
13 |
| Figure 8: ExtraLow Burner Control Knob |
13 |
| Operation of the ExtraLow Burners |
13 |
| ExtraLow Techniques |
13 |
| Figure 9: Igniter |
14 |
| CAUTION: |
14 |
| Figure 10: Star® Burner Components |
14 |
| Burner Cap Placement |
14 |
| WARNING: |
14 |
| WARNING: |
14 |
| Checking Burner Cap Placement |
14 |
| Figure 11 : Correct Burner Cap Placement |
15 |
| Figure 12 : Incorrect Burner Cap Placement |
15 |
| Automatic Re-Ignition |
15 |
| Important: |
15 |
| Power Failure |
15 |
| WARNING: |
15 |
| Flame Height |
15 |
| Flame Description |
15 |
| Figure 13: Flame Color |
16 |
| WARNING: |
16 |
| Cookware Recommendations |
16 |
| WARNING: |
16 |
| Figure 14: Base Diameter |
16 |
| Figure 15: Balanced Pan |
16 |
| Figure 16: Flat Base Pan |
17 |
| Figure 17: Covered Pan |
17 |
| Specialty Cookware |
17 |
| Figure 18: Flat-Bottom Wok Pan |
17 |
| Figure 19: Round-Bottom Wok In Support Ring |
17 |
| Standard Size Water Bath Canner |
18 |
| Standard Size Pressure Canner |
18 |
| Canning Tips: |
18 |
| Cooking Recommendations |
18 |
| Suggestions For Using the Recommendations |
18 |
| Surface Burner Cooking Recommendations |
18 |
| About the Griddle |
21 |
| Description |
21 |
| CAUTION |
21 |
| Control Knob |
21 |
| Figure 20: Griddle Control Knob |
21 |
| Preparing the Griddle |
21 |
| Griddle Grease Tray |
21 |
| Figure 21: Griddle Grease Tray |
21 |
| Cooking on the Griddle |
21 |
| 1. Check that the grease tray is tucked under the griddle plate overhang. |
21 |
| 2. Turn the knob to the cooking temperature to preheat the griddle. |
21 |
| 3. Preheat 10 to 12 minutes or until the light indicator goes off. |
21 |
| 4. Add butter, margarine, oil or shortening if desired. |
21 |
| NOTICE: |
21 |
| Note: |
22 |
| Griddle Cooking Recommendations |
22 |
| Using the Oven |
22 |
| Bake |
22 |
| Tips for Bake |
22 |
| Preheating the Oven |
22 |
| Getting the Best Results |
22 |
| Bakeware Type |
22 |
| Gliding Oven Racks |
22 |
| Figure 22: Gliding Oven Rack |
23 |
| Figure 23: Rack Installation Detail |
23 |
| Bake Rack Positions |
23 |
| Figure 24: Oven Rack Positions |
23 |
| Rack Positions |
23 |
| One Rack Baking |
23 |
| Two Rack Baking |
23 |
| Three Rack Baking |
23 |
| Bakeware Placement |
24 |
| Secondary Oven (48\ |
24 |
| Convection |
24 |
| Cooking with Convection |
24 |
| Convection Baking |
24 |
| Converting Conventional Baking to Convection Baking |
24 |
| Tips for Convection Bake |
24 |
| Preheating the Oven |
24 |
| Temperature Setting |
24 |
| High Altitude Baking |
24 |
| Condensation |
24 |
| Rack Positions |
25 |
| Large Main Oven One Rack Baking |
25 |
| Two Rack Baking |
25 |
| Three Rack Baking |
25 |
| Bakeware Type |
25 |
| Placement |
25 |
| CAUTION: |
25 |
| Setting Bake/Convection Bake/Extended Bake |
25 |
| Bake / Convection Bake |
25 |
| Figure 25: Oven Controls for 36” Range |
25 |
| To Set the Oven |
26 |
| 1. Select BAKE mode or CONVECTION BAKE mode using the Mode Selector Knob. |
26 |
| 2. Set oven temperature using the Temperature Selector Knob. |
26 |
| Note: |
26 |
| Extended Bake |
26 |
| 1. Select EXTENDED BAKE mode using the Mode Selector Knob. |
26 |
| 2. Set oven temperature using the Temperature Selector Knob. |
26 |
| Automatic operation of the cooling blower: |
26 |
| Figure 26: Secondary Oven Controls for 48” Range |
27 |
| To Set the Secondary Oven (48” Range) |
27 |
| 1. Select BAKE mode using the Mode Selector Knob. |
27 |
| 2. Set oven temperature using the Temperature Selector Knob. |
27 |
| Note: |
27 |
| Other Uses of Bake |
27 |
| Slow Cooking and Low Temperature Uses of the Oven |
27 |
| FOOD SAFETY |
27 |
| Suggested Temperature Recommendations to Keep Food Hot |
28 |
| Warm (Secondary Oven) |
28 |
| Secondary Oven (Only on 48\ |
28 |
| To Set the Secondary Oven to Warm |
28 |
| 1. To preheat the oven turn the Mode Selector Knob to WARM about 10 minutes before use. Do not rotate the Temperature Selector Knob to any setting (leave in OFF position). |
28 |
| 2. Place the hot food in the secondary oven then close the door. The ideal temperature for keeping the food warm will be maintained until the Selector Switch is turned off. |
28 |
| 3. Do not open the oven door unnecessarily. Opening the door will reduce the temperature of the oven. |
28 |
| CAUTION |
28 |
| Food Safety Concern Food Poisoning Possible |
28 |
| Figure 27: Secondary Oven Controls for 48” Range |
29 |
| Proof (Secondary Oven) |
29 |
| Secondary Oven (Only on 48\ |
29 |
| To Set the Secondary Oven for Proofing |
29 |
| 1. Place dough in dish in the small oven. Close the door. |
29 |
| 2. Select PROOF using Mode Selector Knob. Do not rotate the Temperature Selector Knob to any setting (leave in the OFF position). |
29 |
| 3. Set a minute timer for the minimum proof time. |
29 |
| Baking Recommendations |
30 |
| Broil/Convection Broil |
30 |
| Tips for Broil |
30 |
| Preheating the Broiler |
30 |
| Getting the Best Results |
30 |
| Rack Positions |
30 |
| Utensils |
30 |
| Broiling Using a Regular Meat Thermometer |
31 |
| Secondary Oven (48\ |
31 |
| Note: |
31 |
| Setting Broil or Convection Broil |
31 |
| Broil — Electric Oven |
31 |
| Note: |
31 |
| To Set the Oven to Broil or Convection Broil |
31 |
| 1. Place oven rack in desired position. |
31 |
| 2. Set Mode Selector Knob to BROIL or Convection Broil. |
31 |
| 3. Set Temperature Selector Knob to BROIL. |
31 |
| 4. Wait until PRE HEATING light turns off, after approximately three (3) minutes. |
31 |
| 5. Place food in oven at desired rack position as referenced on page 28. |
31 |
| 6. The door should be closed throughout the broil cycle. |
31 |
| Automatic operation of the cooling blower: |
31 |
| Note: |
31 |
| Broiling and Roasting Recommendations |
32 |
| Care and Maintenance |
33 |
| Self-Cleaning the Oven |
33 |
| WARNING |
33 |
| Electric Oven |
33 |
| Before Self Cleaning the Oven |
33 |
| Important: |
33 |
| Lock |
33 |
| To Set Self-Clean |
33 |
| 1. Select SPEED CLEAN using the Mode Selector Knob. |
33 |
| 2. Set Temperature Selector Knob to CLEAN. |
33 |
| Note: |
33 |
| Figure 28: Oven Controls for 36” Range |
34 |
| At the End of the Clean Cycle |
34 |
| 1. Select OFF using the Mode Selector Knob. |
34 |
| 2. Turn Oven Control Knob to OFF position. |
34 |
| Cleaning Hints |
34 |
| 1. The porcelain enamel finish is acid resistant, but not acid proof. Acidic foods, such as citrus juices, tomatoes, rhubarb, vinegar, alcohol or milk, should be wiped up and not allowed to bake onto the porcelain during the next use. |
34 |
| 2. Remove the oven racks. See Racks, on Range Cleaning Recommendations, page 36. |
34 |
| 3. The heating elements in the oven do not require cleaning; the elements burn themselves clean when the oven is in use. Both elements are permanently connected. It is not necessary to clean the broiler shield above the broil element. |
34 |
| CAUTION |
34 |
| Range Cleaning |
34 |
| When Cleaning This Range: |
34 |
| 1. Use the mildest cleaning procedure that will do the job efficiently and effectively. Some cleaners of the same type are harsher than others. Try on a small area first. |
34 |
| 2. Always rub metal finishes in the direction of the polish lines for maximum effectiveness and to avoid marring the surface. |
34 |
| 3. Use only clean soft cloths, sponges, paper towels, fibrous brushes, plastic, non-metal or steel wool soap pads for cleaning and scouring, as recommended on the chart. |
34 |
| 4. Any part of this appliance can be cleaned with hot sudsy water. When rinsing is required, rinse thoroughly |
34 |
| 5. Always wipe dry immediately to avoid water marks. |
34 |
| CAUTION |
34 |
| Brand Names |
35 |
| Cleaning Recommendations |
35 |
| Note: |
38 |
| Do-It-Yourself Maintenance |
39 |
| Oven Light Bulb Replacement |
39 |
| To Replace the Light Bulb: |
39 |
| 1. Make sure that oven light switch is in the OFF position . |
39 |
| 2. Remove the light cover - With a flat-blade screwdriver in one hand, use the screwdriver as a small wedge to gently pry apart the glass cover from the metal housing and hold the glass in the other hand as it releases from the housing. |
39 |
| 3. Remove the burned-out bulb. Replace it with a recommended appliance light bulb only. Do not touch bulb with fingers. Follow the bulb manufacturer's instructions. |
39 |
| 4. Replace the glass cover by aligning it with the housing and pressing on both ends of the glass, with equal force, until the cover snaps into position. Avoid applying excessive force on the glass. |
39 |
| CAUTION |
39 |
| Power Failure |
39 |
| Intermittent or Constant Igniter Sparking |
39 |
| Before Calling For Service |
40 |
| If the Burners do not Ignite |
40 |
| Data Rating Plate |
40 |
| Figure 29: Rating Plate and Wiring Diagram Locations (oven door not shown) |
40 |
| CAUTION: |
40 |
| Service Information |
40 |
| STATEMENT OF LIMITED PRODUCT WARRANTY |
41 |
| What this Warranty Covers & Who it Applies to |
41 |
| How Long the Warranty Lasts |
41 |
| Repair/Replace as Your Exclusive Remedy |
41 |
| Out of Warranty Product |
41 |
| Warranty Exclusions |
41 |
| Concernant ce guide 1 |
44 |
| Présentation de ce guide 1 |
44 |
| Introduction 1 |
44 |
| Sécurité 2 |
44 |
| Avant de commencer 7 |
44 |
| Avant d’utiliser la cuisinière pour la première fois 7 |
44 |
| Description 8 |
44 |
| Identification du modèle et des pièces — cuisinière de 48 po 8 |
44 |
| Identification du modèle et des pièces — cuisinière de 36 po 9 |
44 |
| Identification du modèle et des pièces — cuisinière de 30 po 10 |
44 |
| Utilisation de la table de cuisson 11 |
44 |
| Récipients recommandés 15 |
44 |
| Récipients spécialisés 17 |
44 |
| Recommandations de cuisson 17 |
44 |
| Conseils de cuisson avec les brûleurs de la table de cuisson 18 |
44 |
| Concernant la plaque 20 |
44 |
| Recommandations de cuisson sur la plaque chauffante 21 |
44 |
| Utilisation du four 22 |
44 |
| Cuisson 22 |
44 |
| Convection 24 |
44 |
| Réglages de cuisson/cuisson par convection/cuisson prolongée 26 |
44 |
| Autres utilisations du four 28 |
44 |
| Chaud (Four auxiliaire) 28 |
44 |
| Apprêt (Four auxiliaire) 29 |
44 |
| Conseils de cuisson au four 30 |
44 |
| Grilloir/Grilloir à convection 30 |
44 |
| Réglage du grilloir ou du grilloir à convection 31 |
44 |
| Conseils de cuisson — gril et four 32 |
44 |
| Entretien et nettoyage 33 |
44 |
| Four autonettoyant 33 |
44 |
| Nettoyage de la cuisinière 34 |
44 |
| Conseils de nettoyage 35 |
44 |
| Entretien à faire soi-même 40 |
44 |
| Avant d’appeler le service technique 41 |
44 |
| ÉNONCÉ DE GARANTIE LIMITÉE DU PRODUIT 42 |
44 |
| Concernant ce guide |
45 |
| Présentation de ce guide |
45 |
| Introduction |
45 |
| AVERTISSEMENT: |
45 |
| Vérification du type de gaz |
45 |
| MISE EN GARDE |
45 |
| Important : |
45 |
| Sécurité |
46 |
| CONSIGNES de sécurité importantes |
46 |
| LISEZ ET CONSERVEZ CES INSTRUCTIONS |
46 |
| Exigences pour installation de l'alimentation au gaz et électrique et instructions pour mise à la terre |
46 |
| LISEZ ATTENTIVEMENT CE QUI SUIT : |
46 |
| Modèles à combustion jumelée 30 po : |
46 |
| Modèles à combustion jumelée 36 po : |
46 |
| Modèles à combustion jumelée 48 po : |
46 |
| AVERTISSEMENT |
46 |
| MISE EN GARDE |
46 |
| AVERTISSEMENT |
46 |
| MISE EN GARDE — TOUS LES MODÈLES |
47 |
| ESSAIS CONFORMES À : |
47 |
| Consignes de sécurité destinées à éviter les blessures |
47 |
| MISE EN GARDE : |
47 |
| ATTENTION : |
48 |
| AVERTISSEMENT — DANGER DE BASCULEMENT |
48 |
| Consignes de sécurité |
48 |
| AVERTISSEMENT |
48 |
| AVERTISSEMENT |
48 |
| AVERTISSEMENT |
49 |
| AVERTISSEMENT |
50 |
| Tableau 1: Accessoires et pièces de cuisinière |
51 |
| Avant de commencer |
51 |
| Avant d’utiliser la cuisinière pour la première fois |
51 |
| 1. Assurez-vous que vous avez tous les éléments énumérés à Tableau 1. |
51 |
| 2. Notez le numéro de modèle et le numéro de série à la page 41. Consultez la fiche signalétique. Ces éléments peuvent être utilisés à des fins de contact avec le service à la clientèle. Notez-les également sur la carte d'enregistrement... |
51 |
| 3. Accessoires optionnels. La plaque de gril, l'ensemble de boutons noirs, la planche à découper, le couvercle de grille, l'anneau pour wok et d'autres accessoires sont en vente chez votre détaillant Thermador. |
51 |
| 4. Placez correctement les grilles dans le four. La position adéquate des grilles dépend de la recette et du mode de cuisson. Les positions des grilles dans le four sont numérotées de bas en haut, comme un ascenseur. La position no 3 est la plus ... |
51 |
| a) Tenez la grille par la barre arrière en position verticale en direction du fond du four. Glissez-la dans le four de manière à ce que les barres se trouvent entre la grille et les glissières des grilles. |
51 |
| b) Soulevez légèrement l’avant de la grille quand vous la glissez dans le four pour que les butées de sûreté passent derrière les glissières. Les butées de sûreté placées à l’arrière des grilles les empêchent de sortir complètement... |
51 |
| 5. Assurez-vous que les chapeaux des brûleurs sont bien posés dans leurs bases sur la table de cuisson. Allumez chaque brûleur pour vérifier la couleur de la flamme. Consultez la page 15 pour plus de détails. |
52 |
| Figure 1 : Postions des grilles dans le four |
52 |
| MISE EN GARDE |
52 |
| Description |
52 |
| Identification du modèle et des pièces — cuisinière de 48 po |
52 |
| Légende pour modèle de 48 po |
52 |
| 1. Plaque de protection à étagère à casseroles de 55,9 cm (22 po), plaque de protection basse de 22,86 cm (9 po) ou garniture d’îlot encastrée (Étagère pour casserole et dosseret bas vendus séparément) |
52 |
| 2. Grilles de brûleurs et brûleurs |
52 |
| 3. Plaque de cuisson |
52 |
| 4. Boutons de commande, brûleurs ExtraLow® (2) |
52 |
| 5. Boutons de commande, brûleurs standards (4) |
52 |
| 6. Bouton de commande, plaque de cuisson (1) |
52 |
| 7. Sélecteurs de température; fours principal et secondaire |
52 |
| 8. Sélecteurs, fours principal et secondaire |
52 |
| 9. Porte du four |
52 |
| 10. Hublot |
52 |
| 11. Four auxiliaire de 30,5 cm (12 po) (2 grilles coulissantes inclues) |
52 |
| 12. Plaque d’habillage |
52 |
| 13. Pieds de cuisinière (4) |
52 |
| Figure 2 : modèle de 48 po |
53 |
| AVERTISSEMENT |
53 |
| Intérieur du four électrique |
53 |
| 14. Éclairage intérieur du four |
53 |
| 15. Élément du grilloir |
53 |
| 16. Capteur thermostat du four |
53 |
| 17. Glissières des grilles |
53 |
| 18. Grilles de four coulissantes (3 incluse, non illustré) |
53 |
| 19. Élément de cuisson (dissimulé) |
53 |
| 20. Couvercle du ventilateur à convection |
53 |
| Figure 3 : Intérieur du four |
53 |
| Identification du modèle et des pièces — cuisinière de 36 po |
53 |
| Légende pour modèle de 36 po |
53 |
| 1. Étagère à casseroles et poêlons de 22 po, plaque de protection basse de 6 po ou garniture d’îlot encastrée (Étagère pour casserole et dosseret bas vendus séparément) |
53 |
| 2. Brûleurs et grilles de brûleurs |
53 |
| 3. Boutons de contrôle, brûleurs ExtraLow® (2) |
53 |
| 4. Boutons de contrôle et brûleurs standards (4) |
53 |
| 5. Sélecteur de température du four |
53 |
| 6. Sélecteur de mode du four |
53 |
| 7. Porte du four |
53 |
| 8. Hublot |
53 |
| 9. Base |
53 |
| 10. Pieds de cuisinière (4) |
53 |
| Figure 4 : modèle de 36 po |
54 |
| AVERTISSEMENT |
54 |
| Identification du modèle et des pièces — cuisinière de 30 po |
54 |
| Légende du modèle de 30 po |
54 |
| 1. Plaque de protection basse de 6 po (garniture d'îlot et étagère à casseroles commandées séparément) |
54 |
| 2. Brûleurs et grilles de brûleurs |
54 |
| 3. Grille centrale |
54 |
| 4. Boutons de contrôle, brûleurs ExtraLow® (2) |
54 |
| 5. Boutons de contrôle et brûleurs standards (4) |
54 |
| 6. Sélecteur de température du four |
54 |
| 7. Sélecteur de température du four |
54 |
| 8. Porte du four |
54 |
| 9. Hublot |
54 |
| 10. Base |
54 |
| 11. Pieds de cuisinière (4) |
54 |
| Figure 5 : modèle de 30 po |
54 |
| AVERTISSEMENT |
54 |
| Intérieur du four électrique |
54 |
| Utilisation de la table de cuisson |
55 |
| Brûleurs Star® scellés |
55 |
| Figure 6 : Base de brûleur Star® en laiton |
55 |
| Boutons de commande |
55 |
| Figure 7 : Bouton de contrôle de brûleur standard |
55 |
| Fonctionnement des brûleurs |
56 |
| BTU des brûleurs standard |
56 |
| BTU des brûleurs ExtraLow® |
56 |
| Figure 8 : Bouton de contrôle de brûleur ExtraLow® |
56 |
| Fonctionnement du brûleurs ExtraLow® |
56 |
| Techniques ExtraLow |
56 |
| Figure 9 : Allumeur |
57 |
| MISE EN GARDE |
57 |
| Figure 10 : Éléments de brûleurs Star® |
57 |
| Mise en place du capuchon du brûleur |
57 |
| AVERTISSEMENT : |
57 |
| AVERTISSEMENT : |
57 |
| Vérification de la mise en place du capuchon de brûleur |
57 |
| Figure 11 : Emplacement correct du capuchon de brûleur |
58 |
| Figure 12 : Emplacement incorrect du capuchon de brûleur |
58 |
| Rallumage automatique lors d'une panne de courant |
58 |
| Important |
58 |
| Panne de courant |
58 |
| AVERTISSEMENT |
58 |
| Hauteur de la flamme |
58 |
| Description de la flamme |
58 |
| Figure 13 : Couleur de la flamme |
59 |
| AVERTISSEMENT: |
59 |
| Récipients recommandés |
59 |
| AVERTISSEMENT: |
59 |
| Figure 14 : Diamètre de la base |
59 |
| Figure 15 : Récipient stable |
59 |
| Figure 16 : Récipient à base plate |
60 |
| Figure 17 : Récipient avec couvercle |
60 |
| Récipients spécialisés |
61 |
| Figure 18 : Wok à font plat |
61 |
| Figure 19 : Wok à fond rond avec anneau de support |
61 |
| Cocotte de dimensions standards |
61 |
| Cocotte-minute de dimensions standards |
61 |
| Conseils d’utilisation : |
61 |
| Recommandations de cuisson |
61 |
| Suggestions pour les recommandations |
61 |
| Conseils de cuisson avec les brûleurs de la table de cuisson |
62 |
| Concernant la plaque |
64 |
| ATTENTION |
64 |
| Bouton de Contrôle |
64 |
| Figure 20 : Bouton de contrôle de la plaque électrique |
64 |
| Préparation de la plaque |
64 |
| Plateau à graisse de la plaque |
64 |
| Figure 21 : Plateau à graisse de la plaque |
65 |
| Cuisson sur la grille |
65 |
| 1. Assurez-vous que le plateau à graisse est sous la plaque. |
65 |
| 2. Tournez le bouton à la température de cuisson pour préchauffer. |
65 |
| 3. Préchauffez de 10 à 12 minutes ou jusqu'à ce que le voyant s'éteigne. |
65 |
| 4. Ajoutez du beurre, de la margarine ou de l'huile si désiré. |
65 |
| AVIS : |
65 |
| Remarques : |
65 |
| Recommandations de cuisson sur la plaque chauffante |
65 |
| Utilisation du four |
66 |
| Cuisson |
66 |
| Conseils pour la cuisson |
66 |
| Préchauffage du four |
66 |
| Optimisation des résultats |
66 |
| Plats pour le four |
66 |
| Grilles de four coulissantes |
66 |
| Figure 22: Grilles de four coulissantes |
66 |
| Figure 23: Détail d'installation des grilles |
67 |
| Position des grilles pour la cuisson |
67 |
| Figure 24 : Position des grilles du four |
67 |
| Position des grilles du four |
67 |
| Cuisson avec une seule grille |
67 |
| Cuisson avec deux grilles |
67 |
| Cuisson avec trois grilles |
67 |
| Placement des plats |
67 |
| Four auxiliaire (modèle de 48 po) |
67 |
| Convection |
68 |
| Cuisson par convection |
68 |
| Cuisson par convection |
68 |
| Conversion de la cuisson conventionnelle à la cuisson par convection |
68 |
| Conseils d’utilisation de la cuisson par convection |
68 |
| Préchauffage du four |
68 |
| Réglage de température |
68 |
| Cuisson à haute altitude |
68 |
| Condensation |
68 |
| Position des grilles |
68 |
| Grand four— Cuisson avec une grille |
68 |
| Cuisson avec deux grilles |
69 |
| Cuisson avec trois grilles |
69 |
| Type de plats pour le four |
69 |
| Positionnement |
69 |
| MISE EN GARDE |
69 |
| Réglages de cuisson/cuisson par convection/cuisson prolongée |
70 |
| Cuisson, cuisson à convection |
70 |
| Figure 25: contrôles du four pour cuisinière 36 po |
70 |
| Pour régler le four |
70 |
| 1. Choisir le mode CUISSON ou CUISSON À CONVECTION à l’aide du sélecteur de mode. |
70 |
| 2. Régler la température du four avec le sélecteur de température. |
70 |
| Remarque : |
70 |
| Cuisson prolongée |
70 |
| 1. Choisir le mode CUISSON PROLONGÉE avec le sélecteur de mode. |
70 |
| 2. Régler la température du four avec le sélecteur de température. |
70 |
| Fonctionnement automatique de la soufflerie de refroidissement : |
71 |
| Figure 26: Contrôles de four secondaire pour cuisinière 48 po. |
71 |
| Pour régler le four secondaire (cuisinière 48 po) |
71 |
| 1. Sélectionner le mode CUISSON avec le sélecteur de mode. |
71 |
| Remarque : |
71 |
| Autres utilisations du four |
72 |
| Cuisson lente et à basse température |
72 |
| SALUBRITÉ ALIMENTAIRE |
72 |
| Suggestions de température pour conserver la chaleur des aliments |
72 |
| Chaud (Four auxiliaire) |
72 |
| Four auxiliaire (modèle de 48 po seulement) |
72 |
| Pour régler le four auxiliaire afin de maintenir au chaud |
72 |
| 1. Pour préchauffer le four, régler le sélecteur de mode à RÉCHAUD environ 10 minutes avant l’utilisation. Ne pas régler le sélecteur de température (laisser en position ARRÊT). |
72 |
| 2. Placez le plat chaud dans le four auxiliaire et refermez la porte. La température idéale de maintien de la chaleur des aliments sera conservée jusqu’à ce que le sélecteur soit tourné sur OFF. |
72 |
| 3. N'ouvrez pas la porte inutilement. Cela fera baisser la température du four. |
72 |
| MISE EN GARDE |
72 |
| Salubrité alimentaire — Intoxication alimentaire possible |
72 |
| Figure 27 : Contrôles de four secondaire pour cuisinière 48 po |
73 |
| Apprêt (Four auxiliaire) |
73 |
| Four auxiliaire (modèle de 48 po seulement) |
73 |
| Pour régler le four auxiliaire pour faire lever des pâtes |
73 |
| 1. Placez le plat contenant la pâte dans le petit four. Fermez la porte. |
73 |
| 2. Choisir LEVAGE avec le sélecteur de mode. Ne pas régler le sélecteur de température (laisser en position ARRÊT). |
73 |
| 3. Utilisez un minuteur que vous réglerez sur le temps minimum nécessaire pour faire lever la pâte. |
73 |
| Conseils de cuisson au four |
74 |
| Grilloir/Grilloir à convection |
74 |
| Conseils pour le grilloir |
74 |
| Préchauffer le grilloir |
74 |
| Pour obtenir les meilleurs résultats |
74 |
| Position des grilles |
75 |
| Récipients |
75 |
| Griller avec un thermomètre à viande ordinaire |
75 |
| Four auxiliaire (modèle de 48 po) |
75 |
| Remarque : |
75 |
| Réglage du grilloir ou du grilloir à convection |
75 |
| Grilloir — four électrique |
75 |
| REMARQUE: |
75 |
| Pour régler le four à grilloir ou à grilloir à convection |
75 |
| 1. Placez la grille à la position désirée. |
75 |
| 2. Régler le sélecteur de mode à GRIL ou gril à convection. |
75 |
| 3. Régler le sélecteur de température à GRIL. |
75 |
| 4. Attendez que le voyant de préchauffage s'éteigne, après environ 3 minutes. |
75 |
| 5. Placez les aliments au four sur la grille à la position désirée; voir page 31. |
75 |
| 6. La porte doit être fermée pendant tout le cycle du grilloir. |
75 |
| Fonctionnement automatique de la soufflerie de refroidissement : |
75 |
| Remarque : |
75 |
| Conseils de cuisson — gril et four |
76 |
| Entretien et nettoyage |
77 |
| Four autonettoyant |
77 |
| AVERTISSEMENT: |
77 |
| Four électrique |
77 |
| Avant d’effectuer le nettoyage automatique du four |
77 |
| Important : |
77 |
| Verrouillage de porte |
77 |
| Réglage de l'autonettoyage |
78 |
| 1. Choisir NETTOYAGE RAPIDE avec le sélecteur de mode. |
78 |
| 2. Régler le sélecteur de température à NETTOYER. |
78 |
| Figure 28: contrôles du four pour cuisinière 36 po |
78 |
| À la fin de l'autonettoyage |
78 |
| 1. Choisir ARRÊT avec le sélecteur de mode. |
78 |
| 2. Mettez le bouton de contrôle du four à OFF. |
78 |
| Conseils de nettoyage |
78 |
| 1. Le fini en porcelaine émaillée est résistant à l'acide, mais non à l'épreuve. Les aliments acides comme le jus d'agrumes, de tomates, de rhubarbe, ou le vinaigre, l'alcool et le lait doivent être essuyés. Ils ne doivent pas être laissés ... |
78 |
| 2. Retirez les grilles du four. Voir grilles, conseils de nettoyage, page 39. |
78 |
| 3. Les éléments chauffants du four ne requièrent pas de nettoyage. Les éléments se nettoient lorsque le four est utilisé. Les deux éléments sont branchés en permanence. Il n'est pas nécessaire de nettoyer l'écran de protection du grilloir ... |
78 |
| MISE EN GARDE |
78 |
| Nettoyage de la cuisinière |
78 |
| Pour nettoyer la cuisinière |
78 |
| 1. Utilisez la méthode de nettoyage efficace et modérée. Certains produits d'entretien similaires sont plus rudes que d'autres. Faites d'abord un essai sur une petite surface. |
78 |
| 2. Passez toujours les produits lustrant pour le métal dans le sens des lignes de polissage pour obtenir une efficacité maximum et éviter de rayer la surface. |
78 |
| 3. N'utilisez que des chiffons, éponges, serviettes en papier, brosses douces et propres; des tampons à récurer savonneux de plastique, non métalliques, pour nettoyer et gratter, comme recommandé dans le tableau. |
79 |
| 4. Toutes les pièces de cet appareil peuvent être nettoyées avec de l’eau chaude savonneuse. S’il est nécessaire de rincer, rincez soigneusement. |
79 |
| 5. Essuyez toujours immédiatement pour éviter les traces d’eau. |
79 |
| MISE EN GARDE |
79 |
| Marques de produits |
79 |
| Conseils de nettoyage |
79 |
| REMARQUE : |
83 |
| Entretien à faire soi-même |
84 |
| Changement de l’ampoule du four |
84 |
| Pour remplacer l’ampoule d’éclairage : |
84 |
| 1. S’assurer que l’interrupteur de l’éclairage du four est en position ARRÊT. |
84 |
| 2. Enlever le couvercle de l’ampoule. Utiliser un tournevis à lame plate pour forcer délicatement le couvercle en verre du boîtier en métal et tenir le verre de l’autre main pour l’enlever. |
84 |
| 3. Enlever l’ampoule grillée. La remplacer avec une ampoule recommandée pour les électroménagers seulement. Ne pas toucher l’ampoule avec les doigts. Suivre les instructions du fabricant. |
84 |
| 4. Remettre le couvercle en verre en l’alignant avec le boîtier et en pressant les deux côtés du verre avec une force égale jusqu’à ce qu’il s’enclenche en place. Ne pas appliquer une force excessive sur le verre. |
84 |
| MISE EN GARDE |
84 |
| Panne de courant |
84 |
| Production intermittente ou constante d’étincelles par l’allumeur |
84 |
| Avant d’appeler le service technique |
85 |
| Vérifiez d’abord les points suivants : |
85 |
| Si les brûleurs ne s’allument pas |
85 |
| Plaque signalétique |
85 |
| Figure 29 : Emplacement de la plaque signalétique et diagrammes de câblage (porte du four non illustrée) |
85 |
| ATTENTION |
85 |
| Information pour le service technique |
85 |
| ÉNONCÉ DE GARANTIE LIMITÉE DU PRODUIT |
86 |
| Couverture de la garantie et à qui elle s'applique |
86 |
| Durée de la garantie |
86 |
| Réparation ou remplacement du produit comme recours exclusif |
86 |
| Produit hors garantie |
86 |
| Exclusions de la garantie |
86 |
| Acerca de este manual 1 |
88 |
| Cómo está organizado este manual 1 |
88 |
| Introducción 1 |
88 |
| Seguridad 2 |
88 |
| Instrucciones Importantes de Seguridad 2 |
88 |
| Antes de comenzar 7 |
88 |
| Antes de usar su estufa por primera vez 7 |
88 |
| Descripción 8 |
88 |
| Modelo e Identificación — Estufas de 48” 8 |
88 |
| Modelo e Identificación — Estufas de 36” 9 |
88 |
| Modelo e Identificación — Estufas de 30” 10 |
88 |
| Usar la Parilla 11 |
88 |
| Recomendaciones para los utensilios de cocina 15 |
88 |
| Utensilios especiales para cocinar 16 |
88 |
| Recomendaciones para cocinar 17 |
88 |
| Recomendaciones para cocinar con los quemadores 17 |
88 |
| Acerca de la plancha 19 |
88 |
| Recomendaciones para cocinar con la plancha 21 |
88 |
| Usar el horno 21 |
88 |
| Hornear 21 |
88 |
| Convección 23 |
88 |
| Ajustar el horneado/horneado de convección/Horneado Extendido 25 |
88 |
| Otros usos del horneado 27 |
88 |
| Calentar (Horno secundario) 28 |
88 |
| Prueba (Horno Secundario) 28 |
88 |
| Recomendaciones para hornear 29 |
88 |
| Asar/Asar por convección 29 |
88 |
| Ajustar el Asado o el Asado de convección 30 |
88 |
| Recomendaciones para asar y tostar 31 |
88 |
| Cuidado y Mantenimiento 32 |
88 |
| Autolimpiar el horno 32 |
88 |
| Limpieza de la estufa 34 |
88 |
| Recomendaciones de limpieza 34 |
88 |
| Mantenimiento hecho por usted mismo 39 |
88 |
| Antes de solicitar servicio 40 |
88 |
| DECLARACIÓN DE GARANTÍA LIMITADA DEL PRODUCTO 41 |
88 |
| Acerca de este manual |
89 |
| Cómo está organizado este manual |
89 |
| Introducción |
89 |
| ADVERTENCIA: |
89 |
| Verificación del tipo de gas |
89 |
| PRECAUCIÓN |
89 |
| Importante: |
89 |
| Seguridad |
90 |
| Instrucciones Importantes de Seguridad |
90 |
| LEA Y GUARDE ESTAS INSTRUCCIONES |
90 |
| Requerimientos eléctricos y de gas e instrucciones para la puesta a tierra |
90 |
| FAVOR DE LEER CUIDADOSAMENTE |
90 |
| Modelos doble combustible de 30\ |
90 |
| Modelos doble combustible de 36\ |
90 |
| Modelos doble combustible de 48\ |
90 |
| ADVERTENCIA |
90 |
| PRECAUCIÓN |
90 |
| ADVERTENCIA |
90 |
| PRECAUCIÓN — TODOS LOS MODELOS |
91 |
| PROBADO CONFORME A: |
91 |
| Prácticas de Seguridad para Evitar Lesiones |
91 |
| PRECAUCIÓN |
91 |
| ATENCIÓN: |
92 |
| ADVERTENCIA - RIESGO DE VOLCADURA DE LA ESTUFA |
92 |
| Precauciones de seguridad |
92 |
| ADVERTENCIA |
92 |
| ADVERTENCIA |
92 |
| ADVERTENCIA |
93 |
| ADVERTENCIA |
94 |
| ANTES DE USAR SU ESTUFA POR PRIMERA VEZ, REVISE QUE TENGA ESTOS ARTÍCULOS: |
94 |
| Tabla 1: Piezas y Acesorios del Horno |
94 |
| Antes de comenzar |
95 |
| Antes de usar su estufa por primera vez |
95 |
| 1. Asegúrese de tener los artículos listados en la Tabla 1. |
95 |
| 2. Anote el número de modelo y de serie en la “Placa con información del aparato” en la página 40. Esta información puede ser utilizada en el futuro cuando contacte a su proveedor de servicios o la fábrica. Escriba esta información en la ta... |
95 |
| 3. Accesorios opcionales. Bandeja de asar, Kit para perilla negra, Tabla para cortar, Cubierta para la plancha, Anillo de soporte para wok y otros accesorios están disponibles con su distribuidor de Thermador. Contacte al departamento de refacciones... |
95 |
| 4. Posicione las rejillas correctamente en el horno. La posición correcta de las rejillas depende de la receta y del modo de cocinar. Las posiciones de rejillas están numeradas desde abajo hacia arriba, igual que un elevador. La posición de rejill... |
95 |
| a) Agarre la rejilla con el riel trasero en la posición arriba hacia el fondo del horno. Insértela en el horno de tal modo que la rejilla se deslice entre la rejilla y las guías. |
95 |
| b) Incline la parte delantera de la rejilla ligeramente hacia arriba cuando la deslice en el horno de modo que los topes de seguridad liberen los portarejillas. Los topes de seguridad en el fondo de la rejilla evitan que se pueda salir del horno cuan... |
95 |
| 5. Asegúrese de asentar correctamente las tapas de los quemadores en las bases en la parrilla de la estufa. Prenda cada quemador para comprobar el color correcto de las llamas. Vea “Operación de los Quemadores” en la página 12 para más detalles. |
95 |
| Figura 1: Posiciones de las rejillas en el horno |
95 |
| PRECAUCIÓN |
95 |
| Descripción |
96 |
| Modelo e Identificación — Estufas de 48” |
96 |
| Clave para Modelo de 48\ |
96 |
| 1. Estante para ollas y sartenes de 22”, consola baja de 9\ |
96 |
| 2. Rejillas y quemadores |
96 |
| 3. Plancha eléctrica |
96 |
| 4. Perillas de control, Quemadores ExtraLow® (2) |
96 |
| 5. Perillas de control, Quemadores estándar (4) |
96 |
| 6. Perilla de control, Plancha (1) |
96 |
| 7. Selector de temperatura del horno, hornos principal y secundario |
96 |
| 8. Selector de modo del horno, hornos principal y secundario |
96 |
| 9. Puerta del horno |
96 |
| 10. Ventana |
96 |
| 11. Horno secundario (2 rejillas deslizables incluidas) |
96 |
| 12. Panel para los pies |
96 |
| 13. Patas de estufa (4) |
96 |
| Figura 2: Modelo de 48\ |
96 |
| ADVERTENCIA |
96 |
| Interior del horno eléctrico |
97 |
| 14. Luz interior del horno |
97 |
| 15. Elemento de asar |
97 |
| 16. Termostato del horno |
97 |
| 17. Guías para rejillas |
97 |
| 18. Rejillas deslizantes del horno (3 incluidas, no oculto) |
97 |
| 19. Elemento de hornear (oculto) |
97 |
| 20. Tapa del ventilador de convección |
97 |
| Figura 3: Interior del horno |
97 |
| Modelo e Identificación — Estufas de 36” |
97 |
| Clave para Modelo de 36\ |
97 |
| 1. Estante para ollas y sartenes de 22”, Consola baja de 9\ |
97 |
| 2. Rejillas y quemadores |
97 |
| 3. Perillas de control, Quemadores ExtraLow® (2) |
97 |
| 4. Perillas de control, quemadores estándar(4) |
97 |
| 5. Selector de temperatura del horno |
97 |
| 6. Selector de modo del horno |
97 |
| 7. Puerta del horno |
97 |
| 8. Ventana |
97 |
| 9. Panel para los pies |
97 |
| 10. Patas de la estufa (4) |
97 |
| Figura 4: Modelo de 36\ |
97 |
| ADVERTENCIA |
97 |
| Modelo e Identificación — Estufas de 30” |
98 |
| Clave para Modelo de 30\ |
98 |
| 1. Consola baja de 6\ |
98 |
| 2. Rejillas y quemadores |
98 |
| 3. Perillas de control, quemadores ExtraLow® (2) |
98 |
| 4. Parrilla central |
98 |
| 5. Perillas de control, quemadores estándar (2) |
98 |
| 6. Interruptor de modo del horno |
98 |
| 7. Selector de modo del horno |
98 |
| 8. Puerta del horno |
98 |
| 9. Ventana |
98 |
| 10. Panel para los pies |
98 |
| 11. Patas de estufa (4) |
98 |
| Figura 5: Modelo de 30\ |
98 |
| ADVERTENCIA |
98 |
| Interior del horno eléctrico |
98 |
| Usar la Parilla |
99 |
| Quemadores sellados tipo estrella |
99 |
| Figura 6: Base de quemador de bronce en forma de estrella |
99 |
| Perillas de control |
99 |
| Figura 7: Perilla de control estándar |
99 |
| Operación de los Quemadores |
100 |
| BTU para quemador ExtraLow® |
100 |
| Figura 8: Perilla de control ExtraLow® |
100 |
| Figura 9: Encendedor |
101 |
| PRECAUCIÓN |
101 |
| Figura 10: Componentes del quemador tipo de Star® |
101 |
| Colocación de las tapas de quemadores |
101 |
| ADVERTENCIA: |
101 |
| ADVERTENCIA: |
101 |
| Revisar la colocación de las tapas de quemadores |
101 |
| Figure 11 : Colocación correcta de las tapas de quemadores |
102 |
| Figure 12 : Colocación incorrecta de las tapas de quemadores |
102 |
| Reencendido Automático |
102 |
| Importante: |
102 |
| Falla de electricidad |
102 |
| ADVERTENCIA |
102 |
| Altura de la llama |
103 |
| Descripción de la llama |
103 |
| Figura 13: Color de la llama |
103 |
| ADVERTENCIA: |
103 |
| Recomendaciones para los utensilios de cocina |
103 |
| ADVERTENCIA: |
103 |
| Figura 14: Diámetro de la base |
103 |
| Figura 15: Olla balanceada |
103 |
| Figura 16: Olla de base plana |
104 |
| Figura 17: Olla tapada |
104 |
| Utensilios especiales para cocinar |
104 |
| Figura 18: Olla tipo wok con base plana |
104 |
| Figura 19: Wok con base redonda en un anillo de soporte |
104 |
| Enlatador estándar con baño de agua |
105 |
| Enlatador estándar con presión |
105 |
| Consejos para enlatar: |
105 |
| Recomendaciones para cocinar |
105 |
| Sugerencias para usar las recomendaciones |
105 |
| Recomendaciones para cocinar con los quemadores |
105 |
| Acerca de la plancha |
107 |
| Descripción |
107 |
| PRECAUCIÓN |
108 |
| Perilla de control |
108 |
| Figura 20: Perilla de control para la plancha |
108 |
| Preparar la plancha |
108 |
| Colector de grasa de la plancha |
108 |
| Figura 21: Colector de grasa de la plancha |
108 |
| Cocinar en la plancha |
108 |
| 1. Verifique que el colector de grasa está metido debajo del saliente de la bandeja de la plancha. |
108 |
| 2. Gire la perilla a la temperatura de cocinar para precalentar la plancha. |
108 |
| 3. Precaliente de 10 a 12 minutos. |
108 |
| 4. Añada mantequilla, margarina, aceite o manteca para el sabor. |
108 |
| 5. Añada el alimento y cuézalo. |
108 |
| AVISO: |
108 |
| Nota: |
108 |
| Recomendaciones para cocinar con la plancha |
109 |
| Usar el horno |
109 |
| Hornear |
109 |
| Consejos para hornear |
109 |
| Precalentar el horno |
109 |
| Obtener mejores resultados |
109 |
| Tipo de molde |
109 |
| Rejillas deslizantes del horno |
110 |
| Figure 22: Rejillas deslizantes del horno |
110 |
| Figure 23: Detalle de la instalación del rejillas |
110 |
| Posiciones de rejillas para hornear |
110 |
| Figura 24: Posiciones de rejillas del horno |
110 |
| Posiciones de rejillas |
111 |
| Hornear con una rejilla |
111 |
| Hornear con dos rejillas |
111 |
| Hornear con tres rejillas |
111 |
| Colocación de moldes |
111 |
| Horno Secundario (Modelos de 48\ |
111 |
| Convección |
111 |
| Cocinar con el modo de convección |
111 |
| Hornear de convección |
111 |
| Convertir el horneado convencional al horneado de convección |
112 |
| Consejos para el horneado de convección |
112 |
| Precalentar el horno |
112 |
| Ajuste de temperatura |
112 |
| Hornear a gran altitud |
112 |
| Condensación |
112 |
| Posiciones de rejillas |
112 |
| Horneando en un estante en el horno principal grande |
112 |
| Hornear con dos rejillas |
112 |
| Hornear con tres rejillas |
112 |
| Tipo de molde |
112 |
| Colocación |
112 |
| PRECAUCIÓN |
112 |
| Ajustar el horneado/horneado de convección/Horneado Extendido |
113 |
| Hornear / Horneado de Convección |
113 |
| Figure 25: Controles del horno para estufas de 36” |
113 |
| Para configurar el horno |
113 |
| 1. Seleccione el modo de hornear (BAKE) o el modo de horneado de convección (CONVECTION BAKE) usando la perilla del selector de modo. |
113 |
| 2. Fije la temperatura del horno usando la perilla del selector de temperatura. |
113 |
| Nota: |
113 |
| Horneado Extendido |
113 |
| 1. Seleccione el modo EXTENDED BAKE (Horneado Extendido) con la perilla del selector de modo. |
113 |
| 2. Fije la temperatura del horno usando la perilla del selector de temperatura. |
113 |
| Operación automática del ventilador de enfriamiento: |
114 |
| Figura 26: Controles del horno secundario para estufas de 48\ |
114 |
| Para configurar el horno secundario (Estufa de 48”) |
114 |
| 1. Seleccione el modo de hornear (BAKE) usando la perilla del selector de modo. |
114 |
| 2. Fije la temperatura del horno usando la perilla del selector de temperatura. |
114 |
| Nota: |
115 |
| Otros usos del horneado |
115 |
| Cocinar lentamente y usos del horno con temperaturas bajas |
115 |
| SEGURIDAD ALIMENTICIA |
115 |
| Temperaturas sugeridas para mantener calientes los alimentos |
115 |
| Calentar (Horno secundario) |
116 |
| Horno secundario (solo en los modelos de 48\ |
116 |
| Para establecer el horno secundario a caliente |
116 |
| 1. Para precalentar el horno gire la perilla del selector de modo a Calentar (WARM) aproximadamente 10 minutos antes de usarlo. No gire la perilla del selector de temperatura a ninguna posición (déjelo en la posición OFF (Apagado)). |
116 |
| 2. Coloque los alimentos calientes en el horno secundario y cierre la puerta. La temperatura ideal para mantener los alimentos calientes será mantenida hasta que el Interruptor de Selección sea apagado. |
116 |
| 3. No abra la puerta del horno innecesariamente. El abrir la puerta reducirá la temperatura del horno. |
116 |
| PRECAUCIÓN |
116 |
| Asunto de Seguridad de Alimentos Posible Envenenamiento por Alimentos |
116 |
| Figura 27: Controles del horno secundario para estufas de 48” |
116 |
| Prueba (Horno Secundario) |
116 |
| Horno Secundario (Sólo en Modelos de 48\ |
116 |
| Para establecer el horno secundario para prueba |
116 |
| 1. Coloque masa sobre un plato en el horno pequeño. Cierre la puerta. |
116 |
| 2. Seleccione Fermentar (PROOF) usando la perilla del selector de modo. No gire la perilla del selector de temperatura a ninguna posición (déjelo en la posición OFF (Apagado)). |
116 |
| 3. Establezca un tiempo de un minuto como tiempo mínimo de prueba. |
116 |
| Recomendaciones para hornear |
117 |
| Asar/Asar por convección |
117 |
| Consejos para asar |
117 |
| Precalentar el asador |
117 |
| Obtener los mejores resultados |
117 |
| Posiciones de rejillas |
117 |
| Utensilios |
118 |
| Asar con un termómetro regular para carne |
118 |
| Horno secundario (48\ |
118 |
| Nota: |
118 |
| Ajustar el Asado o el Asado de convección |
118 |
| Asar — Horno eléctrico |
118 |
| NOTA: |
118 |
| Para cambiar el horno al modo de asar o asar por convección |
118 |
| 1. Coloque la rejilla del horno en la posición deseada. |
118 |
| 2. Cambiar la perilla del selector de temperatura a Asar (BROIL) o Asado de Convección (CONVECTION BROIL). |
118 |
| 3. Cambiar el selector de temperatura a Asar (BROIL). |
118 |
| 4. Espere hasta que se apague la luz de PRECALENTAR, después de aproximadamente tres (3) minutos. |
118 |
| 5. Ponga los alimentos en el horno en la posición de rejilla deseada como se indica en la página 29. |
118 |
| 6. La puerta del horno debe estar cerrada durante el ciclo de asar. |
118 |
| Operación automática del ventilador de enfriamiento: |
118 |
| Nota: |
118 |
| Recomendaciones para asar y tostar |
119 |
| Cuidado y Mantenimiento |
120 |
| Autolimpiar el horno |
120 |
| ADVERTENCIA |
120 |
| Horno eléctrico |
120 |
| Antes de autolimpiar el horno |
120 |
| Importante: |
120 |
| Bloquear |
120 |
| Para ajustar la autolimpieza |
121 |
| 1. Seleccione Limpieza Rápida (SPEED CLEAN) usando la perilla del selector de modo. |
121 |
| 2. Cambie la perilla del selector de temperatura a Limpiar (CLEAN). |
121 |
| Figura 28: Controles del horno para estufas de 36\ |
121 |
| Al final del ciclo de limpieza |
121 |
| 1. Seleccione OFF (Apagado) usando la perilla del selector de modo. |
121 |
| 2. Cambie la perilla de control del horno a la posición OFF (Apagar). |
121 |
| Consejos para la limpieza |
121 |
| 1. El acabado de esmalte de porcelana es resistente a ácidos, pero no está a prueba de ácidos. Derrames de alimentos acídicos, tal como jugos cítricos, jitomates, ruibarbo, vinagre, alcohol o leche deben ser eliminados de inmediato y no se debe ... |
121 |
| 2. Saque las rejillas del horno. Vea rejillas, en las recomendaciones de limpieza de la estufa, en la página 38. |
121 |
| 3. No es necesario limpiar los elementos de calentamiento en el horno; los elementos se limpian solos cuando se usa el horno. Ambos elementos están permanentemente conectados. No es necesario limpiar el escudo del asador arriba del elemento de asar. |
121 |
| PRECAUCIÓN |
121 |
| Limpieza de la estufa |
122 |
| Cuando limpia esta estufa: |
122 |
| 1. Use la limpieza más suave que limpia de manera eficiente y eficaz. Algunos detergentes del mismo tipo son más abrasivos que otros. Úselo primero en un área pequeña. |
122 |
| 2. Siempre frote los acabados metálicos en la dirección de las líneas de pulido para mayor efectividad y evite dañar la superficie. |
122 |
| 3. Use solamente trapos limpios suaves, esponjas, toallas de papel, cepillos fibrosos, esponjillas de plástico, no metálicas o de fibra metálica para limpiar y frotar, como se recomienda en la tabla. |
122 |
| 4. Se puede limpiar cualquier parte de este aparato con agua jabonosa caliente. Cuando se necesite enjuagar, hágalo a conciencia. |
122 |
| 5. Siempre seque de inmediato para evitar las marcas de agua. |
122 |
| PRECAUCIÓN |
122 |
| Nombres de marcas |
122 |
| Recomendaciones de limpieza |
122 |
| Nota: |
126 |
| Mantenimiento hecho por usted mismo |
127 |
| Reemplazar un foco de luz en el horno |
127 |
| Para reemplazar el foco de luz: |
127 |
| 1. Asegúrese que el interruptor de la luz del horno esté en la posición OFF (Apagado). |
127 |
| 2. Quitar la cubierta de la luz – Con un destornillador plano en una mano, use el destornillador como una cuña pequeña para aflojar la cubierta de vidrio poco a poco de la caja de metal y sostenga el vidrio con la otra mano a medida que salga de ... |
127 |
| 3. Quite el foco quemado. Reemplácelo solamente con un foco recomendado para uso en hornos. No toque el foco con los dedos. Siga las instrucciones del fabricante del foco. |
127 |
| 4. Reemplace la cubierta de vidrio alineándola con la caja y empujando sobre ambos extremos del vidrio con la misma fuerza, hasta que la cubierta entre con presión en su posición. Trate de no aplicar fuerza excesiva sobre el vidrio. |
127 |
| PRECAUCIÓN |
127 |
| Falla de electricidad |
127 |
| Chispas intermitentes o constantes del encendedor |
127 |
| Antes de solicitar servicio |
128 |
| Asegúrese de verificar primero estos puntos: |
128 |
| Cuando no se prenden los quemadores: |
128 |
| Placa con información del aparato |
128 |
| Figura 29: Ubicaciones de la placa de información y del diagrama de cableado (no se muestra la puerta del horno) |
128 |
| PRECAUCIÓN |
128 |
| Información de servicio |
129 |
| DECLARACIÓN DE GARANTÍA LIMITADA DEL PRODUCTO |
129 |
| Cobertura de esta garantía y a quiénes se aplica |
129 |
| Duración de la garantía |
129 |
| Reparación/reemplazo como único recurso |
129 |
| Producto fuera de garantía |
130 |
 1
1 4
4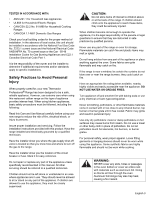 5
5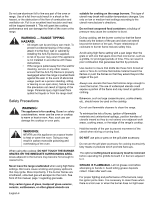 6
6 7
7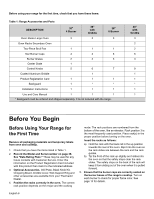 8
8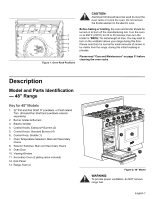 9
9 10
10 11
11 12
12 13
13 14
14

