Thermador PRD486JDGU Use and Care Manual - Page 14
Caution, Important
 |
View all Thermador PRD486JDGU manuals
Add to My Manuals
Save this manual to your list of manuals |
Page 14 highlights
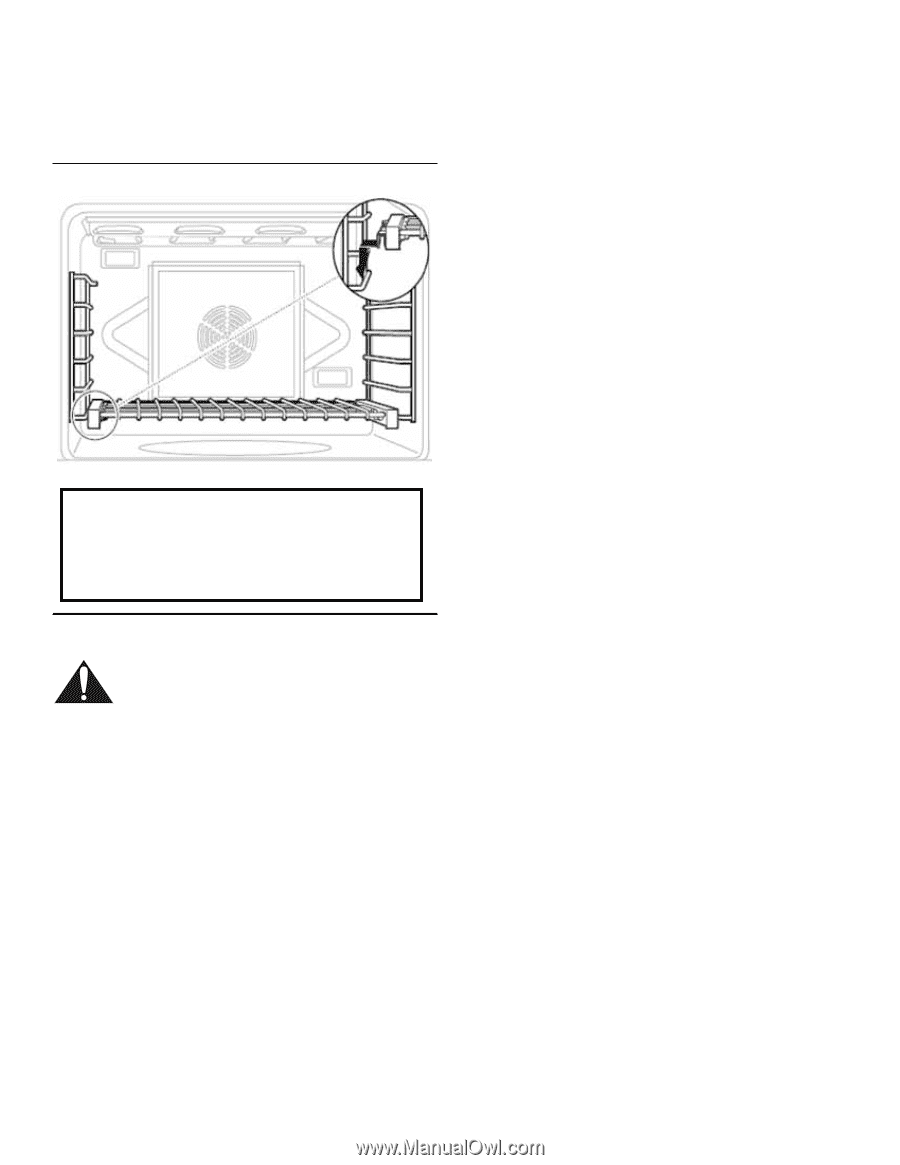
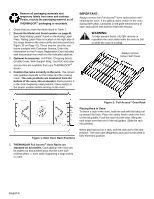
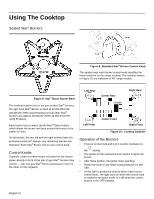
Removing Rack from Oven: To remove or reposition a rack in the oven, pull the rack toward the front of the oven. Lift up the front of the rack over the safety stops and pull the rack from the oven. IMPORTANT: When placing the gliding rack in the oven, make sure the front supports on the rack guides rest in the large slots at the front corners of the rack, as shown. This is necessary to keep the rack in the correct position while fully inserted into the oven. Figure 3: Side View of Rack on the Rack Guide CAUTION: Aluminum foil should never be used to cover the oven racks or to line the oven. Do not remove the broiler element in the electric oven. Note: It is normal for the cooling process to push heated air out into the room when the oven is on. The THERMADOR PROFESSIONAL® range occasionally has a smell or smoke when first used. These smells or smoke comes from the burning off of manufacturing residues and is typical of any new oven regardless of manufacturer. Before baking or broiling, the oven and broiler should be turned on to burn off the manufacturing oils using one of the two following methods: - Turn on kitchen ventilation (or if vent hood is a recirculation type open a window). Set oven at 500ºF/ 260ºC and let the oven go through a 2 hour cycle at high heat then shut off the oven. Please read "Care and Maintenance" on page 34 before cleaning the oven racks. - Turn on kitchen ventilation (or if vent hood is a recirculation type open a window). Remove oven racks. Set oven into self clean cycle and let self clean run (see "Self-Cleaning the Oven(s)" on page 34). Please note that pet birds can be sensitive to the odors created during any high heat cooking whether it is a manufacturing residue burn off or food so it is recommended that birds be removed from the kitchen area. 6. Ensure that the burner caps are correctly seated on the burner bases of the range's cooktop (see Figure 14 and Figure 15 on Page 15). Turn on each burner to check for proper flame color. See "Flame Description" on page 16 for details. English 9
-
 1
1 -
2
-
3
-
4
-
5
-
6
-
7
-
8
-
 9
9 -
 10
10 -
 11
11 -
 12
12 -
 13
13 -
 14
14 -
 15
15 -
 16
16 -
 17
17 -
 18
18 -
 19
19 -
20
-
21
-
22
-
23
-
24
-
25
-
26
-
27
-
28
-
29
-
30
-
31
-
32
-
33
-
34
-
35
-
36
-
37
-
38
-
39
-
40
-
41
-
42
-
43
-
44
-
45
-
46
-
47
-
48
-
49
-
50
-
51
-
52
-
53
-
54
-
55
-
56
-
57
-
58
-
59
-
60
-
61
-
62
-
63
-
64
-
65
-
66
-
67
-
68
-
69
-
70
-
71
-
72
-
73
-
74
-
75
-
76
-
77
-
78
-
79
-
80
-
81
-
82
-
83
-
84
-
85
-
86
-
87
-
88
-
89
-
90
-
91
-
92
-
93
-
94
-
95
-
96
-
97
-
98
-
99
-
100
-
101
-
102
-
103
-
104
-
105
-
106
-
107
-
108
-
109
-
110
-
111
-
112
-
113
-
114
-
115
-
116
-
117
-
118
-
119
-
120
-
121
-
122
-
123
-
124
-
125
-
126
-
127
-
128
-
129
-
130
-
131
-
132
-
133
-
134
-
135
-
136
-
137
-
138
 |
 |