Thermador PRD486JDGU Use and Care Manual - Page 40
To Set Self-Clean Ovens, At the End of the Clean Cycle, Cleaning Tips, Range Cleaning, Brand Names
 |
View all Thermador PRD486JDGU manuals
Add to My Manuals
Save this manual to your list of manuals |
Page 40 highlights
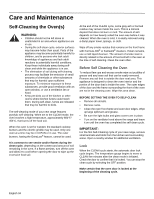
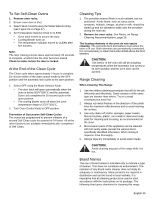
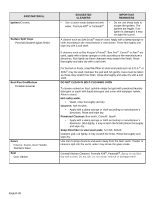
To Set Self-Clean Ovens 1. Remove oven racks. 2. Ensure oven door is shut. 3. Select SELF CLEAN using the Mode Selector Ring (see Figure 31 on Page 27). 4. Set Temperature Selector Knob to CLEAN. • Oven latch moves to secure the door. • Cooling Blower turns on. • The temperature indicator moves to CLEAN after five minutes. Note: The door closing process takes approximately 20 seconds to complete, at which time the door becomes locked. Check to make certain the door is locked. At the End of the Clean Cycle The Clean cycle takes approximately 2 hours to complete. Do not turn either of the oven control knobs to the OFF position until the automatic lock cycles to the open position. 1. Select OFF using the Mode Selector Knob. • The door latch will open automatically when the oven is below 500°F/200°C and the automatic Door Lock completes its 20 second cycle to the open position. • The cooling blower turns off when the oven temperature drops to 375°F/191°C. 2. Turn Oven Control Knob to OFF position. Prevention of Successive Self-Clean Cycles The ovens are programmed to prevent initiation of a second Self Clean cycle for a period of 24 hours. All of the other functions are available immediately after completion of Self Clean. Cleaning Tips 1. The porcelain enamel finish is acid resistant, but not acid proof. Acidic foods, such as citrus juices, tomatoes, rhubarb, vinegar, alcohol or milk, should be wiped up and not allowed to bake onto the porcelain during the next use. 2. Remove the oven racks. See Racks, on Range Cleaning Recommendations, page 36. The heating elements in the oven do not require cleaning. The elements burn themselves clean when the oven is in use. Both elements are permanently connected. It is not necessary to clean the broiler shield above the broil element. CAUTION: The interior of the oven will still be at baking temperatures when the automatic lock cycles to its open position and the oven door can be opened. Range Cleaning When Cleaning This Range: 1. Use the mildest cleaning procedure that will do the job efficiently and effectively. Some cleaners of the same type are harsher than others. Try on a small inconspicuous area first. 2. Always rub metal finishes in the direction of the polish lines for maximum effectiveness and to avoid marring the surface. 3. Use only clean soft cloths, sponges, paper towels, fibrous brushes, plastic, non-metal or steel wool soap pads for cleaning and scouring, as recommended on the chart. 4. Most exterior parts of this appliance can be cleaned with hot sudsy water (except the various items specifically identified otherwise). When rinsing is required, rinse thoroughly. 5. Always wipe dry immediately to avoid water marks. CAUTION: Avoid cleaning any part of the range while it is hot. Brand Names The use of brand names is intended only to indicate a type of cleaner. This does not constitute an endorsement. The omission of any brand name cleaner does not imply its adequacy or inadequacy. Many products are regional in distribution and can be found in local markets. It is imperative that all cleaning products be used in strict accordance with the instructions on its package. The following chart gives directions for cleaning this range. English 35
-
 1
1 -
2
-
3
-
4
-
5
-
6
-
7
-
8
-
9
-
10
-
11
-
12
-
13
-
14
-
15
-
16
-
17
-
18
-
19
-
20
-
21
-
22
-
23
-
24
-
25
-
26
-
27
-
28
-
29
-
30
-
31
-
32
-
33
-
34
-
 35
35 -
 36
36 -
 37
37 -
 38
38 -
 39
39 -
 40
40 -
 41
41 -
 42
42 -
 43
43 -
 44
44 -
 45
45 -
46
-
47
-
48
-
49
-
50
-
51
-
52
-
53
-
54
-
55
-
56
-
57
-
58
-
59
-
60
-
61
-
62
-
63
-
64
-
65
-
66
-
67
-
68
-
69
-
70
-
71
-
72
-
73
-
74
-
75
-
76
-
77
-
78
-
79
-
80
-
81
-
82
-
83
-
84
-
85
-
86
-
87
-
88
-
89
-
90
-
91
-
92
-
93
-
94
-
95
-
96
-
97
-
98
-
99
-
100
-
101
-
102
-
103
-
104
-
105
-
106
-
107
-
108
-
109
-
110
-
111
-
112
-
113
-
114
-
115
-
116
-
117
-
118
-
119
-
120
-
121
-
122
-
123
-
124
-
125
-
126
-
127
-
128
-
129
-
130
-
131
-
132
-
133
-
134
-
135
-
136
-
137
-
138
 |
 |