Thermador PRG304GH Installation Instructions - Page 2
Table of Contents - installation
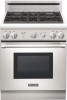 |
View all Thermador PRG304GH manuals
Add to My Manuals
Save this manual to your list of manuals |
Page 2 highlights
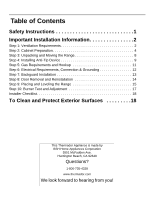
Table of Contents Safety Instructions 1 Important Installation Information 2 Step 1: Ventilation Requirements 2 Step 2: Cabinet Preparation 4 Step 3: Unpacking and Moving the Range 8 Step 4: Installing Anti-Tip Device 9 Step 5: Gas Requirements and Hookup 11 Step 6: Electrical Requirements, Connection & Grounding 12 Step 7: Backguard Installation 13 Step 8: Door Removal and Reinstallation 14 Step 9: Placing and Leveling the Range 15 Step 10: Burner Test and Adjustment 17 Installer Checklist 18 To Clean and Protect Exterior Surfaces 18 This Thermador Appliance is made by BSH Home Appliances Corporation 5551 McFadden Ave. Huntington Beach, CA 92649 Questions? 1-800-735-4328 www.thermador.com We look forward to hearing from you!
-
 1
1 -
 2
2 -
 3
3 -
 4
4 -
 5
5 -
 6
6 -
 7
7 -
 8
8 -
9
-
10
-
11
-
12
-
13
-
14
-
15
-
16
-
17
-
18
-
19
-
20
-
21
-
22
-
23
-
24
-
25
-
26
-
27
-
28
-
29
-
30
-
31
-
32
-
33
-
34
-
35
-
36
-
37
-
38
-
39
-
40
-
41
-
42
-
43
-
44
-
45
-
46
-
47
-
48
-
49
-
50
-
51
-
52
-
53
-
54
-
55
-
56
-
57
-
58
-
59
-
60
-
61
-
62
-
63
-
64
 |
 |

Table of Contents
This Thermador Appliance is made by
BSH Home Appliances Corporation
5551 McFadden Ave.
Huntington Beach, CA 92649
Questions?
1-800-735-4328
www.thermador.com
We look forward to hearing from you!
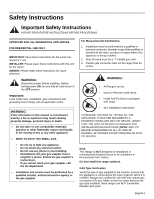
Safety Instructions . . . . . . . . . . . . . . . . . . . . . . . . . . . .1
Important Installation Information. . . . . . . . . . . . . . . .2
Step 1: Ventilation Requirements. . . . . . . . . . . . . . . . . . . . . . . . . . . . . . . . . . . . . 2
Step 2: Cabinet Preparation. . . . . . . . . . . . . . . . . . . . . . . . . . . . . . . . . . . . . . . . . 4
Step 3: Unpacking and Moving the Range. . . . . . . . . . . . . . . . . . . . . . . . . . . . . . 8
Step 4: Installing Anti-Tip Device . . . . . . . . . . . . . . . . . . . . . . . . . . . . . . . . . . . . . 9
Step 5: Gas Requirements and Hookup . . . . . . . . . . . . . . . . . . . . . . . . . . . . . . 11
Step 6: Electrical Requirements, Connection & Grounding . . . . . . . . . . . . . . . . 12
Step 7: Backguard Installation . . . . . . . . . . . . . . . . . . . . . . . . . . . . . . . . . . . . . . 13
Step 8: Door Removal and Reinstallation . . . . . . . . . . . . . . . . . . . . . . . . . . . . . 14
Step 9: Placing and Leveling the Range . . . . . . . . . . . . . . . . . . . . . . . . . . . . . . 15
Step 10: Burner Test and Adjustment . . . . . . . . . . . . . . . . . . . . . . . . . . . . . . . . 17
Installer Checklist . . . . . . . . . . . . . . . . . . . . . . . . . . . . . . . . . . . . . . . . . . . . . . . . 18
To Clean and Protect Exterior Surfaces
. . . . . . . . .18