Toshiba 100CT User Manual - Page 102
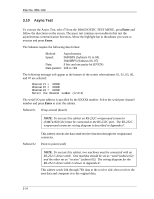
Detail status display, HARD DISK TEST, SUB-TEST : XX, PASS COUNT: X, ERROR COUNT: X, WRITE DATA: XX
 |
View all Toshiba 100CT manuals
Add to My Manuals
Save this manual to your list of manuals |
Page 102 highlights
File No. 960-140 4. This message is used to select whether or not the HDD status is displayed on the screen. The HDD status is described in section 3.19. Selectyes or no: Detail status display yes no 5. This message is used to select whether or not the HDD status is displayed on the screen. The HDD status is described in section 3.19. Select1 or 2 and press Enter. 6. The Hard Disk Test message will appear after you respond to the Detail Status prompt. Select the number of the subtest you want to execute and press Enter. The following message will appear during each subtest. HARD DISK TEST XXXXXXX SUB- TEST : XX PASS COUNT: XXXXX ERROR COUNT: XXXXX WRITE DATA: XX READ DATA : XX ADDRESS : XXXXXX STATUS : XXX The first three digits of the ADDRESS indicate which cylinder is being tested, the fourth digit indicates the head and the last two digits indicate the sector. The first digit of the STATUS number indicates the drive being tested and the last two digits indicate the error status code as explained in Table 3-2. Subtest 01 Sequential read This subtest is a sequential reading of all the tracks on the HDD starting at track 0. When all the tracks on the HDD have been read, the test starts at the maximum track and reads the tracks on the HDD sequentially back to track 0. Subtest 02 Address uniqueness This subtest writes unique address data to each sector of the HDD track-bytrack. The data written to each sector is then read and compared with the original data. There are three ways the HDD can be read: • Forward sequential • Reverse sequential • Random Subtest 03 Random address/data This subtest writes random data to random addresses on the HDD cylinder, head and sector. This data is then read and compared to the original data. 3-27
-
 1
1 -
2
-
3
-
4
-
5
-
6
-
7
-
8
-
9
-
10
-
11
-
12
-
13
-
14
-
15
-
16
-
17
-
18
-
19
-
20
-
21
-
22
-
23
-
24
-
25
-
26
-
27
-
28
-
29
-
30
-
31
-
32
-
33
-
34
-
35
-
36
-
37
-
38
-
39
-
40
-
41
-
42
-
43
-
44
-
45
-
46
-
47
-
48
-
49
-
50
-
51
-
52
-
53
-
54
-
55
-
56
-
57
-
58
-
59
-
60
-
61
-
62
-
63
-
64
-
65
-
66
-
67
-
68
-
69
-
70
-
71
-
72
-
73
-
74
-
75
-
76
-
77
-
78
-
79
-
80
-
81
-
82
-
83
-
84
-
85
-
86
-
87
-
88
-
89
-
90
-
91
-
92
-
93
-
94
-
95
-
96
-
 97
97 -
 98
98 -
 99
99 -
 100
100 -
 101
101 -
 102
102 -
 103
103 -
 104
104 -
 105
105 -
 106
106 -
 107
107 -
108
-
109
-
110
-
111
-
112
-
113
-
114
-
115
-
116
-
117
-
118
-
119
-
120
-
121
-
122
-
123
-
124
-
125
-
126
-
127
-
128
-
129
-
130
-
131
-
132
-
133
-
134
-
135
-
136
-
137
-
138
-
139
-
140
-
141
-
142
-
143
-
144
-
145
-
146
-
147
-
148
-
149
-
150
-
151
-
152
-
153
-
154
-
155
-
156
-
157
-
158
-
159
-
160
-
161
-
162
-
163
-
164
-
165
-
166
-
167
-
168
-
169
-
170
-
171
-
172
-
173
-
174
-
175
-
176
-
177
-
178
-
179
-
180
-
181
-
182
-
183
-
184
-
185
-
186
-
187
-
188
-
189
-
190
-
191
-
192
-
193
-
194
-
195
-
196
-
197
-
198
-
199
-
200
-
201
-
202
-
203
-
204
-
205
-
206
-
207
-
208
-
209
-
210
-
211
-
212
-
213
-
214
-
215
-
216
-
217
-
218
-
219
-
220
-
221
-
222
-
223
-
224
-
225
-
226
-
227
-
228
-
229
-
230
-
231
-
232
-
233
-
234
-
235
-
236
 |
 |