Toshiba 55SL417U User Manual - Page 41
Adjusting the amplifier’s audio, Other HDMI® CEC Control functions - no sound
 |
View all Toshiba 55SL417U manuals
Add to My Manuals
Save this manual to your list of manuals |
Page 41 highlights
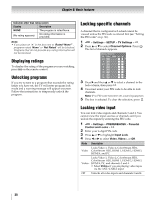
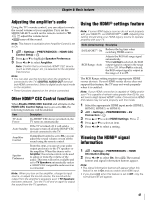
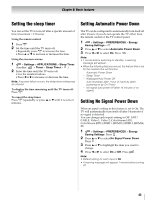
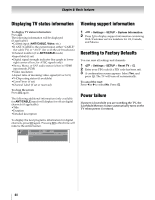
Chapter 6: Basic features Adjusting the amplifier's audio Using the TV's remote control, you can adjust or mute the sound volume of your amplifier. First, set the MODE SELECT switch on the remote control to TV. • VOL VOL adjust the volume level. • turns off the sound. Note: This feature is available when Amplifier Control is set to On. 1 > Settings > PREFERENCES > HDMI-CEC Control Setup > . OK 2 Press B or b to highlight Speaker Preference. 3 Press C or c to select Amplifier. Note: Confirm that a connected HDMI® CEC device (such as DVD player, etc.) is selected for the Amplifier input source. Note: • You can also use this function when the amplifier is connected to the TV's DIGITAL AUDIO OUT terminal (not HDMI connection). Select a digital audio input mode on the amplifier. • These functions depend on the device connected. Other HDMI® CEC Control functions When Enable HDMI-CEC Control and all items in the HDMI-CEC Control Setup menu are set to On, the following functions will be enabled. Item Description TV Auto Power If a HDMI® CEC device is turned on, the TV turns on automatically. If the TV is turned off, it will send a Auto Standby message to turn off all of the HDMI® CEC devices connected to the TV. Amplifier Control If Amplifier Control is set to On, you can adjust the sound volume or turn off the sound using the remote control. Speaker Preference From this item, you can set your audio output preference to the TV speakers or the amplifier. When this item is set to Amplifier, the remote control can be used to adjust or mute the volume of the audio. This item will not be available and set to TV Speakers automatically unless a HDMI® CEC compatible audio receiver is connected. Note: When you turn on the amplifier, change its input source, or adjust the sound volume, the sound will be output from the amplifier's speakers even if TV Speakers has been selected. Turn the TV off and on again to output the sound from the TV speakers. Using the HDMI® settings feature Note: If some HDMI legacy sources do not work properly with your HDMI TV, set INSTAPORT™ to Off. Adjusting this setting should allow your HDMI legacy source to operate properly with your TV. Mode (default setting) Description INSTAPORT™: On Reduces the lag time when switching HDMI sources. RGB Range: Auto Adjusts the RGB full range signal automatically. When Limited is selected, the RGB output signal is output in the range of 16 to 235. When Full is selected, the RGB output signal is output in the range of 0 to 255. The RGB Range setting requires appropriate HDMI source devices. If your HDMI source device does not support this feature, the TV may not work properly when it is enabled. Note: If your HDMI connection is capable of 1080p and/or your TV is capable of refresh rates greater than 60 Hz, you will need a High Speed HDMI® cable. Conventional HDMI/ DVI cables may not work properly with this mode. 1 Select the appropriate HDMI input mode (HDMI 1, HDMI 2, HDMI 3, or HDMI 4). 2 > Settings > PREFERENCES > AV Connection > . OK 3 Press B or b to select HDMI Settings. Press . OK 4 Press B or b to select an item. 5 Press C or c to select a setting. Viewing the HDMI® signal information 1 > Settings > PREFERENCES > HDMI Information Display. 2 Press C or c to select On. Press Q. The normal banner and signal information banner appear. Note: • The signal information banner will appear when this feature is set to On and you watch and HDMI input. • If you press Q when this feature is set to Off, only the normal banner will appear. 41
-
 1
1 -
2
-
3
-
4
-
5
-
6
-
7
-
8
-
9
-
10
-
11
-
12
-
13
-
14
-
15
-
16
-
17
-
18
-
19
-
20
-
21
-
22
-
23
-
24
-
25
-
26
-
27
-
28
-
29
-
30
-
31
-
32
-
33
-
34
-
35
-
 36
36 -
 37
37 -
 38
38 -
 39
39 -
 40
40 -
 41
41 -
 42
42 -
 43
43 -
 44
44 -
 45
45 -
 46
46 -
47
-
48
-
49
-
50
-
51
-
52
-
53
-
54
-
55
-
56
-
57
-
58
-
59
-
60
-
61
-
62
-
63
-
64
-
65
-
66
-
67
-
68
-
69
-
70
-
71
-
72
-
73
-
74
-
75
-
76
-
77
-
78
-
79
-
80
-
81
-
82
-
83
-
84
-
85
-
86
-
87
-
88
-
89
-
90
-
91
-
92
-
93
 |
 |