Toshiba PH3100U-1EXB User's Guide for Desktop External Hard Drives - Page 13
Connecting the drive via eSATA, In My Computer or Computer, right-click the Virtual CD - windows 7
 |
UPC - 883974254644
View all Toshiba PH3100U-1EXB manuals
Add to My Manuals
Save this manual to your list of manuals |
Page 13 highlights
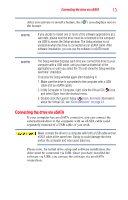
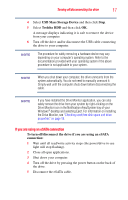
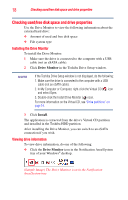
Connecting the drive via eSATA 13 After you activate or install a feature, the ( ) icon displays next to the feature. NOTE If you decide to install one or more of the software applications at a later date, please note the drive must be connected to the computer via USB to access the Setup window. The Setup window is not accessible when the drive is connected via an eSATA cable. After software installation, you can use the software in eSATA mode. NOTE The Setup window displays each time you connect the drive to your computer with a USB cable, until you have activated all of the applications or until you select the "Do not show the Setup window next time" checkbox. To access the Setup window again after disabling it: 1. Make sure the drive is connected to the computer with a USB cable (not an eSATA cable). 2. In My Computer or Computer, right-click the Virtual CD ( ) icon, and select Open from the shortcut menu. 3. Double-click the Launch Setup ( ) icon. For more information about the Virtual CD, see "Drive partitions" on page 14. Connecting the drive via eSATA If your computer has an eSATA connector, you can connect the external hard drive to the computer with an eSATA cable (sold separately) instead of a USB cable, if you wish. Never connect the drive to a computer with both a USB cable and an eSATA cable at the same time. Doing so could damage the drive and/or the computer and may cause data loss. Please note, for initial drive setup and software installation, the drive must be connected via USB. Once you have installed the software via USB, you can use the software via an eSATA connection.
-
 1
1 -
2
-
3
-
4
-
5
-
6
-
7
-
 8
8 -
 9
9 -
 10
10 -
 11
11 -
 12
12 -
 13
13 -
 14
14 -
 15
15 -
 16
16 -
 17
17 -
 18
18 -
19
-
20
-
21
-
22
-
23
-
24
-
25
-
26
-
27
-
28
-
29
-
30
-
31
-
32
-
33
-
34
-
35
-
36
-
37
-
38
-
39
-
40
-
41
-
42
-
43
-
44
-
45
-
46
-
47
-
48
-
49
-
50
-
51
-
52
-
53
-
54
-
55
-
56
-
57
-
58
-
59
-
60
-
61
-
62
-
63
-
64
-
65
-
66
-
67
-
68
 |
 |
