Toshiba Tecra M8-S8011 User Guide - Page 201
General tips for installing hardware and software, Finish
 |
View all Toshiba Tecra M8-S8011 manuals
Add to My Manuals
Save this manual to your list of manuals |
Page 201 highlights
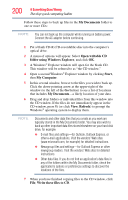
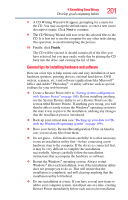
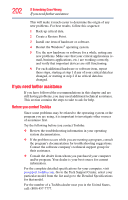
If Something Goes Wrong Develop good computing habits 201 8 A CD Writing Wizard will appear, prompting for a name for the CD. You may accept the default name, or enter a new (more descriptive) name. Click Next to continue. 9 The CD Writing Wizard will now write the selected files to the CD. It is best not to use the computer for any other tasks during this operation, to avoid interrupting the process. 10 Finally, click Finish. The CD will be ejected. It should contain all of the files you have selected, but you may easily verify this by placing the CD back into the drive, and viewing the list of files. General tips for installing hardware and software Here are a few tips to help ensure safe and easy installation of new hardware (printers, pointing devices, external hard drives, DVD writers, scanners, etc.) and software (applications like Microsoft® Office and Adobe® Photoshop®, or utility software such as special toolbars for your web browser). ❖ Create a Restore Point (refer to "Saving system configuration with Restore Points" on page 198). Before installing anything, use the System Restore utility to set a Restore Point (see the section titled Restore Points). If anything goes wrong, you will then be able to easily restore the Windows® operating system to the state it was in prior to the installation, undoing any changes that the installation process introduced. ❖ Back up your critical data (see "Backing up your data to CDs with the Windows® operating system" on page 199). ❖ Have your factory Restore/Reconfiguration CD(s) on hand in case you need any files from them. ❖ Do not guess-follow directions carefully! It is often necessary to run an installation utility first-before connecting a new hardware item to the computer. If the device is connected first, it may be very difficult to complete the installation successfully. Always carefully follow the installation instructions that accompany the hardware or software. ❖ Restart the Windows® operating system. Always restart Windows® after each installation, even if the installation utility does not prompt you to do so. This will ensure that the installation is completed, and will clean up anything that the installation utility left behind. ❖ Do one installation at a time. If you have several new items to add to your computer system, install just one at a time, creating Restore Points immediately before each successive installation.
-
 1
1 -
2
-
3
-
4
-
5
-
6
-
7
-
8
-
9
-
10
-
11
-
12
-
13
-
14
-
15
-
16
-
17
-
18
-
19
-
20
-
21
-
22
-
23
-
24
-
25
-
26
-
27
-
28
-
29
-
30
-
31
-
32
-
33
-
34
-
35
-
36
-
37
-
38
-
39
-
40
-
41
-
42
-
43
-
44
-
45
-
46
-
47
-
48
-
49
-
50
-
51
-
52
-
53
-
54
-
55
-
56
-
57
-
58
-
59
-
60
-
61
-
62
-
63
-
64
-
65
-
66
-
67
-
68
-
69
-
70
-
71
-
72
-
73
-
74
-
75
-
76
-
77
-
78
-
79
-
80
-
81
-
82
-
83
-
84
-
85
-
86
-
87
-
88
-
89
-
90
-
91
-
92
-
93
-
94
-
95
-
96
-
97
-
98
-
99
-
100
-
101
-
102
-
103
-
104
-
105
-
106
-
107
-
108
-
109
-
110
-
111
-
112
-
113
-
114
-
115
-
116
-
117
-
118
-
119
-
120
-
121
-
122
-
123
-
124
-
125
-
126
-
127
-
128
-
129
-
130
-
131
-
132
-
133
-
134
-
135
-
136
-
137
-
138
-
139
-
140
-
141
-
142
-
143
-
144
-
145
-
146
-
147
-
148
-
149
-
150
-
151
-
152
-
153
-
154
-
155
-
156
-
157
-
158
-
159
-
160
-
161
-
162
-
163
-
164
-
165
-
166
-
167
-
168
-
169
-
170
-
171
-
172
-
173
-
174
-
175
-
176
-
177
-
178
-
179
-
180
-
181
-
182
-
183
-
184
-
185
-
186
-
187
-
188
-
189
-
190
-
191
-
192
-
193
-
194
-
195
-
 196
196 -
 197
197 -
 198
198 -
 199
199 -
 200
200 -
 201
201 -
 202
202 -
 203
203 -
 204
204 -
 205
205 -
 206
206 -
207
-
208
-
209
-
210
-
211
-
212
-
213
-
214
-
215
-
216
-
217
-
218
-
219
-
220
-
221
-
222
-
223
-
224
-
225
-
226
-
227
-
228
-
229
-
230
-
231
-
232
-
233
-
234
-
235
-
236
-
237
-
238
-
239
-
240
-
241
-
242
-
243
-
244
-
245
-
246
-
247
-
248
-
249
-
250
-
251
-
252
-
253
-
254
 |
 |