Turtle Beach Ear Force PX21 User's Guide - Page 10
Windows Vista, & Windows 7 Setup Procedure - instructions
 |
View all Turtle Beach Ear Force PX21 manuals
Add to My Manuals
Save this manual to your list of manuals |
Page 10 highlights
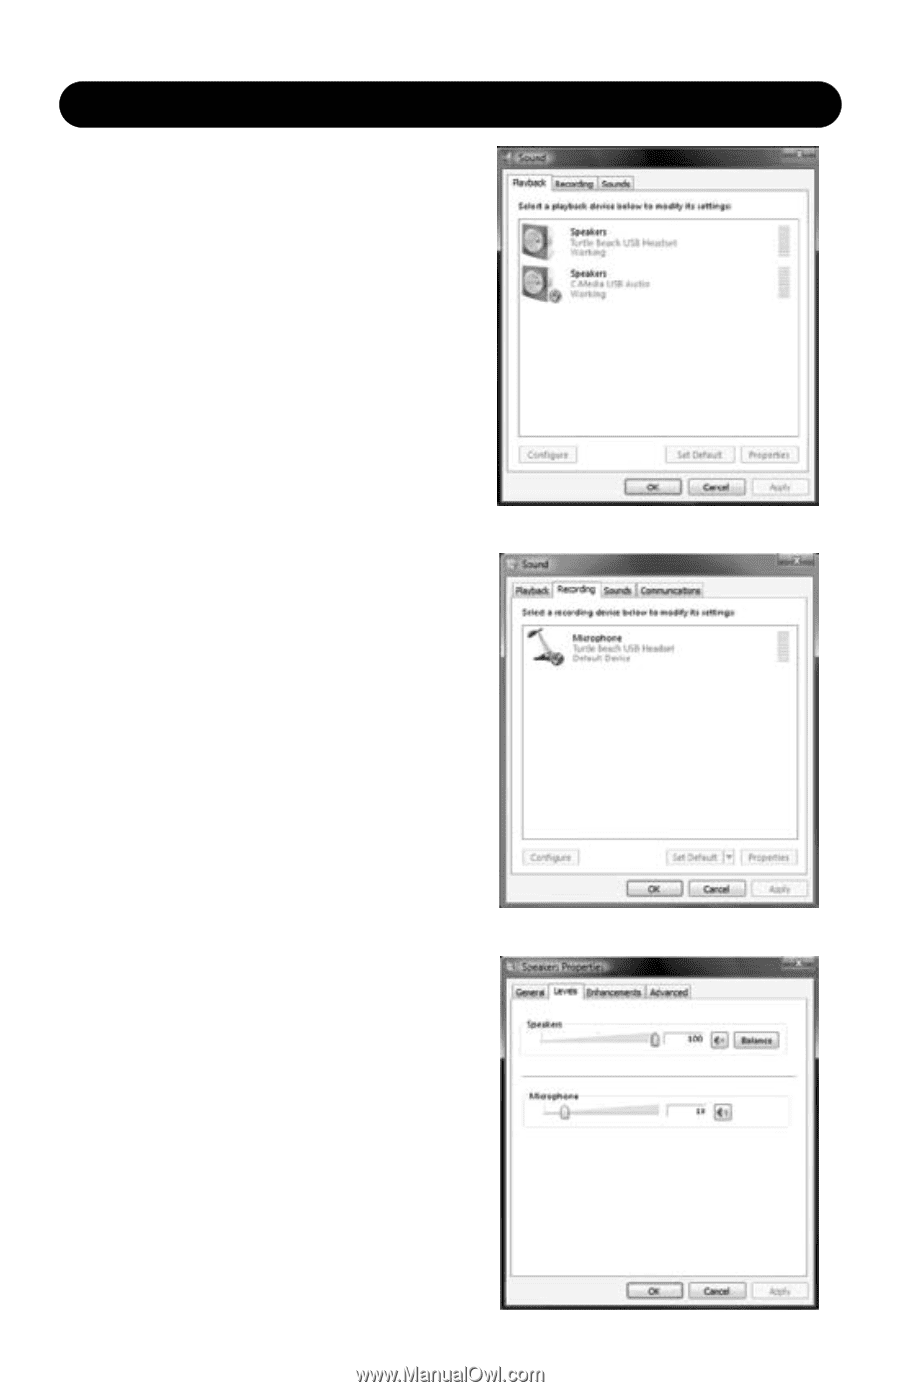
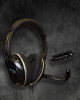
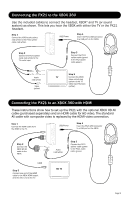
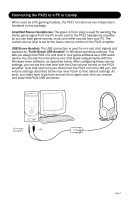
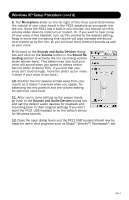
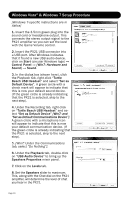
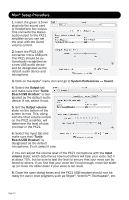
Windows Vista® & Windows 7 Setup Procedure [Windows 7-specific instructions are in italics] 1. Insert the 3.5mm green plug into the sound card or headphone output. This connects the stereo output signal to the PX21 amplifier so you can set the level with the Game Volume control. 2. Insert the PX21 USB connector into a USB port. After Windows indicates that it found a new USB audio device, click on Start (circular Windows logo) → Control Panel → [Win7: Hardware and Sound] → Sound. 3. In the dialog box (shown here), click the Playback tab, right-click "Turtle Beach USB Headset" and select "Set as Default Device". A green circle with a check mark will appear to indicate that this is now your default sound device. (If the green circle is already indicating that the PX21 is selected, skip to the next step). 4. Under the Recording tab, right-click on "Turtle Beach USB Headset" and select "Set as Default Device" [Win7: and "Set as Default Communications Device"]. A green circle with a microphone icon will appear to indicate that this is now your default communication device. (If the green circle is already indicating that the PX21 is selected, skip to the next step). 5. [Win7: Under the Communications tab, select "Do Nothing"]. 6. Under the Playback tab, double-click on "USB Audio Device" to bring up the Speakers Properties mixer panel. 7. Click on the Levels tab. 8. Set the Speakers slider to maximum. This, along with the Chat dial on the PX21 amplifier, will determine the level of chat you hear in the PX21. Page 10
-
 1
1 -
2
-
3
-
4
-
 5
5 -
 6
6 -
 7
7 -
 8
8 -
 9
9 -
 10
10 -
 11
11 -
 12
12 -
 13
13
 |
 |