Turtle Beach Ear Force PX21 User's Guide - Page 12
Setup Procedure - set up
 |
View all Turtle Beach Ear Force PX21 manuals
Add to My Manuals
Save this manual to your list of manuals |
Page 12 highlights
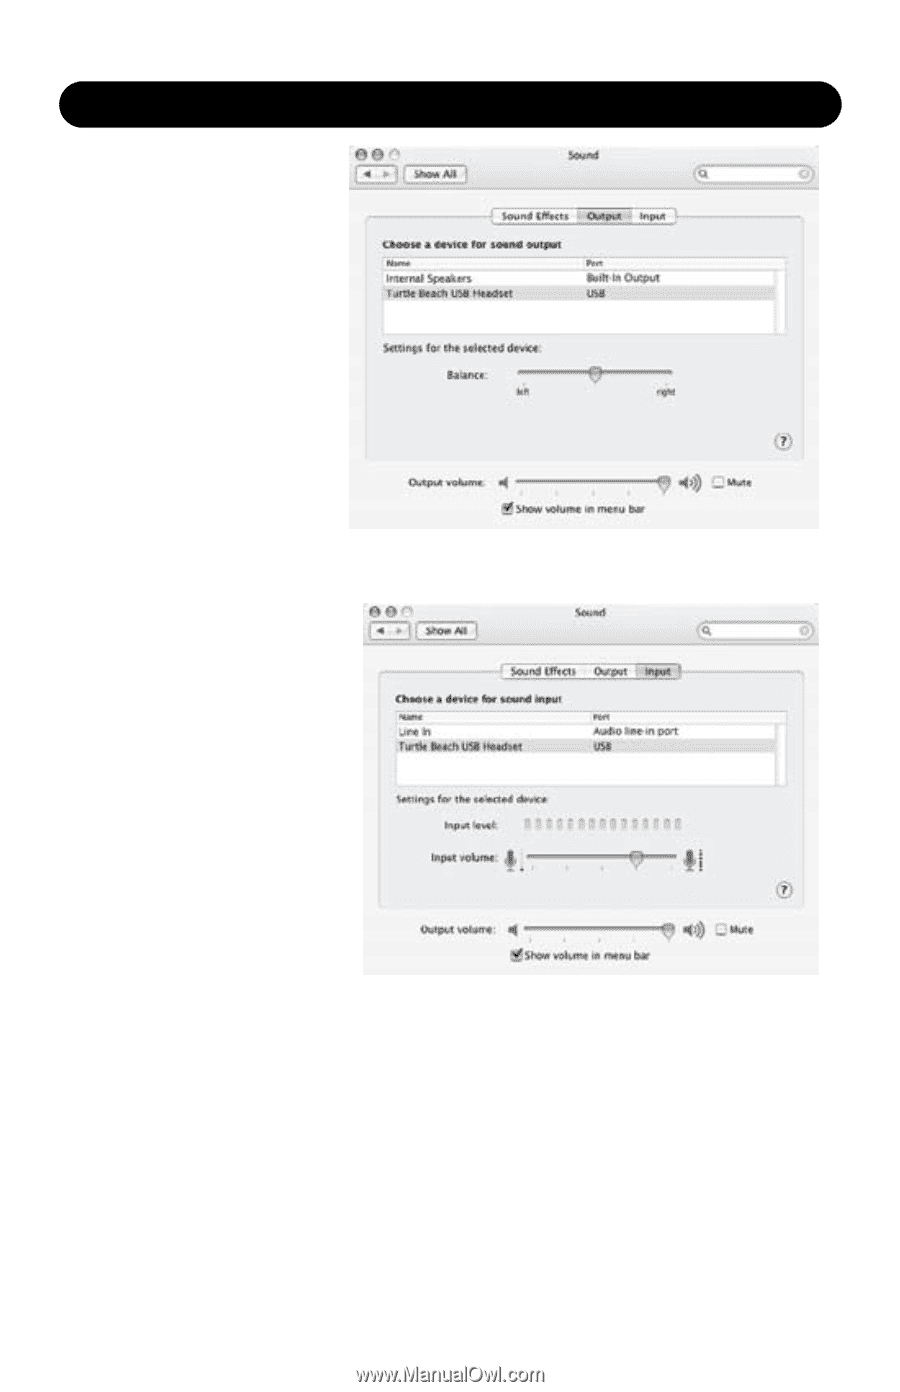
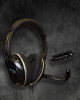
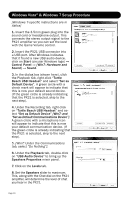
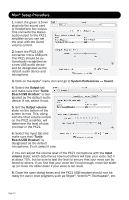
Mac® Setup Procedure 1. Insert the green 3.5mm plug into the sound card or headphone line output. This connects the stereo audio output to the PX21 amplifier so you can set the level with the Game volume control. 2. Insert the PX21 USB connector into a USB port. The PX21 should be automatically recognized as a new USB audio device and be designated as the default audio device and microphone. 3. Click on the Apple® menu icon and go to System Preferences → Sound. 4. Select the Output tab and make sure that "Turtle Beach USB Headset" is designated as the default audio device. If not, select it now. 5. Set the Output volume slider on the bottom of the screen to max. This, along with the Chat volume control on the PX21 amplifier, will determine the level of chat you hear in the PX21. 6. Select the Input tab and make sure that "Turtle Beach USB Headset" is designated as the default microphone. If not, select it now. 7. You can adjust the volume level of the PX21 microphone with the Input volume slider, which determines how loud others will hear your voice. Set it at about 75%, but be sure to test the level to ensure that your voice can be heard by others. If you find that your voice isn't loud enough, move the slider up (or move the slider down if your voice is too loud). 8. Close the open dialog boxes and the PX21 USB headset should now be ready for use in chat programs such as Skype®, Ventrilo™, Teamspeak®, etc. Page 12
-
 1
1 -
2
-
3
-
4
-
5
-
6
-
 7
7 -
 8
8 -
 9
9 -
 10
10 -
 11
11 -
 12
12 -
 13
13
 |
 |