Turtle Beach Riviera User's Guide - Page 25
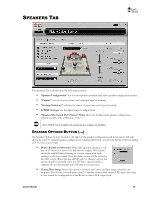
Graphic Equalizer Tab
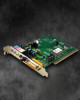 |
View all Turtle Beach Riviera manuals
Add to My Manuals
Save this manual to your list of manuals |
Page 25 highlights
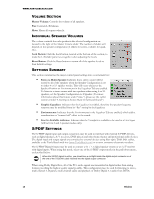
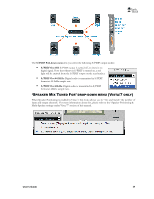
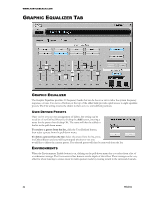
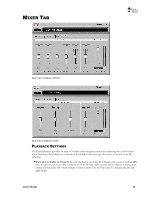
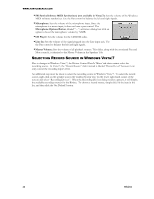
WWW.TURTLEBEACH.COM GRAPHIC EQUALIZER TAB GRAPHIC EQUALIZER The Graphic Equalizer provides 10 frequency bands that can be boost or cut to tailor the system frequency response, or tone. Two rows of buttons at the top of the slider bank provides quick access to eight equalizer presets. The Flat setting returns the sliders to their zero (i.e unmodified) positions. USER DEFINED PRESETS Once you‟ve set your own arrangement of sliders, the setting can be saved as a User Defined Preset by clicking the Add button, entering a name for the preset then clicking OK. The name will then be added to the list in the pull-down menu. To retrieve a preset from the list, click the User Defined button, then select a preset from the pull-down menu. To delete a preset from the list: Select the preset from the list, press the Delete Button and you will be prompted whether or not you would like to delete the current preset. The selected preset will then be removed from the list. ENVIRONMENTS When the Environments Enable button is on, clicking on the pull-down menu lets you select from a list of reverberation settings. The Environment Size buttons set the depth of this effect. These settings can be very effective when listening to stereo music in multi-speaker mode by creating reverb in the surround channels. 21 Riviera
-
 1
1 -
2
-
3
-
4
-
5
-
6
-
7
-
8
-
9
-
10
-
11
-
12
-
13
-
14
-
15
-
16
-
17
-
18
-
19
-
 20
20 -
 21
21 -
 22
22 -
 23
23 -
 24
24 -
 25
25 -
 26
26 -
 27
27 -
 28
28
 |
 |
