Uniden APPCAM26PT User Manual - Page 12
Hold the mounting plate where you want
 |
View all Uniden APPCAM26PT manuals
Add to My Manuals
Save this manual to your list of manuals |
Page 12 highlights
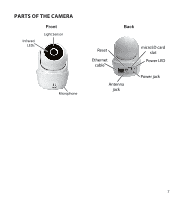
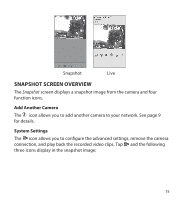
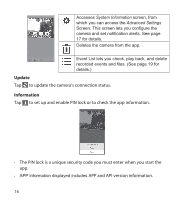
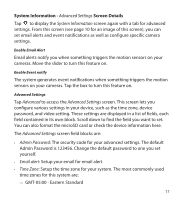
•• The camera is equipped with built-in infrared LEDs so you can use night vision for 24-hour surveillance. The LEDs will automatically activate at night and the picture viewed will turn to black and white. The night viewing range is up to 25 ft. Avoid pointing the camera lens directly at clear glass; the night vision LEDs will cause a blurred image. •• Optimized motion detection range is 6 - 18 feet for the camera. The farther away an object is, the less accurate the motion detection. •• If you leave your camera wirelessly connected to the router, your picture quality will be very good. However, you can leave the camera connected to the router for the highest quality images. If you wish to do so, install the camera within reach of the router. 1. Hold the mounting plate where you want to mount it and mark the location of the screw holes. 2. Use the included screws and anchors to attach the mounting plate to the wall. 3. Use the enclosed screws to screw the camera to the bracket. 12
-
 1
1 -
2
-
3
-
4
-
5
-
6
-
 7
7 -
 8
8 -
 9
9 -
 10
10 -
 11
11 -
 12
12 -
 13
13 -
 14
14 -
 15
15 -
 16
16 -
 17
17 -
18
-
19
-
20
-
21
-
22
-
23
-
24
-
25
-
26
-
27
-
28
-
29
-
30
-
31
-
32
 |
 |
