ViewSonic LS620X LS620X User Guide English - Page 36
Using the 3D functions, Controlling the projector through a LAN environment, Configuring the Wired LAN
 |
View all ViewSonic LS620X manuals
Add to My Manuals
Save this manual to your list of manuals |
Page 36 highlights
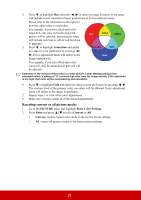
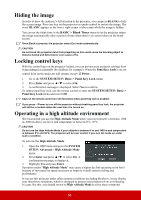
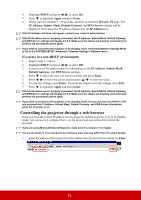
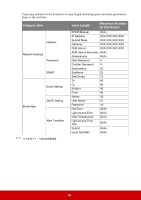
However, this is not to state that this projector can operate under any and all harsh or extreme conditions. Using the 3D functions This projector features 3D function which enables you to enjoy 3D movies, videos, and sporting events in a more realistic way by presenting the depth of the images. You need to wear a pair of 3D glasses to view 3D images. If the 3D signal is input from an HDMI 1.4a compatible device and 3D Mode is set as Auto, the projector projects images in 3D format automatically once detected. In other cases, you may need to manually select a 3D Mode format for the projector to project 3D images correctly. 1. Go to the DISPLAY > 3D Settings menu. 2. Press Enter. The 3D Settings page is displayed. 3. Highlight 3D Mode and press Enter. 4. Press to select a 3D Mode setting and then press Enter to confirm. When the 3D Mode function is on: • The brightness level of the projected image will decrease. • The Color Mode cannot be adjusted. • The Zoom function can only magnify the pictures to limited sizes. If you discover the inversion of the 3D image depth, set the 3D Sync Invert function to "Invert" to correct the problem. Controlling the projector through a LAN environment The projector supports Crestron® software. With correct settings for the Wired LAN menu, you can manage the projector from a computer using a web browser when the computer and the projector are properly connected to the same local area network. (An example of connection) Configuring the Wired LAN If you are in a DHCP environment: 1. Take a RJ45 cable and connect one end to the RJ45 LAN input jack of the projector and the other end to the RJ45 port. 2. Open the OSD menu and go to the SYSTEM SETUP: Advanced > LAN Control Settings > Wired LAN menu. 3. Press Enter. The Wired LAN page is displayed. 31
-
 1
1 -
2
-
3
-
4
-
5
-
6
-
7
-
8
-
9
-
10
-
11
-
12
-
13
-
14
-
15
-
16
-
17
-
18
-
19
-
20
-
21
-
22
-
23
-
24
-
25
-
26
-
27
-
28
-
29
-
30
-
 31
31 -
 32
32 -
 33
33 -
 34
34 -
 35
35 -
 36
36 -
 37
37 -
 38
38 -
 39
39 -
 40
40 -
 41
41 -
42
-
43
-
44
-
45
-
46
-
47
-
48
-
49
-
50
-
51
-
52
-
53
-
54
-
55
-
56
-
57
-
58
-
59
-
60
-
61
-
62
-
63
-
64
-
65
-
66
-
67
-
68
-
69
-
70
-
71
-
72
-
73
-
74
-
75
-
76
-
77
 |
 |
