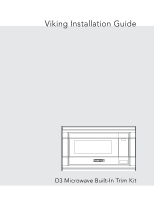
Viking RDMOS201SS 30 inch W. Built-In Trim Kit - Installation Instructions - Page 2
Table of Contents, IMPORTANT
 |
View all Viking RDMOS201SS manuals
Add to My Manuals
Save this manual to your list of manuals |
Page 2 highlights
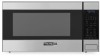
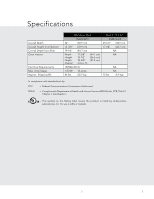
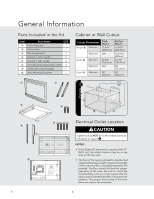
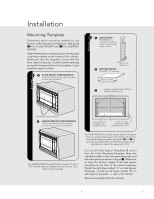
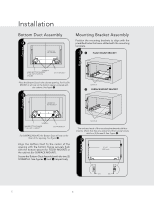
Table of Contents Warnings & Important Information 2 Specifications 3 General Information 4 Parts Included in the Kit 4 Cabinet or Wall Cutout 4 Electrical Outlet Location 4 Installation 5 Mounting Template 5 Bottom Duct Assembly 6 Mounting Bracket Assembly 6 Cabinet Installation 7 Frame Assembly 7 Side Decoration Assembly (For Surface Mount Only 8 Over Oven Installation 8 Performance Checklist 8 IMPORTANT-Please Read and Follow! • Before beginning, please read these instructions completely and carefully. • Be sure to DISCONNECT THE PLUG of the microwave oven from the electrical outlet before installing the built-in trim kit. Remove the turntable from the oven cavity. • Because the kit includes metal parts, caution should be used in handling and installation to avoid the possibility of injury. • Do not remove permanently affixed labels, warnings, or plates from the product. This may void the warranty. • Please observe all local and national codes and ordinances. • The installer should leave these instructions with the consumer who should retain for local inspector's use and for future reference. WARNING This built-in trim kit is designed for use only with Viking microwave ovens specifying builtin trim kit RDMTK302 on the rating label on the left side wall of the oven cavity. E 2
-
 1
1 -
 2
2 -
 3
3 -
 4
4 -
 5
5 -
 6
6 -
 7
7 -
 8
8 -
9
-
10
-
11
-
12
-
13
-
14
-
15
-
16
-
17
-
18
-
19
-
20
-
21
-
22
-
23
-
24
 |
 |
