Vizio D43-C1 User Manual (English)
Vizio D43-C1 Manual
 |
View all Vizio D43-C1 manuals
Add to My Manuals
Save this manual to your list of manuals |
Vizio D43-C1 manual content summary:
- Vizio D43-C1 | User Manual (English) - Page 1
VIZIO USER MANUAL Model D43-C1 - Vizio D43-C1 | User Manual (English) - Page 2
LLC. This product qualifies for ENERGY STAR in the "factory default" setting and this is the setting in which power savings will be achieved. Changing the factory default picture settings or enabling other features will increase power consumption that could exceed the limits necessary to qualify for - Vizio D43-C1 | User Manual (English) - Page 3
service plan, visit www.VIZIO.com. WHEN READING THIS MANUAL When you see this symbol, please read the accompanying important warning or notice. It is intended to alert you to the presence of important operating instructions for replacement of the obsolete outlet. • Protect the power cord from - Vizio D43-C1 | User Manual (English) - Page 4
during a lightning storm or when it will not be used for long period of time. This will protect your TV from damage due to power surges. • Do not attempt to repair or service your TV yourself. Opening or removing the back cover may expose you to high voltages, electric shock, and other hazards. If - Vizio D43-C1 | User Manual (English) - Page 5
your TV will not be used for an extended period of time, unplug the power cord. • To reduce risk of electric shock, do not touch the connector with wet hands. • Insert batteries in accordance with instructions. Incorrect polarities may cause the batteries to leak which can damage the remote control - Vizio D43-C1 | User Manual (English) - Page 6
for long periods of time, unplug the TV from the wall outlet and disconnect the antenna or cable system. Power Lines Do not locate the antenna near overhead light or power circuits, or where it could fall into such power lines or circuits. Remember, the screen of the coaxial cable is intended to be - Vizio D43-C1 | User Manual (English) - Page 7
3 Inspecting the Package Contents 3 Installing the TV 3 Installing the TV Stand 3 Installing the Stand 4 Installing the TV on a Wall 6 Controls and Connections 7 Back Panel 7 Side Panel 8 Front Panel 9 Using the Remote 10 Replacing the Batteries 11 Connecting Your Devices 12 Connecting - Vizio D43-C1 | User Manual (English) - Page 8
the Content Locks 42 Adjusting the Wide Mode (Aspect Ratio 43 Controlling Other Devices with CEC 44 Turning the Power Indicator On or Off 45 Using the Reset & Admin Menu 45 Restoring the TV to Factory Default Settings 45 Using the Guided Setup Menu 46 Using the Info Window 47 Using the USB - Vizio D43-C1 | User Manual (English) - Page 9
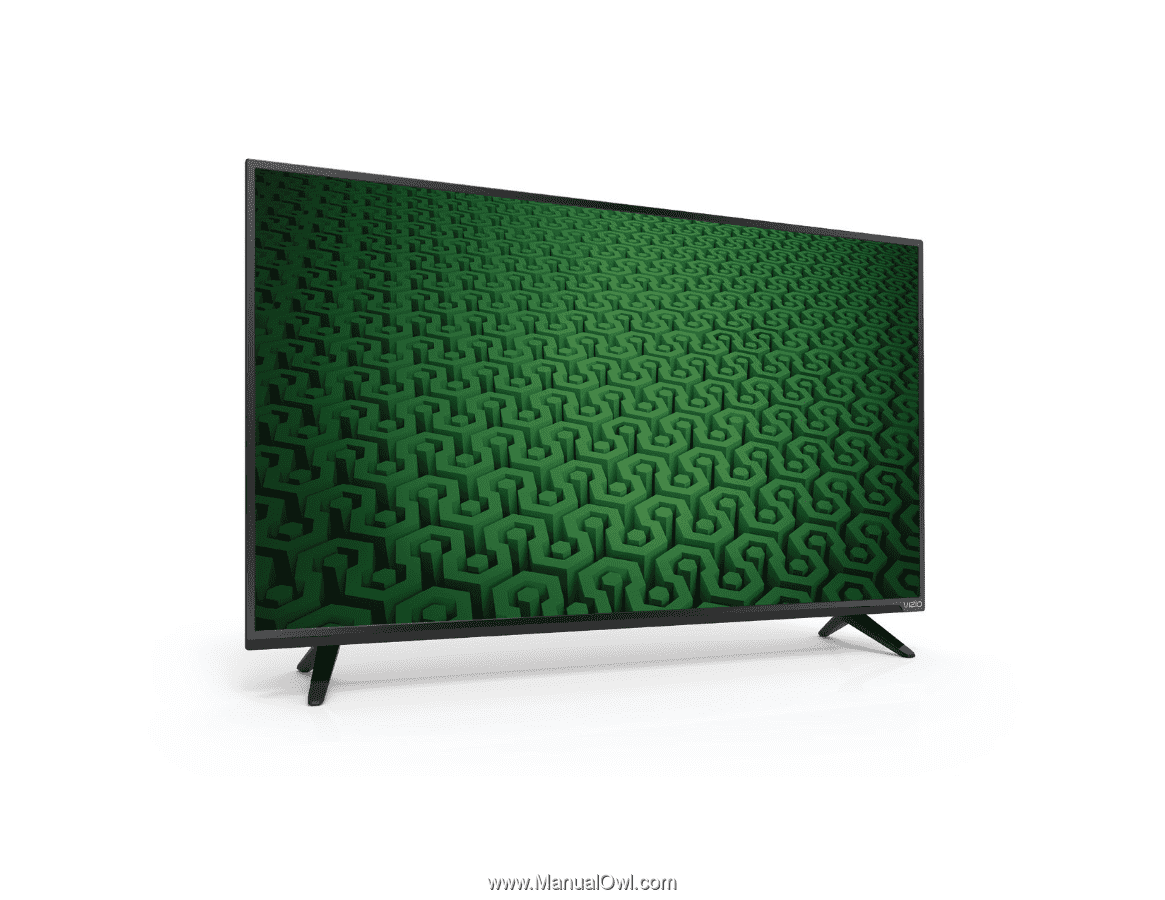
VIZIO LED HDTV Remote control with batteries INSTALLING THE TV After removing the TV from the box and inspecting the package contents you can begin installing the TV. Your TV can be installed in two ways: • On a flat surface, using the included stand • On a wall, using a VESA-standard wall mount - Vizio D43-C1 | User Manual (English) - Page 10
It is recommended that two people take part in the stand installation. Remove any plastic wrapping from the TV and the stand. Place the TV screen-down on a clean, flat surface. To prevent scratches or damage to the screen, place the TV on a soft surface such as a blanket and avoid any sharp edges - Vizio D43-C1 | User Manual (English) - Page 11
1 Insert the left and right stands into the base of the TV. Insert two (2) M4 28 mm Phillips screws (included) into the back of the TV and tighten them using a Phillips screwdriver, to secure each stand to the TV. When you are finished, place the TV on a stable, level surface. 5 - Vizio D43-C1 | User Manual (English) - Page 12
TV model: Installing a TV on a wall requires lifting. To prevent injury or damage to the TV, ask someone to help you. Screw Size: Hole Pattern: Weight w/o Stand: D43-C1 M6 (not included) 200 mm (V) x 200 mm (H) 19.40 lbs Be sure the mount you choose is capable of supporting the weight of the TV - Vizio D43-C1 | User Manual (English) - Page 13
Controls and Connections 2 USB - Connect a USB thumb drive to display photos. HDMI - Connect an HDMI device. Stereo Audio Out - Connect an RCA audio device, such as - Vizio D43-C1 | User Manual (English) - Page 14
2 Power - Press once to turn on the TV. Press and hold to turn off the TV Input - Press once to access the INPUT menu. 8 SIDE PANEL - Vizio D43-C1 | User Manual (English) - Page 15
2 FRONT PANEL REMOTE SENSOR & POWER INDICATOR When using the remote, aim it directly at this sensor. The power indicator flashes on when the TV turns on, then goes out after several seconds. To keep the power indicator on as long as the TV is on, see Turning the Power Indicator On or Off on page 45 - Vizio D43-C1 | User Manual (English) - Page 16
the audio off or on. NUMBER PAD Manually enter a channel. WIDE Switch the display mode. 10 2 POWER Turn the TV on or off. INFO Display the info window. MENU Display the on-screen menu. ARROW Navigate the on-screen menu. GUIDE Display the info window. V BUTTON Open the USB media player. CHANNEL UP - Vizio D43-C1 | User Manual (English) - Page 17
2 Replacing the Batteries 1. Remove the battery cover. 2. Insert two batteries into the remote control. Make sure that the (+) and (-) symbols on the batteries match the (+) and (-) symbols inside the battery compartment. 3. Replace the battery cover. 11 - Vizio D43-C1 | User Manual (English) - Page 18
the appropriate cable (not included) to the TV and the device. 4. Turn the TV and your device on. Set the TV's input to match the connection you used (HDMI-1, HDMI-2, etc.). 12 3 Cable/Satellite Box DVD/Blu-ray Player Game Console HDMI CABLE BEST • DIGITAL • HD VIDEO (1080p)* • HD AUDIO - Vizio D43-C1 | User Manual (English) - Page 19
or composite cables) are the traditional way of connecting your devices to your TV. Video signals are sent over the yellow connector while audio is sent traditional way of connecting antennas and cable television signals to your TV. Coaxial cables carry both audio and video signals through a single - Vizio D43-C1 | User Manual (English) - Page 20
to automatically adjust themselves for optimal viewing. • HD Video Resolutions up to 1080p • HD Audio • Digital Connection • Audio and Video Signals HDMI HDMI BETTER 14 BEST - Vizio D43-C1 | User Manual (English) - Page 21
the device. 4. Turn the TV and your device on. 3 Home Audio Receiver VIZIO Sound Bar RCA CABLE GOOD • ANALOG STEREO CONNECTION • 2.0 CHANNEL OPTICAL/SPDIF CABLE BETTER • PCM STREAM • DOLBY DIGITAL 5.1 CHANNEL • DTS 5.1 CHANNEL HDMI CABLE BEST • CEC 2-WAY COMMUNICATION • 2.0-5.1 DIGITAL AUDIO - Vizio D43-C1 | User Manual (English) - Page 22
digital multi-channel surround audio through a single HDMI cable. Audio Return Channel-enabled (ARC) TVs allow audio to be sent over an already connected HDMI cable, eliminating the need for a • Audio and Video Signals L R Optical/SPDIF DIGITAL OPTICAL AUDIO HDMI HDMI GOOD BETTER 16 BEST - Vizio D43-C1 | User Manual (English) - Page 23
Built-in Tuner Without an HDMI ARC setup, your TV will transmit audio signals from the built-in tuner and VIA apps to your home audio receiver through a separate audio connection. RCA (Audio) Your TV HDMI Your Home Audio Receiver HDMI Your TV HDMI With an HDMI ARC setup, the audio connection - Vizio D43-C1 | User Manual (English) - Page 24
Begin Scan and press OK. Otherwise, use the Arrow and OK buttons on the remote to select the input your TV source is connected to. (The number of inputs may vary depending on your TV.) 6. When you are finished, the message "Your VIZIO TV is set up" will appear. The First-Time Setup is complete. 18 - Vizio D43-C1 | User Manual (English) - Page 25
the on-screen menu, press the MENU button on the remote. From this menu, you can: • Adjust the Picture settings • Adjust the Audio settings • Set the Sleep Timer • Adjust the Channel settings • Set up Closed Captioning • Select input devices • Adjust TV settings • Access the Guided Setup VIZIO TV - Vizio D43-C1 | User Manual (English) - Page 26
game consoles can be connected to your TV. To use one of these devices with your TV, you must first change the input source using the Input menu. To change the input source: 1. Press the INPUT button on the remote. The Input menu is displayed. 2. Use the Up/Down Arrow buttons or the INPUT button - Vizio D43-C1 | User Manual (English) - Page 27
and optimizes the picture settings for displaying game console output. • Computer optimizes the picture settings for displaying computer output. 4. To manually change each of the picture settings, use the Up/ Down Arrow buttons on the remote to highlight that picture setting, then use the Left - Vizio D43-C1 | User Manual (English) - Page 28
Right Arrow buttons to change the setting: • Color Temperature Adjusts the 'warmness' and 'coolness' of the white areas of the picture. Select Cool, Normal, or Computer. VIZIO MORE PICTURE Color Temperature Black Detail Clear Action Backlight Control Reduce Signal Noise Reduce Block Noise Game Low - Vizio D43-C1 | User Manual (English) - Page 29
modes. ABC To create a custom picture mode: Input Wide CC 1. Set the Picture Mode to an existing custom setting. See Adjusting the Picture Settings on STlipm eeaeprge 2Pi1ct.ure Audio 2. From the PICTURE menu, use the Arrow buttons to highlight NePtwiocrktuSreettiMngos deHeEldp it and press - Vizio D43-C1 | User Manual (English) - Page 30
is displayed. VIZIO LOCK PICTURE MODE Create a picture control PIN to prevent change to all custom picture modes. 2. Use the Number Pad on your remote to enter a unique 4-digit Save PIN. 3. Highlight Save and then press the OK button. 4. Press the EXIT button to exit the menu screens. Create - Vizio D43-C1 | User Manual (English) - Page 31
test patterns allow technicians to manually calibrate the TV. Calibration requires specialized training, an input with precisely set colors, and a specialized light meter. To adjust the color calibra picture settings: 1. From the PICTURE menu, use the Arrow buttons to highlight Color Calibration - Vizio D43-C1 | User Manual (English) - Page 32
0 0 0 Magenta 25 -2 0 Yellow -14 0 0 3. Use the Arrow buttons on the remote to highlight the Hue, Saturation, Brightness, (these 3 adjust the color) Offset, button to save the setting. 5. When you have finished adjusting the Color Tuner settings, press the BACK button to adjust additional settings - Vizio D43-C1 | User Manual (English) - Page 33
adjust the value. When you are finished press the OK button to save the setting. 3. When you are finished, press the BACK button to adjust additional settings or EXIT. All changes here are saved to Color Temperature. 2. Use the Arrow buttons on the remote to highlight Off. Use the Left/Right Arrow - Vizio D43-C1 | User Manual (English) - Page 34
the Flat Test Pattern, use the Left/Right Arrow buttons to highlight Off. 3. When you are finished, press the BACK button to adjust additional settings or EXIT. 2. Use the Arrow buttons on the remote to highlight Off. Use the Left/Right Arrow buttons to select the color for the ramp test pattern - Vizio D43-C1 | User Manual (English) - Page 35
AuAdBCio Out - Sets the volume control properties for the 3.5mm (headphone jack) connector when connected Input to WaidheomeCtCheater audio system. Select Variable to control the headphones' volume from the TV's volume controls, or select Fixed to control the headphones' volume from your home - Vizio D43-C1 | User Manual (English) - Page 36
to reflect the mode. 5. Press the BACK button to adjust additional settings or EXIT. To create, modify, or replace the single custom equalizer setting: 1. Press the MENU button on the remote. The on-screen menu is displayed. 2. Use the Arrow buttons on the remote to highlight Audio and press OK. The - Vizio D43-C1 | User Manual (English) - Page 37
timer will turn the TV off after a set period of time. 1. Press the MENU button on the remote. The on-screen menu is displayed. 2. Use the Arrow buttons on the remote to highlight Timers and press OK. The TIMERS menu is displayed. VIZIO TIMERS Sleep Timer Auto Power Off Off 10 minutes 3. Use - Vizio D43-C1 | User Manual (English) - Page 38
SETTING UP CHANNELS You can use the TV's Channels menu to: • Select a Channel Source • Find channels • Perform a partial channel scan • Manually add channels VIZIO the remote control, press Input and use the Arrow button to highlight TV (antenna icon), then press OK. 2. Press the MENU button, - Vizio D43-C1 | User Manual (English) - Page 39
# and use the Number Pad on the remote to type the number of the channel to be added. 3. Highlight Add Channel and press OK. The TV scans for the channel. 4. When the TV is done scanning for the channel, press the EXIT button on the remote. VIZIO ADD ANALOG CHANNEL Enter Channel # Add Channel - Vizio D43-C1 | User Manual (English) - Page 40
from the TV's memory use the parental controls. See Locking and Up/Down Arrow buttons on the remote to highlight the channel settings or EXIT. VIZIO SKIP CHANNEL 1 Test 0 1 Test 1 P 1-2 Test 2 P 2 Test 3 2-2 Test 4 P 2-3 Test 5 Wide Zoom Normal Panoramic Exit 2D 3D ABC Input - Vizio D43-C1 | User Manual (English) - Page 41
) and cable channels broadcast programs in more than one language. The TV's Analog Audio feature allows you to listen to audio in an alternate Press BACK to adjust additional settings or EXIT. Exit 2D 3D VIZIO DIGITAL LANGUAGE English Español Français ABC Input Wide CC Sleep Timer Picture - Vizio D43-C1 | User Manual (English) - Page 42
you wish to change, then use the Left/Right Arrow buttons to change the Exsitetting2:D 3D • Caption Style - Choose As Broadcast to keep ABC default settings or Custom to manually change each Input settWinidge . CC VIZIO DIGITAL STYLE Caption Style Custom Text Style As Broadcast Text - Vizio D43-C1 | User Manual (English) - Page 43
4. When you are satisfied with the appearance of the closed captions, press the EXIT button on the remote. Text Typical choices include: • Opaque background, transparent window-Only a strip of background is red. Background CLOSED CAPTION TEXT SAMPLE Window 37 CLOSED CAPTIONS SCREEN LAYOUT - Vizio D43-C1 | User Manual (English) - Page 44
name using the on-screen keyboard. b. Highlight OK and press OK. c. The Input Name changes to show the custom name that you created. 5. When you have finished naming your input, press the BACK button to adjust additional settings or EXIT. 5 Input Port VIZIO NAME INPUT HDMI-1 DVD DVD_ abcdef - Vizio D43-C1 | User Manual (English) - Page 45
Menu Language Time & Local Settings Parental Controls Wide CEC Power Indicator Reset & Admin English Off View status information for the TV and current input. Viewing System Information To view a summary of the TV settings: 1. Press the MENU button on the remote. The on-screen menu is displayed - Vizio D43-C1 | User Manual (English) - Page 46
language (, , or ) and press . All screens will now be displayed in the selected language. 5. Press the button to change additional settings or . Setting the Time and Local Settings When your TV signal come from an antenna, your TV receives time information as part of the broadcast signal. The - Vizio D43-C1 | User Manual (English) - Page 47
TV directly from the wall (no cable box). • You have a device connected using a composite video cable or a coaxial cable, such as a VCR, satellite or cable box, or DVR. Accessing the Parental Controls Menu To access the Parental Controls menu: 1. Press the MENU button on the remote. The on-screen - Vizio D43-C1 | User Manual (English) - Page 48
passcode and save it in a secure location. 5. Press the EXIT button on the remote. Resetting the Content Locks To reset the content locks to the factory-default settings: 1. From the PARENTAL CONTROLS menu, highlight Reset Locks and press OK. The TV displays, "Select Reset to restore Parental - Vizio D43-C1 | User Manual (English) - Page 49
is displayed. 3. Use the Arrow buttons on the remote to highlight Wide and press OK. The wide mode menu appears at the top of the screen. Normal Panoramic Normal Stretch Wide Wide Zoom Zoom Note: Aspect ratio settings may vary by Input source. 4. Use the Arrow buttons to highlight the aspect - Vizio D43-C1 | User Manual (English) - Page 50
to the HDMI (ARC) input with the included remote, without any programming. Using CEC, your VIZIO TV remote can control: • Power on/off • Volume • Mute Not all HDMI devices support CEC. See your device's user manual for details. To enable, disable, or adjust CEC settings: 1. Set up your audio device - Vizio D43-C1 | User Manual (English) - Page 51
normally does not glow when the TV is on. You can change this setting if you prefer the light to be on. To turn the Power Indicator Light on or off: 1. Press the MENU button on the remote. The on-screen menu is displayed. 2. Use the Arrow buttons on the remote to highlight System and press OK. The - Vizio D43-C1 | User Manual (English) - Page 52
5 USING THE GUIDED SETUP MENU The TV's Setup App can be used to easily set up channels on the TV. To use guided setup: 1. Press the MENU button on the remote. The on-screen menu is displayed. 2. Highlight Guided Setup and press OK. The GUIDED SETUP menu is displayed. VIZIO GUIDED SETUP Channel - Vizio D43-C1 | User Manual (English) - Page 53
WINDOW The Info Window can be displayed by pressing the INFO or GUIDE button on the remote: • Press the INFO or GUIDE button one time to display channel, input, and display information. • Press the INFO or GUIDE button two times to display the program title, program rating, audio information, and - Vizio D43-C1 | User Manual (English) - Page 54
TV. 2. Use the Arrow buttons to highlight Yes and press the OK. If the dialog box disappears, press the V button on the remote to go the next step. 3. Use the Arrow buttons as FAT32. • Files on the USB thumb drive must end in a supported file extension (.jpg or .jpeg). • The USB media player is not - Vizio D43-C1 | User Manual (English) - Page 55
6 Connected Sources Displays connected USB devices. Back Button Highlight this button and press OK to return to the previous screen. VIZIO Photo USB1: Back Button Highlight and press OK to return to left column. Current Folder Displays the folder path. VIZIO_2GB\Photo\root Current Folder Start - Vizio D43-C1 | User Manual (English) - Page 56
Find help with: •New product setup •Connecting your devices •Technical problems •Product updates and more. Live chat support available You can also contact our award-winning support team: Phone: (877) 698-4946 (toll-free) Email: [email protected] Hours of Operation: Monday - Friday: 7 am to 11 - Vizio D43-C1 | User Manual (English) - Page 57
's user manual for details. • Adjust Brightness, Contrast, or Backlight. See Adjusting the Picture Settings on page 21. • Press the INPUT button on the remote to select a different input source. There is no sound. • Press VOLUME UP on the remote control. • Press the MUTE button on the remote to - Vizio D43-C1 | User Manual (English) - Page 58
not operate with this model. • Ensure you are only pressing one button at a time. • Point the remote directly at the TV when pressing a button. • Replace the remote batteries with new ones. See Replacing the Batteries on page 11. The image quality is not good. • For the best image quality, view high - Vizio D43-C1 | User Manual (English) - Page 59
w/ Stand: w/o Stand: Weight w/ Stand: w/o Stand: TV Type: Refresh Rate: Maximum Resolution: Pixel Pitch: Dynamic Contrast Ratio: Clear Action Viewing Angle: HDMI Inputs: Component Video Inputs: Composite Inputs: RF Antenna Input: USB 2.0 Ports: Audio Outputs: OSD Language: D43-C1 43" Class - Vizio D43-C1 | User Manual (English) - Page 60
Remote Control Model: Certifications: Compliance: Voltage Range: Power-On Consumption: Standby Power Consumption: Zero Bright Pixels Guarantee: D43-C1 XRT010 UL, cUL, NOM, BETS-7/ICES-003 Class B, HDMI (CEC, ARC), Dolby Digital Energy Star 6.1 COUNEE NRCan NOM-032 120 V @ 60 Hz 46 W < 0.5 W Yes B - Vizio D43-C1 | User Manual (English) - Page 61
material or packaging that affords an equal degree of protection. VIZIO Technical Support will provide instructions for packing and shipping the covered Product to the VIZIO service center. other than by a VIZIO authorized service center. Products with unreadable or removed serial numbers, or - Vizio D43-C1 | User Manual (English) - Page 62
and used in accordance with the instructions, may cause harmful interference to radio the dealer or an experienced radio/TV technician for help. This device complies with Part 15 of the FCC Rules. Operation the equipment. 2. Shielded interface cables and AC power cord, if any, must be used in order - Vizio D43-C1 | User Manual (English) - Page 63
© 2015 VIZIO INC. ALL RIGHTS RESERVED. 140223EM-US-NC
-
 1
1 -
 2
2 -
 3
3 -
 4
4 -
 5
5 -
 6
6 -
 7
7 -
8
-
9
-
10
-
11
-
12
-
13
-
14
-
15
-
16
-
17
-
18
-
19
-
20
-
21
-
22
-
23
-
24
-
25
-
26
-
27
-
28
-
29
-
30
-
31
-
32
-
33
-
34
-
35
-
36
-
37
-
38
-
39
-
40
-
41
-
42
-
43
-
44
-
45
-
46
-
47
-
48
-
49
-
50
-
51
-
52
-
53
-
54
-
55
-
56
-
57
-
58
-
59
-
60
-
61
-
62
-
63
 |
 |
VIZIO
USER MANUAL
Model D43-C1