Yamaha AP-U70 Owner's Manual - Page 33
BASIC OPERATION, Playing a source
 |
View all Yamaha AP-U70 manuals
Add to My Manuals
Save this manual to your list of manuals |
Page 33 highlights
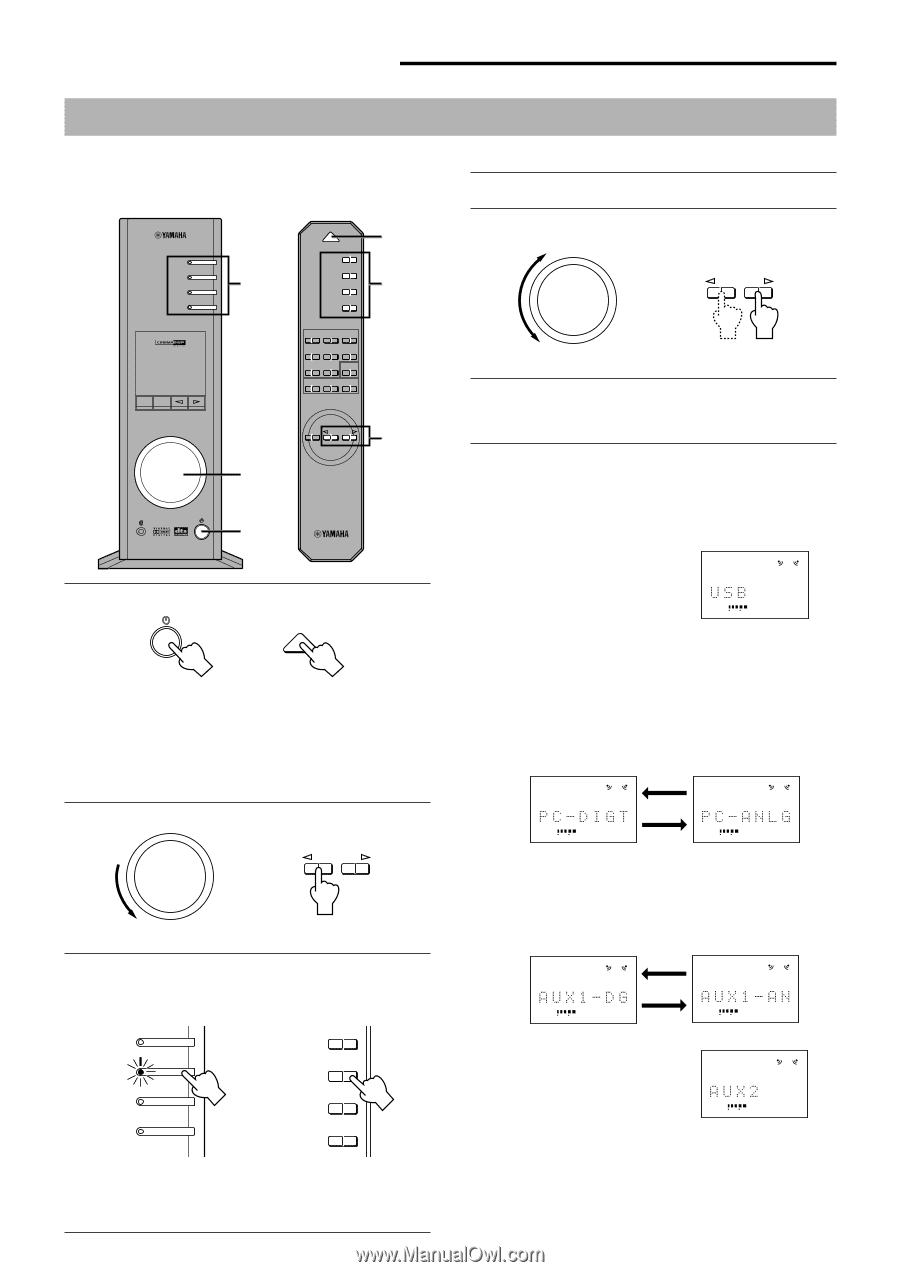
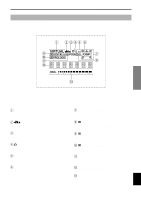
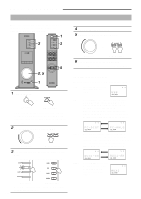
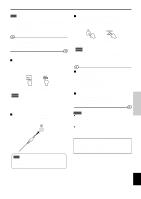
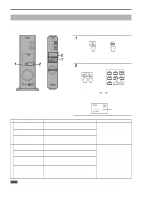
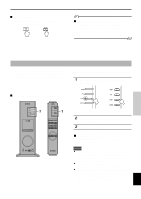
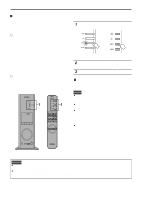
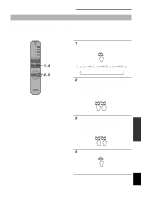
BASIC BASIC OPERATION OPERATION Playing a source This section explains how to turn on this unit and select input sources. If any external audio equipment is connected to this unit, turn it on first. USB PC AUX1 AUX2 3 POWER USB PC AUX1 AUX2 1 3 VIRTUAL 5.ICH DIGITAL USB PCM D. DSP PROLOGIC FM AM ST VOL DSP MUTE HALL JAZZ CHURCH GAME MOVIE LIVE VDD TEST ON/OFF A B C MUTE VOLUME 5 2, 5 1 1 Turn on this unit. or POWER Front panel Remote control The message "Hello" appears for a few seconds, and this unit returns to the state in which it was last used (e.g., the input source that was selected when this unit was turned off is selected). 2 Decrease the volume to minimum (MIN). VOLUME or Front panel Remote control 3 Select an input source by using the input selector keys. The corresponding indicator on the front panel lights up. USB USB PC AUX1 AUX2 PC or AUX1 AUX2 E-8 Front panel Remote control Refer to the explanation on the right side for details about using the input selector keys. 4 Start the selected input source. 5 Adjust the volume to the desired level. VOLUME or Front panel Remote control 6 As you prefer, use a sound field program. Refer to page 10 for details about the sound field programs. About the input selector keys Each of the input selector keys selects the following input signals. USB: Press the USB key to select input signals at the USB terminal. VOL PC: Press the PC key repeatedly to select the PC inputs: "PC_DIGT" and "PC_ANLG". PC_DIGT selects the DIGITAL PC COAX IN or DIGITAL PC OPT IN, and PC_ANLG selects the ANALOG PC IN. Note: The DIGITAL PC OPT IN has priority over the DIGITAL PC COAX IN, so if you connect to both inputs, the signal received at the DIGITAL PC OPT IN is used. AUX1: VOL VOL Press the AUX1 key repeatedly to select the inputs: "AUX1_DG" and "AUX1_AN". AUX1_DG selects the equipment connected to the DIGITAL AUX 1 OPT IN, and AUX1_AN selects the equipment connected to the ANALOG AUX 1 IN connector as the input source. VOL VOL AUX2: Press the AUX2 key to select the equipment connected to the ANALOG AUX 2 IN connectors as the input VOL source.
-
 1
1 -
2
-
3
-
4
-
5
-
6
-
7
-
8
-
9
-
10
-
11
-
12
-
13
-
14
-
15
-
16
-
17
-
18
-
19
-
20
-
21
-
22
-
23
-
24
-
25
-
26
-
27
-
 28
28 -
 29
29 -
 30
30 -
 31
31 -
 32
32 -
 33
33 -
 34
34 -
 35
35 -
 36
36 -
 37
37 -
 38
38 -
39
-
40
-
41
-
42
-
43
-
44
-
45
-
46
-
47
 |
 |