Yamaha DGX-640 Owner's Manual - Page 39
Reference, Start Lesson 1., Stop the Lesson mode. - case
 |
View all Yamaha DGX-640 manuals
Add to My Manuals
Save this manual to your list of manuals |
Page 39 highlights
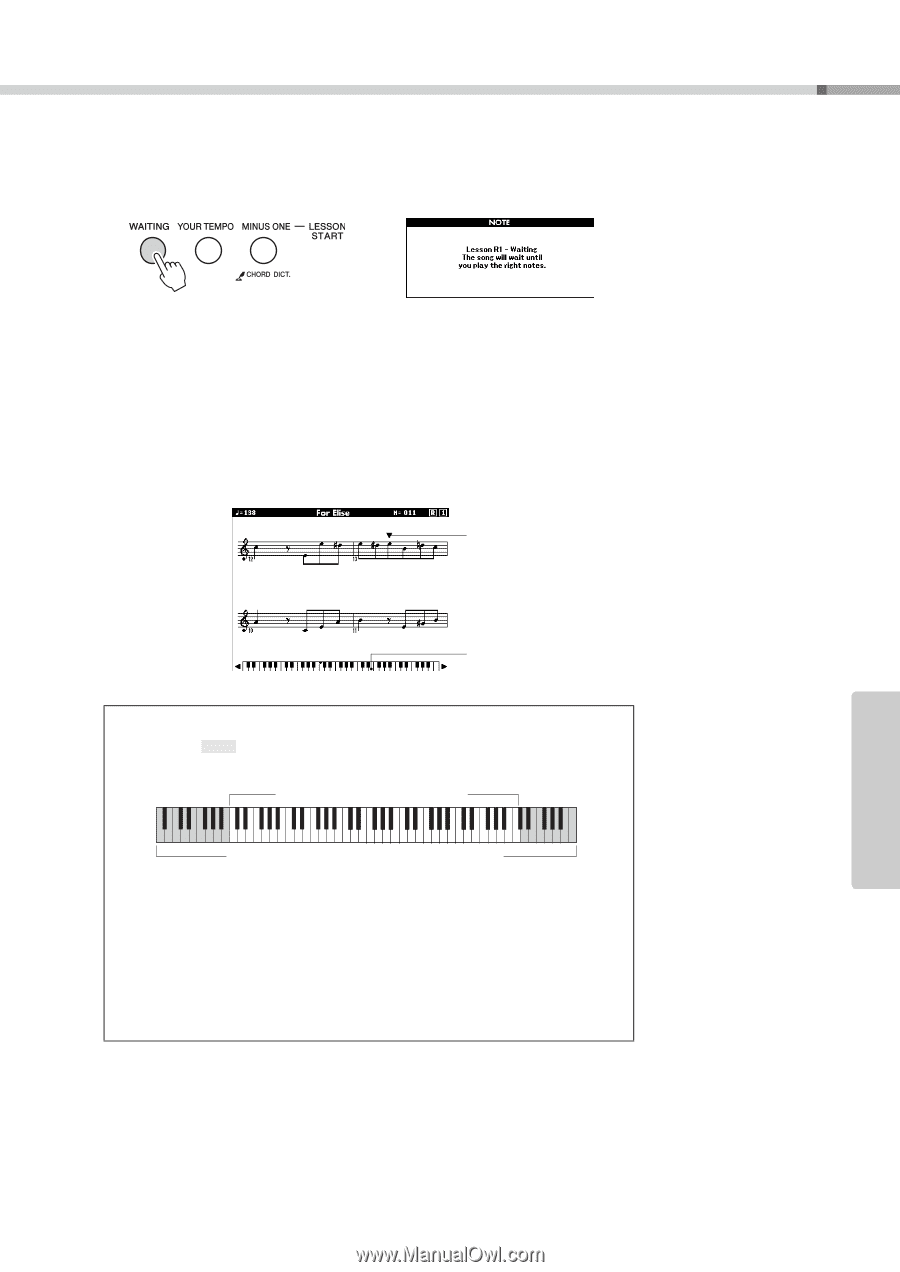
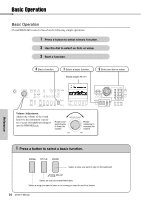
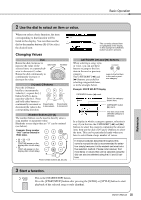
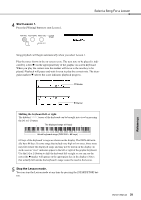
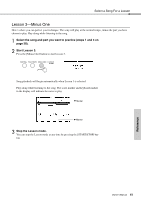
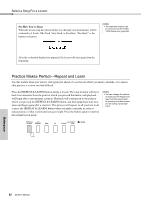
4 Start Lesson 1. Press the [Waiting] button to start Lesson 1. Select a Song For a Lesson Reference Song playback will begin automatically when you select Lesson 1. Play the notes shown in the on-screen score. The next note to be played is indicated by a dot () on the appropriate key of the graphic on-screen keyboard. When you play the correct note the marker will move to the next key to be played. Playback will pause and wait for you to play the correct note. The triangular marker () above the score indicates playback progress. Marker Marker Shifting the keyboard left or right. The hidden ( ) areas of the keyboard can be brought into view by pressing the [+] or [-] button The displayed range (61 keys) Actual keyboard range (DGX-640 = 88 keys) 61 keys of the keyboard's range are shown on the display. The DGX-640 actually have 88 keys. In some songs that include very high or low notes, those notes may fall outside the displayed range and may not be shown on the display. In such cases an "over" indicator appear to the left or right of the graphic keyboard. Use the [+] or [-] button to shift the keyboard left or right so you can see the notes (the marker will appear on the appropriate key in the display). Notes that actually fall outside the keyboard's range cannot be used in the lesson. 5 Stop the Lesson mode. You can stop the Lesson mode at any time by pressing the [START/STOP] button. Owner's Manual 39
-
 1
1 -
2
-
3
-
4
-
5
-
6
-
7
-
8
-
9
-
10
-
11
-
12
-
13
-
14
-
15
-
16
-
17
-
18
-
19
-
20
-
21
-
22
-
23
-
24
-
25
-
26
-
27
-
28
-
29
-
30
-
31
-
32
-
33
-
 34
34 -
 35
35 -
 36
36 -
 37
37 -
 38
38 -
 39
39 -
 40
40 -
 41
41 -
 42
42 -
 43
43 -
 44
44 -
45
-
46
-
47
-
48
-
49
-
50
-
51
-
52
-
53
-
54
-
55
-
56
-
57
-
58
-
59
-
60
-
61
-
62
-
63
-
64
-
65
-
66
-
67
-
68
-
69
-
70
-
71
-
72
-
73
-
74
-
75
-
76
-
77
-
78
-
79
-
80
-
81
-
82
-
83
-
84
-
85
-
86
-
87
-
88
-
89
-
90
-
91
-
92
-
93
-
94
-
95
-
96
-
97
-
98
-
99
-
100
-
101
-
102
-
103
-
104
-
105
-
106
-
107
-
108
-
109
-
110
-
111
-
112
-
113
-
114
-
115
-
116
-
117
-
118
-
119
-
120
 |
 |