Yamaha DKC-850 Operation Manual - Page 18
Getting Started, Checking the Type of Your Piano - connect
 |
View all Yamaha DKC-850 manuals
Add to My Manuals
Save this manual to your list of manuals |
Page 18 highlights
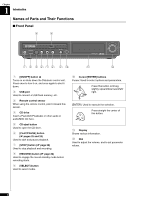
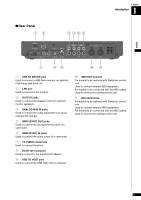
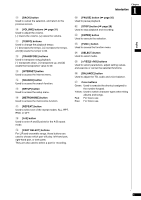
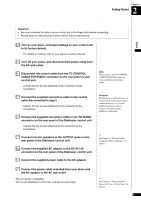
English Chapter 2 Getting Started This chapter describes instructions for connecting with your Disklavier piano and other preparation. Checking the Type of Your Piano The Disklavier control unit can be connected to several models of the Yamaha Disklavier pianos, however, connections and setup procedures vary depending on the piano model. Check the model number on the existing control unit and find your piano model following the descriptions below before connecting. Note: The model number of the control unit is on the upper part of the display. ■ Models to be Replaced with the Disklavier Control Unit If you are using the piano listed below, replace the existing control unit with the Disklavier control unit. Models Upright pianos Disklavier Mark II XG Series Grand pianos Disklavier Mark II XG Series (MX600) Disklavier Mark III Series (DU1A) Disklavier Mark II XG Series Disklavier Mark III Series Full-Function Models Disklavier Mark III Series Standard Models Disklavier Mark III Series PRO Models Disklavier Mark III Series Playback Models Model Number on the Control Unit DKC500R, DKC500RXG, DKC500RW, DKC500RWXG DKC50R DKC55RCD DKC500R, DKC500RXG, DKC500RW, DKC500RWXG DKC55RCD DKC60RCD DKC55RCD DKC55, DKC55CD For details on connections and setup, see Chapter 2 "Getting Started - Replacing the Existing Control Unit with the Disklavier Control Unit" on page 8. Note: You can also connect the piano listed above with the Disklavier control unit using the MIDI cables. However, you cannot use Internet Direct Connection when connected with the MIDI cables. ■ Models to be Connected with the MIDI Cables If you are using the piano listed below, connect your piano to the Disklavier control unit with the MIDI cables. Models Upright pianos Grand pianos Disklavier Mark II Series Disklavier Mark II Series Model Number on the Control Unit DKC100R or built-in DKC100R For details on connections and setup, see Chapter 2 "Getting Started - Connecting the Disklavier Control Unit with the MIDI Cables" on page 10. Note: You cannot replace the control unit of the piano listed above with the Disklavier control unit. Note: You cannot use Internet Direct Connection on the piano listed above. 7
-
 1
1 -
2
-
3
-
4
-
5
-
6
-
7
-
8
-
9
-
10
-
11
-
12
-
 13
13 -
 14
14 -
 15
15 -
 16
16 -
 17
17 -
 18
18 -
 19
19 -
 20
20 -
 21
21 -
 22
22 -
 23
23 -
24
-
25
-
26
-
27
-
28
-
29
-
30
-
31
-
32
-
33
-
34
-
35
-
36
-
37
-
38
-
39
-
40
-
41
-
42
-
43
-
44
-
45
-
46
-
47
-
48
-
49
-
50
-
51
-
52
-
53
-
54
-
55
-
56
-
57
-
58
-
59
-
60
-
61
-
62
-
63
-
64
-
65
-
66
-
67
-
68
-
69
-
70
-
71
-
72
-
73
-
74
-
75
-
76
-
77
-
78
-
79
-
80
-
81
-
82
-
83
-
84
-
85
-
86
-
87
-
88
 |
 |
