Yamaha DKC-850 Operation Manual - Page 20
Connect monitor speakers to the OUTPUT jacks on - manual
 |
View all Yamaha DKC-850 manuals
Add to My Manuals
Save this manual to your list of manuals |
Page 20 highlights
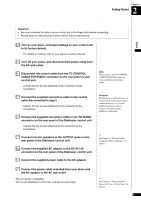
Chapter 2 Getting Started English Important • Be sure to backup the data on your control unit to the floppy disk before connecting. • Please keep the disconnected control unit for future maintenance. 1 Turn on your piano, and reset settings on your control unit to its factory default. For details on setting, refer to your piano's owner's manual. 2 Turn off your piano, and disconnect the power cable from the AC wall outlet. 3 Disconnect the control cable from the TO CONTROL CABLE FOR PIANO connector on the rear panel of your control unit. Loosen the two screws attached to the connector by the screwdriver. 4 Connect the supplied conversion cable to the control cable disconnected in step 2. Tighten the two screws attached to the connector by the screwdriver. 5 Connect the supplied conversion cable to the TO PIANO connector on the rear panel of the Disklavier control unit. Tighten the two screws attached to the connector by the screwdriver. 6 Connect monitor speakers to the OUTPUT jacks on the rear panel of the Disklavier control unit. 7 Connect the supplied AC adaptor to the DC-IN 12V connector on the rear panel of the Disklavier control unit. 8 Connect the supplied power cable to the AC adaptor. Note: The location of the TO CONTROL CABLE FOR PIANO connector varies depending on the piano model. Attention: The Disklavier control unit does not work properly if the control cable is connected directly to it. Use the supplied conversion cable to connect your piano and the Disklavier control unit. See Chapter 2 "Getting Started - Connecting Monitor Speakers" on page 12. 9 Connect the power cable extended from your piano and the AC adaptor to the AC wall outlet. The connection completed. Turn on the Disklavier control unit, and set the piano type. See Chapter 2 "Getting Started - Setting the Type of Your Piano" on page 15. 9
-
 1
1 -
2
-
3
-
4
-
5
-
6
-
7
-
8
-
9
-
10
-
11
-
12
-
13
-
14
-
 15
15 -
 16
16 -
 17
17 -
 18
18 -
 19
19 -
 20
20 -
 21
21 -
 22
22 -
 23
23 -
 24
24 -
 25
25 -
26
-
27
-
28
-
29
-
30
-
31
-
32
-
33
-
34
-
35
-
36
-
37
-
38
-
39
-
40
-
41
-
42
-
43
-
44
-
45
-
46
-
47
-
48
-
49
-
50
-
51
-
52
-
53
-
54
-
55
-
56
-
57
-
58
-
59
-
60
-
61
-
62
-
63
-
64
-
65
-
66
-
67
-
68
-
69
-
70
-
71
-
72
-
73
-
74
-
75
-
76
-
77
-
78
-
79
-
80
-
81
-
82
-
83
-
84
-
85
-
86
-
87
-
88
 |
 |