Yamaha DTX452K DTX402K/DTX432K/DTX452K Owners Manual - Page 52
Pedal Type, 5. Gain, 6. Minimum Level
 |
View all Yamaha DTX452K manuals
Add to My Manuals
Save this manual to your list of manuals |
Page 52 highlights
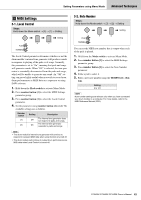
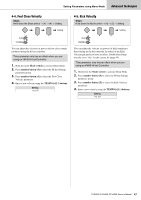
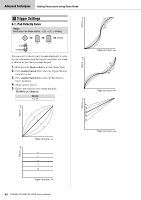
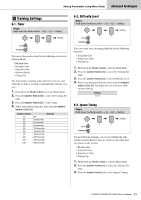
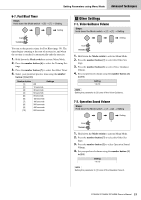
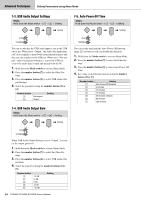
Advanced Techniques Setting Parameters using Menu Mode 5-4. Pedal Type Steps: Hold down the Mode switch [5] [4] Setting Setting 5-5. Gain Steps: Hold down the Mode switch [5] [5] Setting Setting Use the following parameter to specify the types of pedals (i.e., hi-hat controller and kick) connected to your drum module. 1. Hold down the Mode switch to activate Menu Mode. 2. Press number button [5] to select the Trigger Settings parameter group. 3. Press number button [4] to select the Pedal Types parameter. 4. Select a new pedal type combination using the corre- sponding number button [1] to [5]. Number button [1] [2] [3] [4] [5] Setting Hi-hat controller Kick pedal Automatic identification (only for [2] and [3]) HH65 KP65 HH40 KU100 HH40 KP65 HH65 KU100 NOTE • This parameter can normally be set to [1] (automatic identification). • When set to [1], the drum module will automatically identify the type of pedal that came with your electronic drum kit when it is turned on. If you then press and hold number button [1], the drum module will flash number button [2] or [3] to indicate the result of automatic identification. • Connect the hi-hat controller before turning on the drum module. Please do not turn the drum module on with the hi-hat controller depressed. The drum module can not identify the type of pedal properly and it causes that the kick may produce much smaller sound than expected. • Whenever you change the type of hi-hat controller or kick pedal connected to the drum module, please update this setting using the corresponding number button [2] to [5]. You can set the gain level for trigger signals output from individual pads. The higher the gain setting, the louder the sounds produced by light drumming. 1. Hold down the Mode switch to activate Menu Mode. 2. Press number button [5] to select the Trigger Settings parameter group. 3. Press number button [5] to select the Gain parameter. 4. Strike a pad to select it. 5. Enter a new gain level using the TEMPO[+]/[-] but- tons. Setting 1 to 127 5-6. Minimum Level Steps: Hold down the Mode switch [5] [6] Setting Setting When the strength with which you strike a pad is no more than this level, the pad will not output a trigger signal in response and no sound will be produced. 1. Hold down the Mode switch to activate Menu Mode. 2. Press number button [5] to select the Trigger Settings parameter group. 3. Press number button [6] to select the Minimum Level parameter. 4. Strike a pad to select it. 5. Enter a new setting (%) using the TEMPO[+]/[-] but- tons. Setting 0 to 99 (%) 50 DTX402K DTX432K DTX452K Owner's Manual
-
 1
1 -
2
-
3
-
4
-
5
-
6
-
7
-
8
-
9
-
10
-
11
-
12
-
13
-
14
-
15
-
16
-
17
-
18
-
19
-
20
-
21
-
22
-
23
-
24
-
25
-
26
-
27
-
28
-
29
-
30
-
31
-
32
-
33
-
34
-
35
-
36
-
37
-
38
-
39
-
40
-
41
-
42
-
43
-
44
-
45
-
46
-
 47
47 -
 48
48 -
 49
49 -
 50
50 -
 51
51 -
 52
52 -
 53
53 -
 54
54 -
 55
55 -
 56
56 -
 57
57 -
58
-
59
-
60
-
61
-
62
-
63
-
64
-
65
-
66
-
67
-
68
-
69
-
70
-
71
-
72
 |
 |
