Yamaha PSR-2700 Owner's Manual - Page 27
Setting the Auto Accompaniment Split Point, Auto Accompaniment Fingering
 |
View all Yamaha PSR-2700 manuals
Add to My Manuals
Save this manual to your list of manuals |
Page 27 highlights
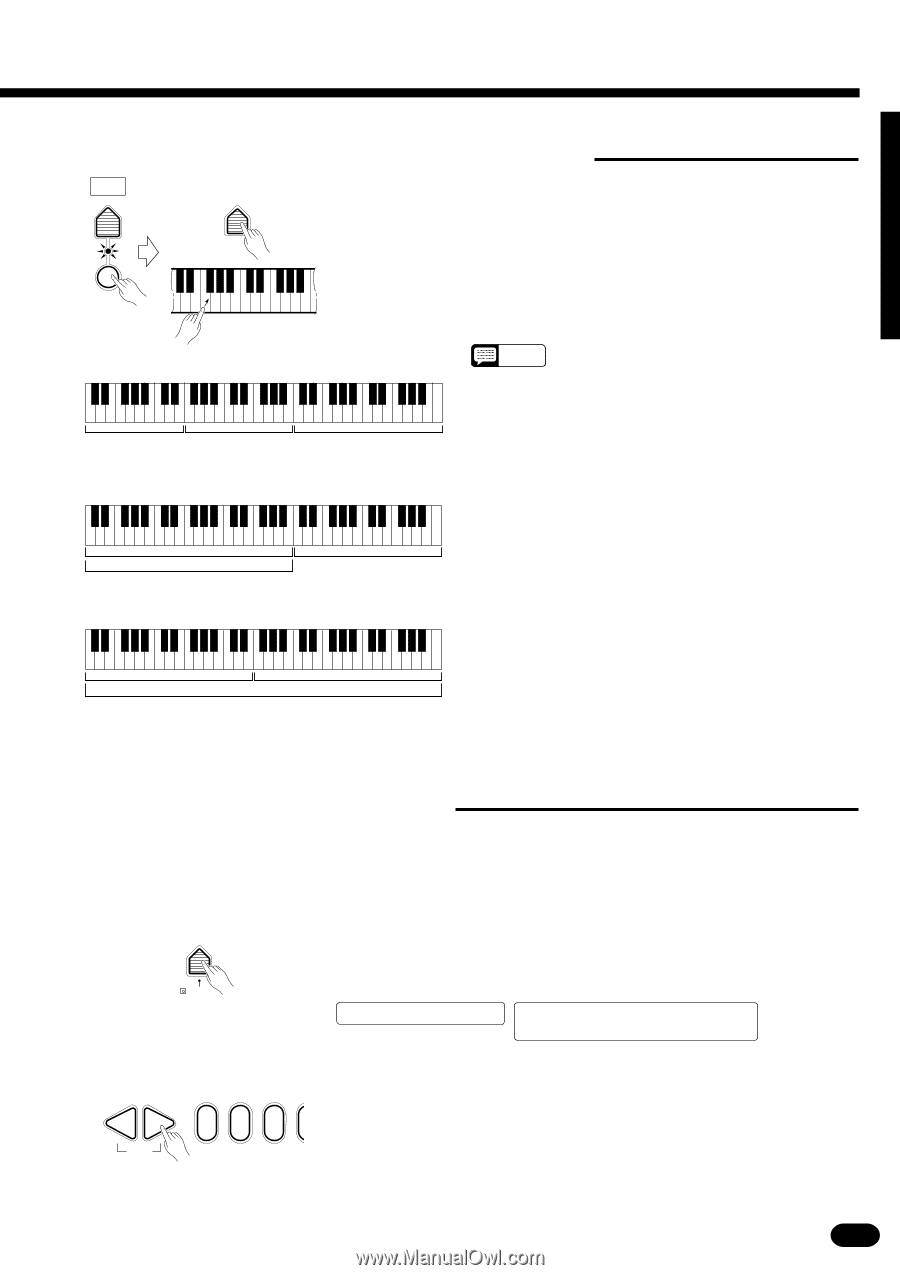
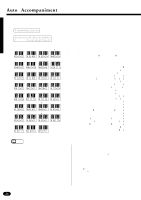
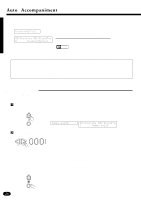
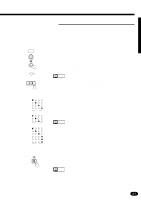
s Setting the Auto Accompaniment Split Point STYLE SELECT SPLIT To set the Auto Accompaniment split point, first turn Auto Accompani- POINT ment ON - press the [AUTO ACCOMP] button so that its indicator lights - then proceed with steps 2 and 3 as described in "Split Point Change" on page 20. The default Auto Accompaniment split point (55) can be instantly recalled by pressing both the [+] and [-] buttons at the same time. AUTO ACCOMP Auto Accompaniment split point w Orchestration split point w Auto Accompaniment Left voice Right voice NOTES • If the Auto Accompaniment split point is set at a lower key than the orchestration split point, the L1 and/or L2 voice will sound between the Auto Accompaniment and orchestration split points. Orchestration split point w Left voice Auto Accompaniment Auto Accompaniment split point w Right voice • If the Auto Accompaniment split point is set at a higher key than the orchestration split point, the L1 and/or L2 voice will sound throughout the entire Auto Accompaniment section. Orchestration split point w Left voice Right voice Auto Accompaniment • If the Auto Accompaniment "Full" fingering mode is selected, the L1 and/or L2 voice will sound to the left of the orchestration split point while the R1 and/or R2 voice will sound to the right of the orchestration split point. s Auto Accompaniment Fingering The PSR-1700 and PSR-2700 have 5 Auto Accompaniment fingering modes, selected via the [FINGERING] button. ZPress the [FINGERING] Button ... FINGERING When you press the [FINGERING] button the currently selected Auto Accompaniment fingering number and type name will appear on the LCD display panel. ....M...O...D...E... 1 CHORD 1 2 CHORD 2 3 SINGLE 4 MULTI 5 FULL PSR-1700 Fingrng=1-:Chord1 PSR-2700 08:Showtune 001:GrandPno C Fingrng=1-:Chord1 XSelect a Fingering Mode ... -+ RESET 012 Use the [+] and [-] buttons, the number buttons, the data dial, or the [FINGERING] button itself to select the required fingering mode (see page 9 for editing procedure details). 25
-
 1
1 -
2
-
3
-
4
-
5
-
6
-
7
-
8
-
9
-
10
-
11
-
12
-
13
-
14
-
15
-
16
-
17
-
18
-
19
-
20
-
21
-
 22
22 -
 23
23 -
 24
24 -
 25
25 -
 26
26 -
 27
27 -
 28
28 -
 29
29 -
 30
30 -
 31
31 -
 32
32 -
33
-
34
-
35
-
36
-
37
-
38
-
39
-
40
-
41
-
42
-
43
-
44
-
45
-
46
-
47
-
48
-
49
-
50
-
51
-
52
-
53
-
54
-
55
-
56
-
57
-
58
-
59
-
60
-
61
-
62
-
63
-
64
-
65
-
66
-
67
-
68
-
69
-
70
-
71
-
72
-
73
-
74
-
75
-
76
-
77
-
78
-
79
-
80
-
81
-
82
-
83
-
84
-
85
-
86
-
87
-
88
-
89
-
90
-
91
-
92
-
93
-
94
 |
 |