Yamaha PSR-550 Owner's Manual - Page 117
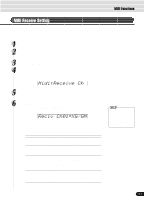
Initial Data Send, Midi:Clock, Clock =Int, Midi:Init Send, Init Send OK?, Completed
 |
View all Yamaha PSR-550 manuals
Add to My Manuals
Save this manual to your list of manuals |
Page 117 highlights
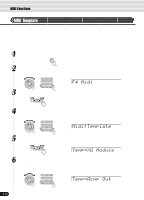
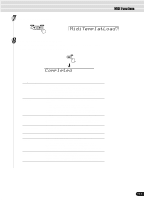
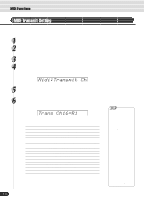
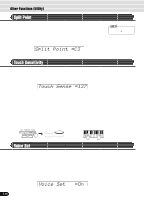
3 Press the [NEXT] button to display the MIDI screen. 4 Select "Clock." Use the data dial, the [+/YES] button or the [-/NO] button. Midi:Clock 5 Press the [NEXT] button to display the Clock screen. 6 Set the Clock to "Int" or "Ext." Use the data dial, the [+/YES] button or the [-/NO] button. Midi Clock =Int MIDI Functions • The default Clock setting (factory setting) is "Int." • When the Clock setting is "Ext," auto accompaniment playback cannot be started via the panel [START/STOP] button. Also, Multi Pad playback cannot be initiated by pressing the any of the Multi Pads. • When the Clock setting is "Ext", "EC" will appear on the TEMPO display, and tempo cannot be changed with the panel button. Initial Data Send Transmits all current panel settings to a second PSR-550 or a MIDI data storage device. If you want to have the song play back with the panel settings used for recording, execute the Initial Data Send function before recording the performance on the PSR550 to an external sequencer. 1 Press the [FUNCTION] button. 2 Select "Midi." Use the data dial, the [+/YES] button or the [-/NO] button. 3 Press the [NEXT] button to display the MIDI screen. 4 Select "Init Send." Use the data dial, the [+/YES] button or the [-/NO] button. Midi:Init Send 5 Press the [NEXT] button to display the Init Send screen. 6 Execute the Init Send operation. Press the [+/YES] button to execute the Init Send operation. To abort the operation, press the [-/NO] button. Init Send OK? Completed 117 115
-
 1
1 -
2
-
3
-
4
-
5
-
6
-
7
-
8
-
9
-
10
-
11
-
12
-
13
-
14
-
15
-
16
-
17
-
18
-
19
-
20
-
21
-
22
-
23
-
24
-
25
-
26
-
27
-
28
-
29
-
30
-
31
-
32
-
33
-
34
-
35
-
36
-
37
-
38
-
39
-
40
-
41
-
42
-
43
-
44
-
45
-
46
-
47
-
48
-
49
-
50
-
51
-
52
-
53
-
54
-
55
-
56
-
57
-
58
-
59
-
60
-
61
-
62
-
63
-
64
-
65
-
66
-
67
-
68
-
69
-
70
-
71
-
72
-
73
-
74
-
75
-
76
-
77
-
78
-
79
-
80
-
81
-
82
-
83
-
84
-
85
-
86
-
87
-
88
-
89
-
90
-
91
-
92
-
93
-
94
-
95
-
96
-
97
-
98
-
99
-
100
-
101
-
102
-
103
-
104
-
105
-
106
-
107
-
108
-
109
-
110
-
111
-
 112
112 -
 113
113 -
 114
114 -
 115
115 -
 116
116 -
 117
117 -
 118
118 -
 119
119 -
 120
120 -
 121
121 -
 122
122 -
123
-
124
-
125
-
126
-
127
-
128
-
129
-
130
-
131
-
132
-
133
-
134
-
135
-
136
-
137
-
138
-
139
-
140
-
141
-
142
-
143
-
144
-
145
-
146
-
147
-
148
-
149
-
150
-
151
-
152
-
153
-
154
-
155
-
156
-
157
-
158
-
159
-
160
 |
 |
