Yamaha SW1000XG SW1000XG Owners Manual - Page 19
Installing XG Plug-In Software
 |
View all Yamaha SW1000XG manuals
Add to My Manuals
Save this manual to your list of manuals |
Page 19 highlights
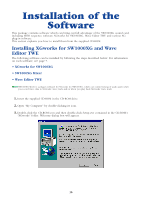
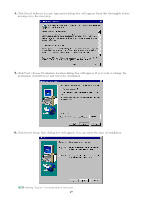
Installing XG Plug-In Software The following software can be installed by following the steps described below. For information on each software, see page 7. • VL Visual Editor • VH Effect Editor • DX Easy Editor & DX Simulator n Before installing the XG plug-in software, make sure that the XGworks for SW1000XG is installed in the computer. 1. Insert the supplied CD-ROM in the CD-ROM drive. 2. Open "My Computer" by double-clicking its icon. 3. Double-click the CD-ROM icon and then double-click Setup.exe contained in the CD-ROM's "Plug" folder. Welcome dialog box will appear. 4. Click [Next]. Software License Agreement dialog box will appear. Read this thoroughly before moving on to the next step. 19
-
 1
1 -
2
-
3
-
4
-
5
-
6
-
7
-
8
-
9
-
10
-
11
-
12
-
13
-
 14
14 -
 15
15 -
 16
16 -
 17
17 -
 18
18 -
 19
19 -
 20
20 -
 21
21 -
 22
22 -
 23
23 -
 24
24 -
25
-
26
-
27
-
28
-
29
-
30
-
31
-
32
-
33
-
34
-
35
-
36
-
37
-
38
-
39
-
40
-
41
-
42
-
43
-
44
-
45
-
46
-
47
-
48
 |
 |

19
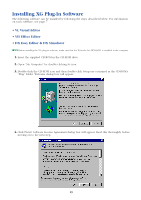
Installing XG Plug-In Software
The following software can be installed by following the steps described below. For information
on each software, see page 7.
• VL Visual Editor
• VH Effect Editor
• DX Easy Editor & DX Simulator
n
Before installing the XG plug-in software, make sure that the XGworks for SW1000XG is installed in the computer.
1.
Insert the supplied CD-ROM in the CD-ROM drive.
2.
Open “My Computer” by double-clicking its icon.
3.
Double-click the CD-ROM icon and then double-click Setup.exe contained in the CD-ROM’s
“Plug” folder. Welcome dialog box will appear.
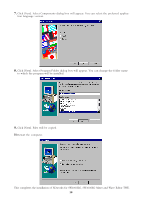
4.
Click [Next]. Software License Agreement dialog box will appear. Read this thoroughly before
moving on to the next step.