ZyXEL PLA4231 User Guide - Page 13
The WPS Button, 2.1 WPS Overview, 2.2 How to Use the WPS Button - configuration
 |
View all ZyXEL PLA4231 manuals
Add to My Manuals
Save this manual to your list of manuals |
Page 13 highlights
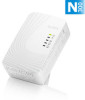
CHAPTER 2 The WPS Button 2.1 WPS Overview Your PLA4231 supports Wi-Fi Protected Setup (WPS), which is an easy way to set up a secure wireless network. WPS is an industry standard specification, defined by the Wi-Fi Alliance. WPS allows you to quickly set up a wireless network with strong security, without having to configure security settings manually. Each WPS connection works between two devices. Both devices must support WPS (check each device's documentation to make sure). Depending on the devices you have, you can either press a button (on the device itself, or in its configuration utility) or enter a PIN (a unique Personal Identification Number that allows one device to authenticate the other) in each of the two devices. When WPS is activated on a device, it has two minutes to find another device that also has WPS activated. Then, the two devices connect and set up a secure network by themselves. 2.2 How to Use the WPS Button You can use the WPS button on the side panel of the PLA4231 to activate WPS. 1 Make sure the power LED and the WLAN LED are on (not blinking). 2 To copy wireless settings (SSID and wireless security key for example) from an access point (AP) or wireless router, press the WPS button for longer than five seconds and release it. The WLAN LED begins to blink. To connect a WPS-enabled wireless client (such as your computer with a WPS-enabled wireless adapter) to the PLA4231 via Wi-Fi or to the existing wireless network through the PLA4231, press the WPS button for two or three seconds and release it. The WLAN LED begins to blink. 3 Press the WPS button on another WPS-enabled device within range of the PLA4231. 4 The WLAN LED turns steady on when WPS was successful. The WLAN LED will be off for about ten seconds if WPS has failed, and comes on again. Note: You must activate WPS in the PLA4231 and in another wireless device within two minutes of each other. PLA4231 User's Guide 13
-
 1
1 -
2
-
3
-
4
-
5
-
6
-
7
-
 8
8 -
 9
9 -
 10
10 -
 11
11 -
 12
12 -
 13
13 -
 14
14 -
 15
15 -
 16
16 -
 17
17 -
 18
18 -
19
-
20
-
21
-
22
-
23
-
24
-
25
-
26
-
27
-
28
-
29
-
30
-
31
-
32
-
33
-
34
-
35
-
36
-
37
-
38
-
39
-
40
-
41
-
42
-
43
-
44
-
45
-
46
-
47
-
48
-
49
-
50
-
51
-
52
-
53
-
54
-
55
-
56
-
57
-
58
-
59
-
60
-
61
-
62
-
63
-
64
-
65
-
66
-
67
-
68
-
69
-
70
-
71
-
72
-
73
-
74
-
75
-
76
-
77
-
78
-
79
-
80
-
81
-
82
-
83
-
84
-
85
-
86
-
87
-
88
-
89
-
90
-
91
-
92
-
93
-
94
-
95
-
96
-
97
-
98
-
99
-
100
-
101
-
102
-
103
-
104
-
105
-
106
-
107
-
108
-
109
-
110
-
111
-
112
-
113
-
114
-
115
-
116
-
117
-
118
-
119
-
120
-
121
-
122
-
123
-
124
 |
 |