eMachines M5414 eMachines 5000 Series Notebook User's Guide - Page 59
hard drive assembly, backup CD onto your new hard drive.
 |
View all eMachines M5414 manuals
Add to My Manuals
Save this manual to your list of manuals |
Page 59 highlights
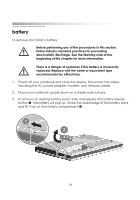
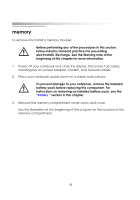
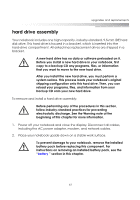
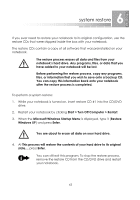
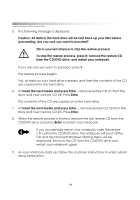
upgrades and replacements hard drive assembly Your notebook includes one high-capacity, industry-standard, 9.5-mm IDE hard disk drive. This hard drive is housed in a bracket, which is inserted into the hard-drive compartment. All eMachines replacement drives are shipped in a bracket. A new hard drive has no data or software preloaded on it. Before you install a new hard drive in your notebook, first copy to a backup CD any programs, files, or information that you want to move to the new hard drive. After you install the new hard drive, you must perform a system restore. This process loads your notebook's original shipping configuration onto this hard drive. Then, you can reload your programs, files, and information from your backup CD onto your new hard drive. To remove and install a hard drive assembly: Before performing any of the procedures in this section, follow industry-standard practices for preventing electrostatic discharge. See the Warning note at the beginning of this chapter for more information. 1. Power off your notebook and close the display. Disconnect all cables, including the AC power adapter, modem, and network cables. 2. Place your notebook upside down on a stable work surface. To prevent damage to your notebook, remove the installed battery pack before replacing this component. For instructions on removing an installed battery pack, see the "battery " section in this chapter. 61
-
 1
1 -
2
-
3
-
4
-
5
-
6
-
7
-
8
-
9
-
10
-
11
-
12
-
13
-
14
-
15
-
16
-
17
-
18
-
19
-
20
-
21
-
22
-
23
-
24
-
25
-
26
-
27
-
28
-
29
-
30
-
31
-
32
-
33
-
34
-
35
-
36
-
37
-
38
-
39
-
40
-
41
-
42
-
43
-
44
-
45
-
46
-
47
-
48
-
49
-
50
-
51
-
52
-
53
-
 54
54 -
 55
55 -
 56
56 -
 57
57 -
 58
58 -
 59
59 -
 60
60 -
 61
61 -
 62
62 -
 63
63 -
 64
64 -
65
-
66
-
67
-
68
-
69
-
70
-
71
-
72
-
73
-
74
-
75
-
76
-
77
-
78
 |
 |