eMachines M5414 eMachines 5000 Series Notebook User's Guide - Page 61
system restore, Start > Turn Off Computer > Restart
 |
View all eMachines M5414 manuals
Add to My Manuals
Save this manual to your list of manuals |
Page 61 highlights
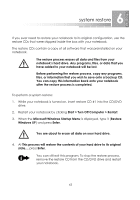
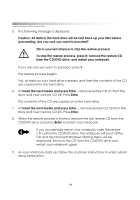
6 system restore If you ever need to restore your notebook to its original configuration, use the restore CDs that were shipped inside the box with your notebook. The restore CDs contain a copy of all software that was preinstalled on your notebook. The restore process erases all data and files from your notebook's hard drive. Any programs, files, or data that you have added to your notebook will be lost. Before performing the restore process, copy any programs, files, or information that you wish to save onto a backup CD. You can copy this information back onto your notebook after the restore process is completed. To perform a system restore: 1. While your notebook is turned on, insert restore CD #1 into the CD/DVD drive. 2. Restart your notebook by clicking Start > Turn Off Computer > Restart. 3. When the Microsoft Windows Startup Menu is displayed, type 1 (Restore Windows XP) and press Enter. You are about to erase all data on your hard drive. 4. At This process will restore the contents of your hard drive to its original state..., press Enter. You can still exit this program. To stop the restore process, remove the restore CD from the CD/DVD drive and restart your notebook. 63
-
 1
1 -
2
-
3
-
4
-
5
-
6
-
7
-
8
-
9
-
10
-
11
-
12
-
13
-
14
-
15
-
16
-
17
-
18
-
19
-
20
-
21
-
22
-
23
-
24
-
25
-
26
-
27
-
28
-
29
-
30
-
31
-
32
-
33
-
34
-
35
-
36
-
37
-
38
-
39
-
40
-
41
-
42
-
43
-
44
-
45
-
46
-
47
-
48
-
49
-
50
-
51
-
52
-
53
-
54
-
55
-
 56
56 -
 57
57 -
 58
58 -
 59
59 -
 60
60 -
 61
61 -
 62
62 -
 63
63 -
 64
64 -
 65
65 -
 66
66 -
67
-
68
-
69
-
70
-
71
-
72
-
73
-
74
-
75
-
76
-
77
-
78
 |
 |