eMachines T3616 eMachines Desktop PC User Guide (Windows XP) - Page 54
Creating an Ethernet network - ethernet driver
 |
View all eMachines T3616 manuals
Add to My Manuals
Save this manual to your list of manuals |
Page 54 highlights
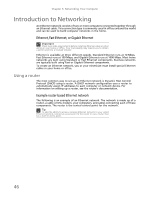
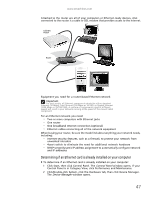
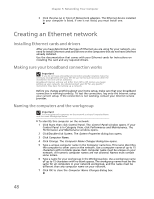
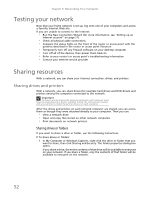
Chapter 5: Networking Your Computer 3 Click the plus (+) in front of Netwcmork adapters. The Ethernet device installed in your computer is listed. If one is not listed, you must install one. Creating an Ethernet network Installing Ethernet cards and drivers After you have determined the type of Ethernet you are using for your network, you need to install Ethernet cards and drivers on the computers that do not have Ethernet already installed. Use the documentation that comes with your Ethernet cards for instructions on installing the card and any required drivers. Making sure your broadband connection works Important If you do not have a broadband connection already installed, make the necessary arrangements with your ISP. Be sure to find out how soon after the installation the line will be activated. Broadband Internet settings will differ from ISP to ISP. Before you begin setting up your network, you should contact your ISP for any specific instructions they have for setting up a network. Before you change anything about your home setup, make sure that your broadband connection is working correctly. To test the connection, log onto the Internet using your current setup. If the connection is not working, contact your Internet service provider. Naming the computers and the workgroup Important You must give each computer on the network a unique Computer Name and the same Workgroup Name. To identify this computer on the network: 1 Click Start, then click Control Panel. The Control Panel window opens. If your Control Panel is in Category View, click Performance and Maintenance. The Performance and Maintenance window opens. 2 Click/Double-click System. The System Properties dialog box opens. 3 Click Computer Name. 4 Click Change. The Computer Name Changes dialog box opens. 5 Type a unique computer name in the Computer name box. This name identifies the computer to other users on the network. Use a computer name of up to 15 characters with no blank spaces. Each computer name must be unique on your network. All-numeric computer names are not allowed. Names must contain some letters. 6 Type a name for your workgroup in the Workgroup box. Use a workgroup name of up to 15 characters with no blank spaces. The workgroup name must be the same for all computers in your network workgroup, and the name must be different than any computer name on your network. 7 Click OK to close the Computer Name Changes dialog box. 48
-
 1
1 -
2
-
3
-
4
-
5
-
6
-
7
-
8
-
9
-
10
-
11
-
12
-
13
-
14
-
15
-
16
-
17
-
18
-
19
-
20
-
21
-
22
-
23
-
24
-
25
-
26
-
27
-
28
-
29
-
30
-
31
-
32
-
33
-
34
-
35
-
36
-
37
-
38
-
39
-
40
-
41
-
42
-
43
-
44
-
45
-
46
-
47
-
48
-
 49
49 -
 50
50 -
 51
51 -
 52
52 -
 53
53 -
 54
54 -
 55
55 -
 56
56 -
 57
57 -
 58
58 -
 59
59 -
60
-
61
-
62
-
63
-
64
-
65
-
66
-
67
-
68
-
69
-
70
-
71
-
72
-
73
-
74
-
75
-
76
-
77
-
78
-
79
-
80
-
81
-
82
-
83
-
84
-
85
-
86
-
87
-
88
-
89
-
90
-
91
-
92
-
93
-
94
 |
 |
