2006 Saab 9-2X Owner's Manual - Page 178
2006 Saab 9-2X Manual
Page 178 highlights
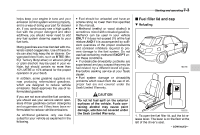
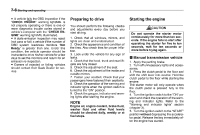
7-6 Starting and operating — A vehicle fails the OBD inspection if the "CHECK ENGINE" warning light/MIL is not properly operating or there is one or more diagnostic trouble codes stored in vehicle's computer with the "CHECK ENGINE" warning light/MIL illuminated. — A state emission inspection may reject (not pass or fail) a vehicle if the number of OBD system readiness monitors "Not Ready" is greater than one. Under this condition, the vehicle operator should be instructed to drive his/her vehicle for a few days to set the monitors and return for an emission re-inspection. — Owners of rejected or failing vehicles should contact their Saab Dealer for service. Preparing to drive You should perform the following checks and adjustments every day before you start driving. 1. Check that all windows, mirrors, and lights are clean and unobstructed. 2. Check the appearance and condition of the tires. Also check tires for proper inflation. 3. Look under the vehicle for any sign of leaks. 4. Check that the hood, trunk and rear liftgate are fully closed. 5. Check the adjustment of the seat. 6. Check the adjustment of the inside and outside mirrors. 7. Fasten your seatbelt. Check that your passengers have fastened their seatbelts. 8. Check the operation of the warning and indicator lights when the ignition switch is turned to the "ON" position. 9. Check the gauges, indicator and warning lights after starting the engine. Starting the engine Do not operate the starter motor continuously for more than ten seconds. If the engine fails to start after operating the starter for five to ten seconds, wait for ten seconds or more before trying again. ¢ Manual transmission vehicle 1. Apply the parking brake. 2. Turn off unnecessary lights and accessories. 3. Press the clutch pedal to the floor and shift the shift lever into neutral. Hold the clutch pedal to the floor while starting the engine. The starter motor will only operate when the clutch pedal is pressed fully to the floor. 4. Turn the ignition switch to the "ON" position and check the operation of the warning and indicator lights. Refer to the "Warning and indicator lights" section (chapter 3). 5. Turn the ignition switch to the "START" position without depressing the accelerator pedal. Release the key immediately after the engine has started. NOTE Engine oil, engine coolant, brake fluid, washer fluid and other fluid levels should be checked daily, weekly or at fuel stops.
-
 1
1 -
2
-
3
-
4
-
5
-
6
-
7
-
8
-
9
-
10
-
11
-
12
-
13
-
14
-
15
-
16
-
17
-
18
-
19
-
20
-
21
-
22
-
23
-
24
-
25
-
26
-
27
-
28
-
29
-
30
-
31
-
32
-
33
-
34
-
35
-
36
-
37
-
38
-
39
-
40
-
41
-
42
-
43
-
44
-
45
-
46
-
47
-
48
-
49
-
50
-
51
-
52
-
53
-
54
-
55
-
56
-
57
-
58
-
59
-
60
-
61
-
62
-
63
-
64
-
65
-
66
-
67
-
68
-
69
-
70
-
71
-
72
-
73
-
74
-
75
-
76
-
77
-
78
-
79
-
80
-
81
-
82
-
83
-
84
-
85
-
86
-
87
-
88
-
89
-
90
-
91
-
92
-
93
-
94
-
95
-
96
-
97
-
98
-
99
-
100
-
101
-
102
-
103
-
104
-
105
-
106
-
107
-
108
-
109
-
110
-
111
-
112
-
113
-
114
-
115
-
116
-
117
-
118
-
119
-
120
-
121
-
122
-
123
-
124
-
125
-
126
-
127
-
128
-
129
-
130
-
131
-
132
-
133
-
134
-
135
-
136
-
137
-
138
-
139
-
140
-
141
-
142
-
143
-
144
-
145
-
146
-
147
-
148
-
149
-
150
-
151
-
152
-
153
-
154
-
155
-
156
-
157
-
158
-
159
-
160
-
161
-
162
-
163
-
164
-
165
-
166
-
167
-
168
-
169
-
170
-
171
-
172
-
 173
173 -
 174
174 -
 175
175 -
 176
176 -
 177
177 -
 178
178 -
 179
179 -
 180
180 -
 181
181 -
 182
182 -
 183
183 -
184
-
185
-
186
-
187
-
188
-
189
-
190
-
191
-
192
-
193
-
194
-
195
-
196
-
197
-
198
-
199
-
200
-
201
-
202
-
203
-
204
-
205
-
206
-
207
-
208
-
209
-
210
-
211
-
212
-
213
-
214
-
215
-
216
-
217
-
218
-
219
-
220
-
221
-
222
-
223
-
224
-
225
-
226
-
227
-
228
-
229
-
230
-
231
-
232
-
233
-
234
-
235
-
236
-
237
-
238
-
239
-
240
-
241
-
242
-
243
-
244
-
245
-
246
-
247
-
248
-
249
-
250
-
251
-
252
-
253
-
254
-
255
-
256
-
257
-
258
-
259
-
260
-
261
-
262
-
263
-
264
-
265
-
266
-
267
-
268
-
269
-
270
-
271
-
272
-
273
-
274
-
275
-
276
-
277
-
278
-
279
-
280
-
281
-
282
-
283
-
284
-
285
-
286
-
287
-
288
-
289
-
290
-
291
-
292
-
293
-
294
-
295
-
296
-
297
-
298
-
299
-
300
-
301
-
302
-
303
-
304
-
305
-
306
-
307
-
308
-
309
-
310
-
311
-
312
-
313
-
314
-
315
-
316
-
317
-
318
-
319
-
320
-
321
-
322
 |
 |
