3Com ADSL Wireless 11g Firewall Router User Guide - Page 18
Using the Rubber Feet, Powering Up the Router, Connecting the Router
 |
UPC - 662705905136
View all 3Com ADSL Wireless 11g Firewall Router manuals
Add to My Manuals
Save this manual to your list of manuals |
Page 18 highlights
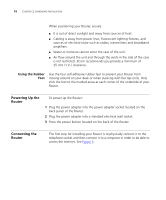
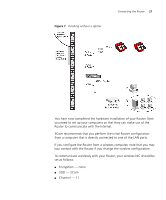
18 CHAPTER 2: HARDWARE INSTALLATION When positioning your Router, ensure: ■ It is out of direct sunlight and away from sources of heat. ■ Cabling is away from power lines, fluorescent lighting fixtures, and sources of electrical noise such as radios, transmitters and broadband amplifiers. ■ Water or moisture cannot enter the case of the unit. ■ Air flow around the unit and through the vents in the side of the case is not restricted. 3Com recommends you provide a minimum of 25 mm (1 in.) clearance. Using the Rubber Feet Use the four self-adhesive rubber feet to prevent your Router from moving around on your desk or when stacking with flat top units. Only stick the feet to the marked areas at each corner of the underside of your Router. Powering Up the Router To power up the Router: 1 Plug the power adapter into the power adapter socket located on the back panel of the Router. 2 Plug the power adapter into a standard electrical wall socket. 3 Press the power button located on the back of the Router. Connecting the Router The first step for installing your Router is to physically connect it to the telephone socket and then connect it to a computer in order to be able to access the Internet. See Figure 5:
-
 1
1 -
2
-
3
-
4
-
5
-
6
-
7
-
8
-
9
-
10
-
11
-
12
-
 13
13 -
 14
14 -
 15
15 -
 16
16 -
 17
17 -
 18
18 -
 19
19 -
 20
20 -
 21
21 -
 22
22 -
 23
23 -
24
-
25
-
26
-
27
-
28
-
29
-
30
-
31
-
32
-
33
-
34
-
35
-
36
-
37
-
38
-
39
-
40
-
41
-
42
-
43
-
44
-
45
-
46
-
47
-
48
-
49
-
50
-
51
-
52
-
53
-
54
-
55
-
56
-
57
-
58
-
59
-
60
-
61
-
62
-
63
-
64
-
65
-
66
-
67
-
68
-
69
-
70
-
71
-
72
-
73
-
74
-
75
-
76
-
77
-
78
-
79
-
80
-
81
-
82
-
83
-
84
-
85
-
86
-
87
-
88
-
89
-
90
-
91
-
92
-
93
-
94
-
95
-
96
-
97
-
98
-
99
-
100
-
101
-
102
-
103
-
104
-
105
-
106
-
107
-
108
-
109
-
110
-
111
-
112
-
113
-
114
-
115
-
116
-
117
-
118
 |
 |
