ASRock FM2A55M-HD RAID Installation Guide - Page 10
Raid 1, Raid 5 And Raid 10.
 |
View all ASRock FM2A55M-HD manuals
Add to My Manuals
Save this manual to your list of manuals |
Page 10 highlights
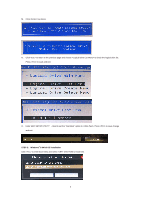
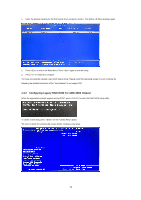
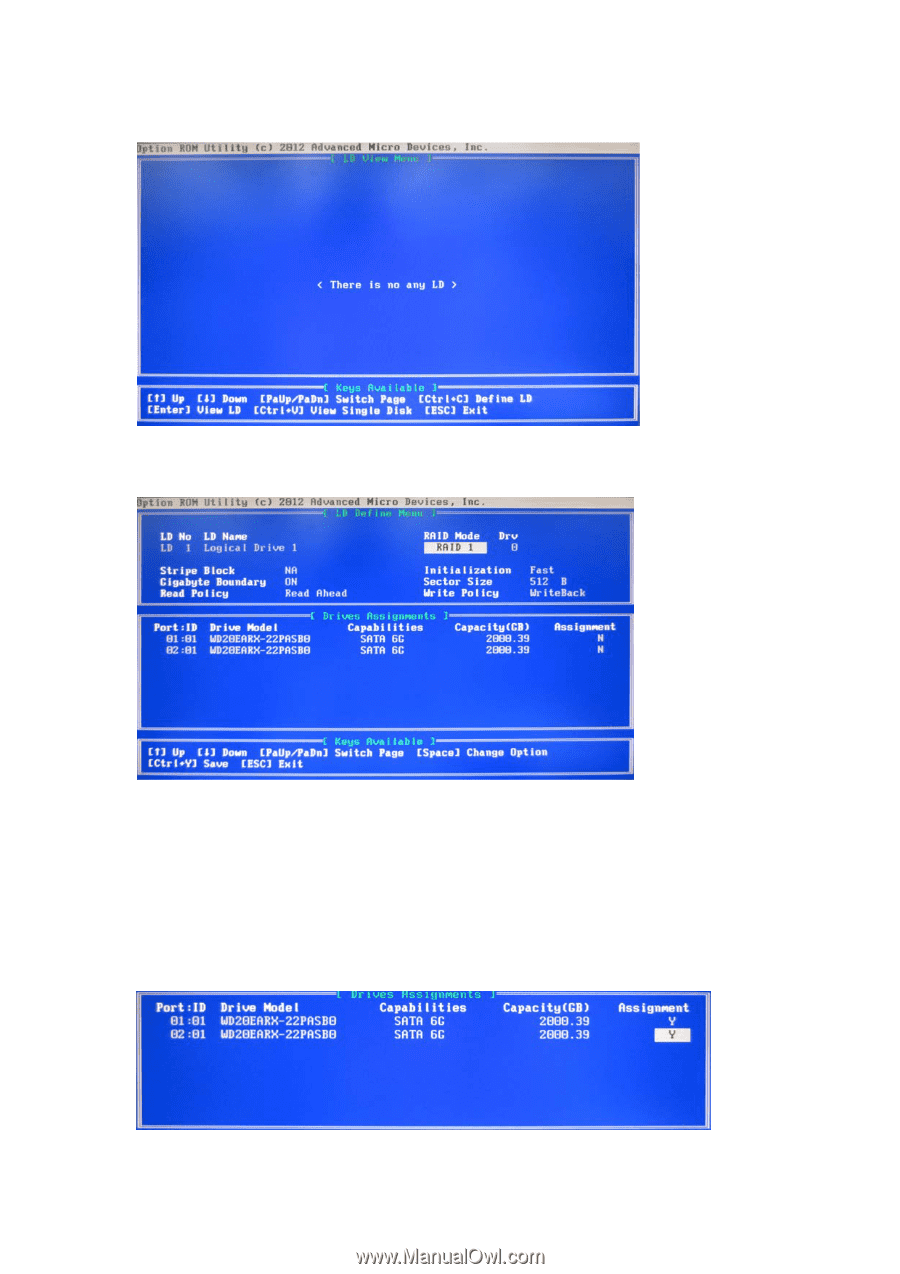
Press 2 on the Main Menu screen to display the Define LD Menu. Press to create a RAID array. Press the arrow keys to highlight an option. Press the spacebar to cycle through logical drive types, including RAID 0, RAID 1, RAID 5 and RAID 10. WARNING!! While you are allowed to use any available RAID level for your bootable logical drive, it is recommended to use RAID 1 for most applications. Press the arrow key to move to Disk Assignments. Press the spacebar to toggle between N and Y for each available drive. Y means this disk drive will be assigned to the logical drive. Assign the appropriate number of disk drives to your logical drive. Then press to save your logical drive configuration. 10
-
 1
1 -
2
-
3
-
4
-
 5
5 -
 6
6 -
 7
7 -
 8
8 -
 9
9 -
 10
10 -
 11
11 -
 12
12 -
 13
13 -
 14
14 -
 15
15 -
16
-
17
-
18
-
19
-
20
-
21
-
22
-
23
-
24
-
25
-
26
-
27
 |
 |
10
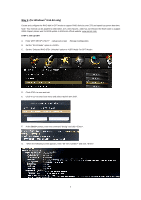
Press 2 on the Main Menu screen to display the Define LD Menu. Press <Ctrl+C> to create a RAID array.
Press the arrow keys to highlight an option. Press the spacebar to cycle through logical drive types, including RAID 0,
RAID 1, RAID 5 and RAID 10.
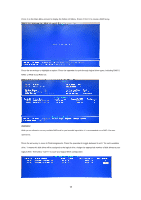
WARNING!!
While you are allowed to use any available RAID level for your bootable logical drive, it is recommended to use RAID 1 for most
applications.
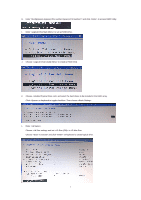
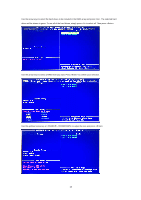
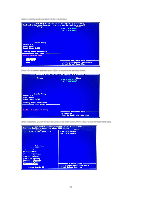
Press the arrow key to move to Disk Assignments. Press the spacebar to toggle between N and Y for each available
drive. Y means this disk drive will be assigned to the logical drive. Assign the appropriate number of disk drives to your
logical drive. Then press <Ctrl-Y> to save your logical drive configuration.