ASRock FM2A55M-HD RAID Installation Guide - Page 6
Way 2, for Windows, 64-bit only - + bios
 |
View all ASRock FM2A55M-HD manuals
Add to My Manuals
Save this manual to your list of manuals |
Page 6 highlights
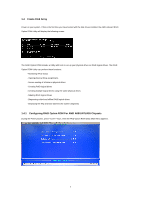
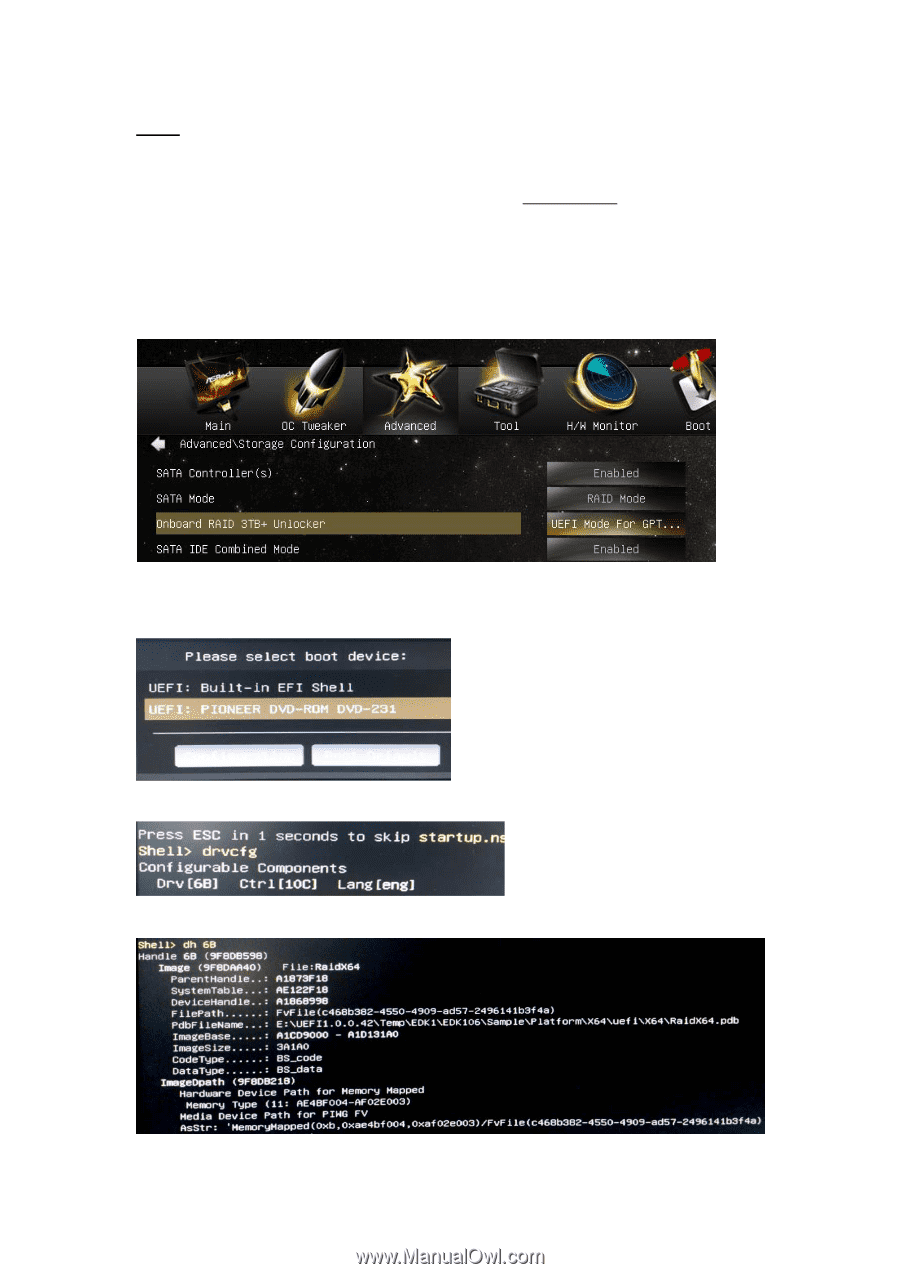
Way 2: (for Windows® 8 64-bit only) Create and configure the RAID disk in GPT mode to support RAID disk size over 2TB and speed up system boot time. Note: This method can be applied to AMD A85X, A75, A55 chipsets. AMD has not released the BIOS code to support A88X chipset, please wait for BIOS update in ASRock's official website: www.asrock.com. STEP 1: Set up UEFI A. Enter UEFI SETUP UTILITY → Advanced screen → Storage Configuration. B. Set the "SATA Mode" option to . C. Set the "Onboard RAID 3TB+ Unlocker" option to . D. Click to save and exit. E. Click to enter boot menu and select "Built-in EFI shell". F. At the Shell> prompt, enter the command "drvcfg" and click . G. When the following screen appears, enter "dh " and click . 6
-
 1
1 -
 2
2 -
 3
3 -
 4
4 -
 5
5 -
 6
6 -
 7
7 -
 8
8 -
 9
9 -
 10
10 -
 11
11 -
 12
12 -
13
-
14
-
15
-
16
-
17
-
18
-
19
-
20
-
21
-
22
-
23
-
24
-
25
-
26
-
27
 |
 |
6
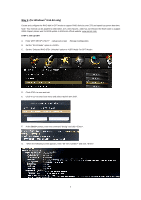
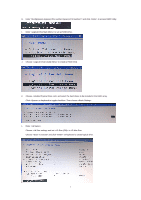
Way 2
:
(for Windows
®
8 64-bit only)
Create and configure the RAID disk in GPT mode to support RAID disk size over 2TB and speed up system boot time.
Note: This method can be applied to AMD A85X, A75, A55 chipsets.
AMD has not released the BIOS code to support
A88X chipset, please wait for BIOS update in ASRock’s official website: www.asrock.com.
STEP 1: Set up UEFI
A.
Enter UEFI SETUP UTILITY → Advanced screen → Storage Configuration.
B.
Set the “SATA Mode” option to <RAID>.
C.
Set the “Onboard RAID 3TB+ Unlocker” option to <UEFI Mode For GPT Mode>.
D.
Click <F10> to save and exit.
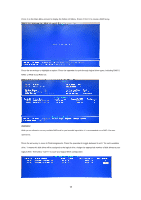
E.
Click <F11> to enter boot menu and select “Built-in EFI shell”.
F.
At the
Shell>
prompt, enter the command “drvcfg” and click <Enter>.
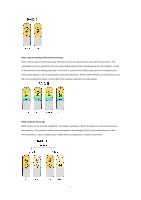
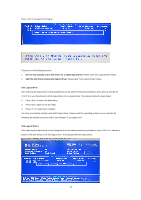
G.
When the following screen appears, enter “dh <Drv number>” and click <Enter>.