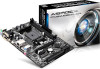
ASRock FM2A55M-HD RAID Installation Guide - Page 5
Installing Windows, 8 64-bit / 7 / 7 64-bit With RAID Functions, Way 1 - dvd
 |
View all ASRock FM2A55M-HD manuals
Add to My Manuals
Save this manual to your list of manuals |
Page 5 highlights
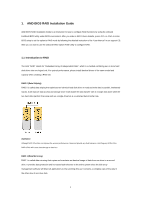
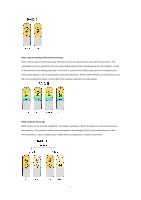
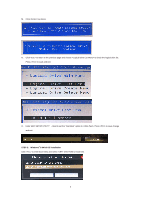
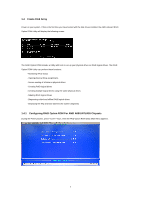
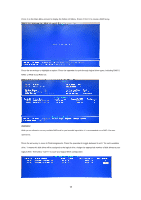
1.3 Installing Windows® 8 / 8 64-bit / 7 / 7 64-bit With RAID Functions If you want to install Windows® 8 / 8 64-bit / 7 / 7 64-bit on a RAID disk composed of 2 or more SATA HDDs with RAID functions, please follow below procedures according to the OS you install. Way 1: Use legacy RAID ROM to create and configure the RAID disk. The RAID disk will be created in MBR mode which the size of the RAID disk is limited to 2TB. For RAID disk size larger than 2TB, please refer to Way 2 (UEFI Mode for GPT partition). STEP 1: Set up UEFI A. During system boot, press or key to enter UEFI setup utility. B. Go to Advanced Storage Configuration. C. Set the "SATA Mode" option to . D. Click to save to exit. STEP 2: Create and configure the RAID disk A. During system boot, press to enter legacy RAID ROM utility. B. Follow the instruction inside the RAID ROM utility to create the target RAID disk. (Please refer to Section 1.4 in this guide for more details) STEP 3: Copy RAID driver to a USB flash drive A. Please install the DVD-ROM into one of the SATA ports 5 ~ 8 which support IDE Combined Mode. B. During system boot, press or key to enter UEFI setup utility. C. Plug a USB drive into one of the USB port. D. Insert the Support CD into the DVD-ROM drive. E. Go to Tools Easy RAID Installer F. Follow instructions to finish the driver copy process. STEP 4: Windows installation A. During Windows installation process, when Disk selection page show up, please click . B. Click to find the driver inside your USB flash drive. C. For 32bit OS, the driver is under /I386 directory. For 64bit OS, the driver is under /AMD64 directly. Please select the correct driver for your Windows version (Windows 7/8/8.1). D. After RAID driver is loaded, the RAID disk will show up. E. Please follow Windows installation instruction to finish the process. 5
-
 1
1 -
 2
2 -
 3
3 -
 4
4 -
 5
5 -
 6
6 -
 7
7 -
 8
8 -
 9
9 -
 10
10 -
 11
11 -
12
-
13
-
14
-
15
-
16
-
17
-
18
-
19
-
20
-
21
-
22
-
23
-
24
-
25
-
26
-
27
 |
 |