Adaptec 1210SA User Guide - Page 29
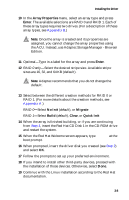
Array Properties, Enter, No Init, Migrate, Build, Clear, Quick Init
 |
UPC - 760884154038
View all Adaptec 1210SA manuals
Add to My Manuals
Save this manual to your list of manuals |
Page 29 highlights
Installing the Driver 10 In the Array Properties menu, select an array type and press Enter. The available selections are RAID 0 and RAID 1. Each of these array types requires two drives. (For a description of these array types, see Appendix B.) Note: Once the array is created and its properties are assigned, you cannot change the array properties using the ACU. Instead, use Adaptec Storage Manager - Browser Edition. 11 Optional-Type in a label for the array and press Enter. 12 RAID 0 only-Select the desired stripe size. Available stripe sizes are 16, 32, and 64 KB (default). Note: Adaptec recommends that you do not change the default. 13 Select between the different creation methods for RAID 0 or RAID 1. (For more details about the creation methods, see Appendix A.) RAID 0-Select No Init (default), or Migrate RAID 1-Select Build (default), Clear, or Quick Init 14 When the array is finished building, or if you are continuing from Step 4, insert the Red Hat CD Disk 1 in the CD-ROM drive and restart the system. 15 When the Red Hat Welcome screen appears, type expert at the boot prompt. 16 When prompted, insert the driver disk you created (see Step 2) and select OK. 17 Follow the prompts to set up your preferred environment. 18 If you intend to install other third-party devices, proceed with the installation of those devices. Otherwise, select Done. 19 Continue with the Linux installation according to the Red Hat documentation. 3-8
-
 1
1 -
2
-
3
-
4
-
5
-
6
-
7
-
8
-
9
-
10
-
11
-
12
-
13
-
14
-
15
-
16
-
17
-
18
-
19
-
20
-
21
-
22
-
23
-
 24
24 -
 25
25 -
 26
26 -
 27
27 -
 28
28 -
 29
29 -
 30
30 -
 31
31 -
 32
32 -
 33
33 -
 34
34 -
35
-
36
-
37
-
38
-
39
-
40
-
41
-
42
-
43
-
44
-
45
-
46
-
47
-
48
-
49
-
50
-
51
-
52
-
53
-
54
-
55
-
56
-
57
-
58
-
59
-
60
-
61
-
62
-
63
-
64
-
65
-
66
-
67
-
68
-
69
-
70
-
71
-
72
-
73
-
74
-
75
-
76
-
77
-
78
-
79
-
80
-
81
-
82
-
83
-
84
-
85
-
86
-
87
-
88
 |
 |
