Asus TRL-DLS TRL-DLS User Manual - Page 71
Intel, Network Driver Installation
 |
View all Asus TRL-DLS manuals
Add to My Manuals
Save this manual to your list of manuals |
Page 71 highlights
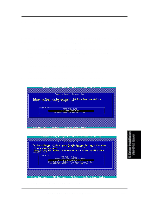
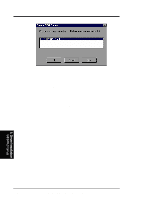
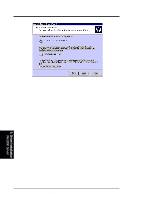
5. OS Driver Installation II. Intel® 82550 Network Driver Installation A. Preparing Intel 82550 LAN Driver Diskette If you need to use a floppy disk to install the on-board Intel 82550 network adapter drivers, use the dcreat.exe utility located in the \Drivers\LAN\MAKEDISK directory in the ASUS Support CD. Make sure you have a 1.44 MB formatted, non-bootable diskette in the floppy drive when using this utility. Choose check bottom of Windows NT4.0 to create Windows NT diskette (two diskette) when appeared create window disk screen. B. New System Installation 1. Press Next when Installing Windows NT Networking screen appears. 2. Select Wired to the Network: Press Next. You can select install IIS or not. 3. Press Select from list........ Insert the PRO/100+ adapter diskette and click Have Disk. CAUTION! Don't let the Windows NT system to detect the on-board network device. The bundled driver cannot support Intel 82550 network controller and will cause the system installation failure. 4. Type A:\ (for floppy) in the dialog box and click OK. Then follow the prompts to complete installation. When the adapter is added you'll see a new adapter "Intel(R) PRO Adapter" listed in the Network adapters list. 5. Click Next to finish and configure any protocols as prompted. C. Existing System Installation 1. Double-click the Network icon in the Control Panel. 2. Select the Adapter tab. 3. Click Add. You'll see a list of adapters. 4. Don't select an adapter from this list. Instead, insert the Intel PRO/100+ Adapter diskette and click Have Disk. 5. Type A:\ (for floppy) in the dialog box and click OK. Then follow the prompts to complete the installation. When the adapter is added you'll see a new adapter listed in the Network adapters list. 5. Driver Installation WinNT4.0 Server ASUS TRL-DLS User's Manual 71
-
 1
1 -
2
-
3
-
4
-
5
-
6
-
7
-
8
-
9
-
10
-
11
-
12
-
13
-
14
-
15
-
16
-
17
-
18
-
19
-
20
-
21
-
22
-
23
-
24
-
25
-
26
-
27
-
28
-
29
-
30
-
31
-
32
-
33
-
34
-
35
-
36
-
37
-
38
-
39
-
40
-
41
-
42
-
43
-
44
-
45
-
46
-
47
-
48
-
49
-
50
-
51
-
52
-
53
-
54
-
55
-
56
-
57
-
58
-
59
-
60
-
61
-
62
-
63
-
64
-
65
-
 66
66 -
 67
67 -
 68
68 -
 69
69 -
 70
70 -
 71
71 -
 72
72 -
 73
73 -
 74
74 -
 75
75 -
 76
76 -
77
-
78
-
79
-
80
-
81
-
82
-
83
-
84
-
85
-
86
 |
 |
