Bernina 740 Manual - Page 21
Bernina 740 Manual
 |
View all Bernina 740 manuals
Add to My Manuals
Save this manual to your list of manuals |
Page 21 highlights
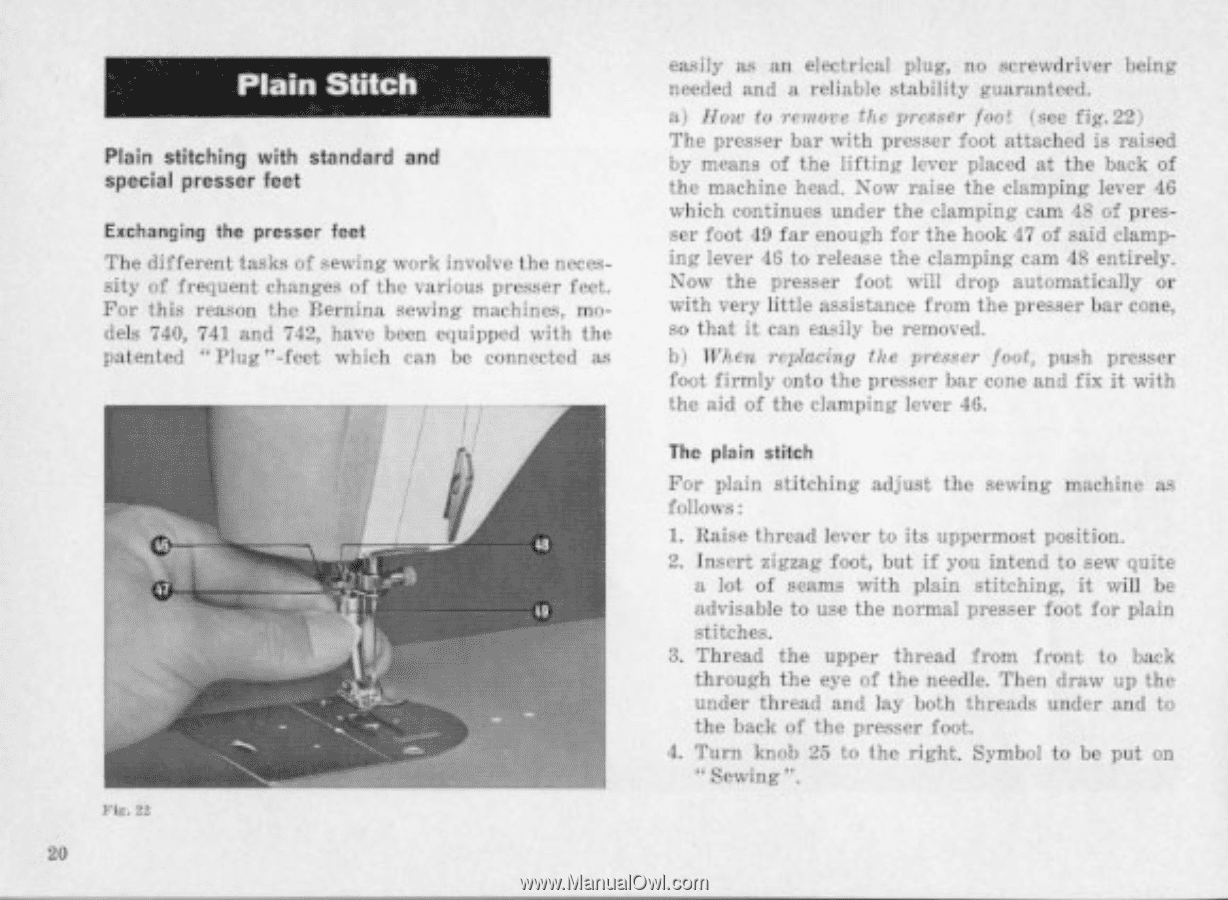
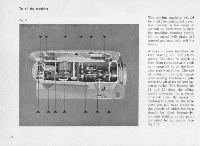
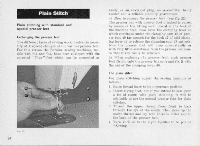
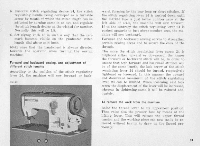
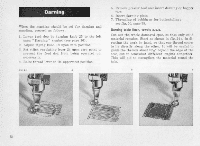
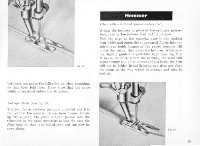
Plain Stitch Plain stitching with standard and spacial pressor feet Exchanging the pressor feet The different tasks of sewing work involve the necessity of frequent changes of the various presser feet. For this reason the Bernina sewing machines, inn. dels 740, 741 and 742, have been equipped with the patented Plug".feet which can be connected as Fit. rt 20 easily as an electrical plug, no screwdriver being needed and a reliable stability guaranteed. a) from ft. rowere the presser foe! I see fig.22) The presser bar with presser foot attached is raised by means of the lifting lever placed at the back of the machine head. Now raise the clamping lever 46 which continues under the clamping cam 48 of presser foot 40 far enough for the hook 47 of said clamping lever 46 to release the clamping cam 48 entirely. Now the presser foot will drop automatically or with very little assistance from the presser bar cone, so that it can easily he removed. hi When replacimp the presser foot, push presser foot firmly onto the presser bar cone and fix it with the aid of the damping lever 16. The plain stitch For plain stitching adjust the sewing machine as follows: 1. Raise thread lever to its uppermost position. 2. Insert zigzag foot. but if you intend to sew quite a lot of seams with plain stitching, it will be advisable to use the normal presser foot for plain stitches. 3, Thread the upper thread from front to back through the eye of the needle. Then draw up the under thread and lay both threads. under and to the back of the prewr foot_ 4. Turn knob 26 to I he right. Symbol to be put on - Sewing".
-
 1
1 -
2
-
3
-
4
-
5
-
6
-
7
-
8
-
9
-
10
-
11
-
12
-
13
-
14
-
15
-
 16
16 -
 17
17 -
 18
18 -
 19
19 -
 20
20 -
 21
21 -
 22
22 -
 23
23 -
 24
24 -
 25
25 -
 26
26 -
27
-
28
-
29
-
30
-
31
-
32
-
33
-
34
-
35
-
36
-
37
-
38
-
39
-
40
-
41
-
42
-
43
-
44
-
45
-
46
-
47
-
48
-
49
-
50
-
51
-
52
-
53
-
54
-
55
-
56
-
57
-
58
-
59
-
60
-
61
-
62
-
63
-
64
-
65
-
66
-
67
-
68
-
69
-
70
-
71
-
72
-
73
-
74
-
75
-
76
-
77
-
78
-
79
 |
 |