Bernina 740 Manual - Page 67
Bernina 740 Manual
 |
View all Bernina 740 manuals
Add to My Manuals
Save this manual to your list of manuals |
Page 67 highlights
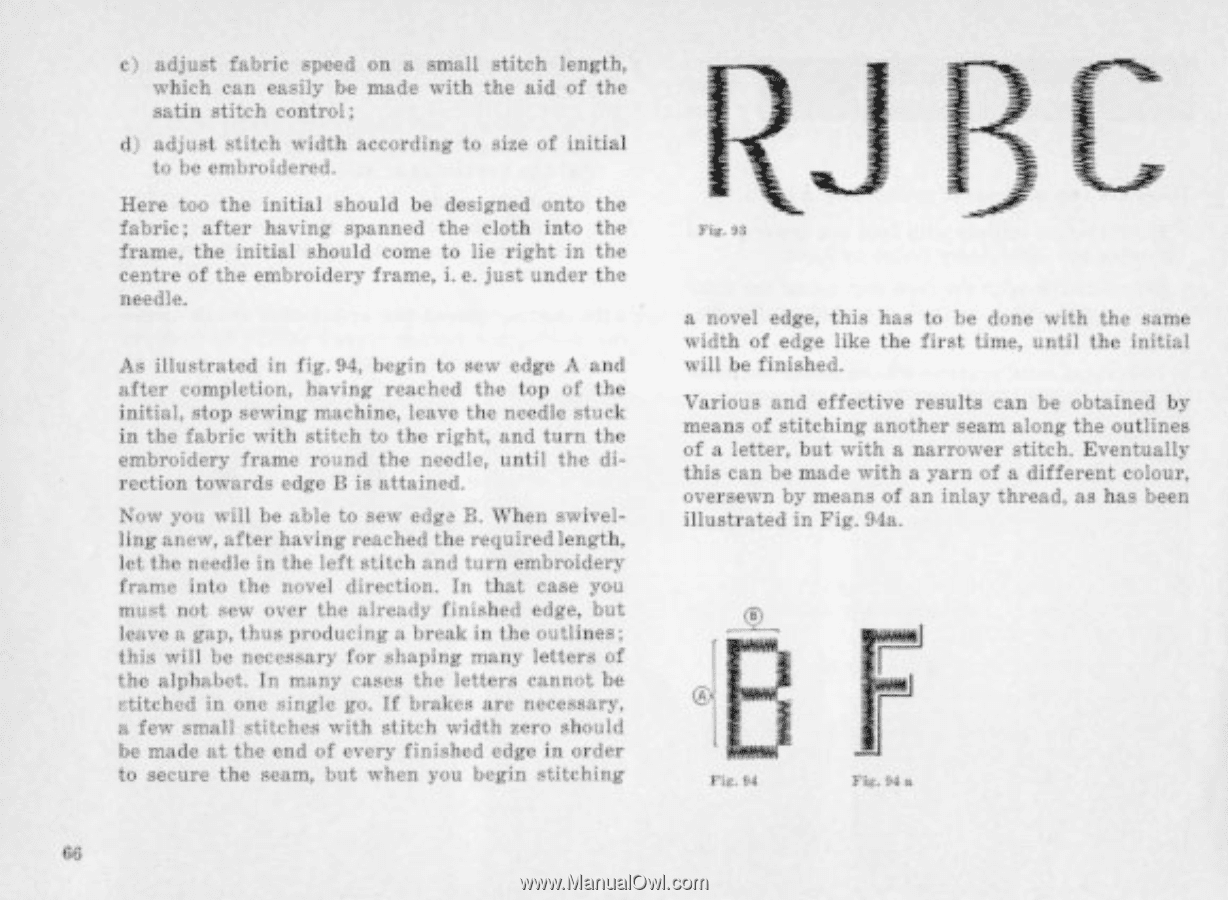
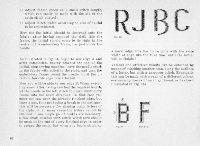
c) adjust fabric speed on a small stitch length, which can easily be made with the aid of the satin stitch control; d) adjust stitch width according to size of initial to be embroidered. Here too the initial should be designed onto the fabric: after having spanned the cloth into the frame. the Initial should come to lie right in the centre of the embroidery frame. i.e. just under the needle. As illustrated in fig.94, begin to sew edge A and after completion. having reached the lop or the initial, stop sewing rrutchine, leave the needle Murk in the fabric with stitch to the right, and turn the embroidery frame round the needle, until the direction towards edge l3 is attained. Now you will be able to sew edge B. When swivelling anew, after having reached the required length. let the needle in the left stitch and turn embroidery frame into the novel direction. In that case you must not sew over the already finished edge, but leave a gap, thus producing a break in the outlines: this will he necessary for shaping many letters of the alphabet. In many rases the letters cannot be rtitched in one single go. if brakes are necessary, a few small stitches with st itch width zero should be made ut the and of every finished edge in order to secure the seam. but when you begin stitching a novel edge. this has to be done with the same width of edge like the first time, until the initial wilt be finished. Various and effective results can be obtained by means of stitching another seam along the outlines of a letter. but with a narrower stitch. Eventually this can be made with a yarn of a different colour. oversewn by means of an inlay thread, as has been illustrated in Fig. 94a. Ile. 64 Far N• 46
-
 1
1 -
2
-
3
-
4
-
5
-
6
-
7
-
8
-
9
-
10
-
11
-
12
-
13
-
14
-
15
-
16
-
17
-
18
-
19
-
20
-
21
-
22
-
23
-
24
-
25
-
26
-
27
-
28
-
29
-
30
-
31
-
32
-
33
-
34
-
35
-
36
-
37
-
38
-
39
-
40
-
41
-
42
-
43
-
44
-
45
-
46
-
47
-
48
-
49
-
50
-
51
-
52
-
53
-
54
-
55
-
56
-
57
-
58
-
59
-
60
-
61
-
 62
62 -
 63
63 -
 64
64 -
 65
65 -
 66
66 -
 67
67 -
 68
68 -
 69
69 -
 70
70 -
 71
71 -
 72
72 -
73
-
74
-
75
-
76
-
77
-
78
-
79
 |
 |