Bernina 740 Manual - Page 53
Bernina 740 Manual
 |
View all Bernina 740 manuals
Add to My Manuals
Save this manual to your list of manuals |
Page 53 highlights
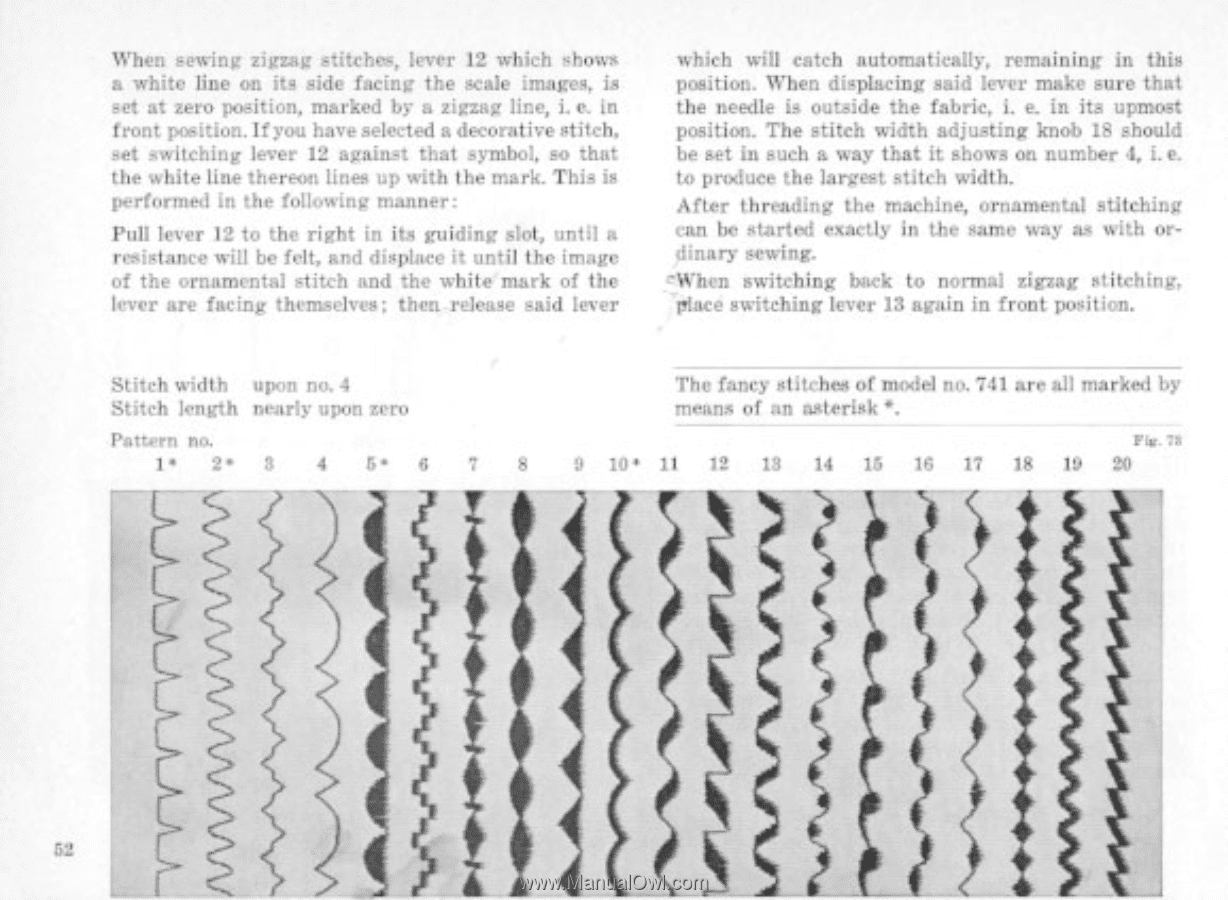
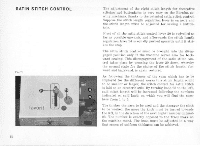
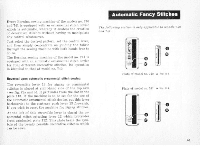
When rening zigzag stitches, lever 12 which shows a white line on its side facing the scale images, is set at zero position, marked by a zigzag line, i.e. in front position.If you have selected a decorative stitch. set switching lever 12 against that symbol, so that the white line thereon lines up with the mark. This is performed in the following manner: Pull lever 12 to the right in its guiding slot, until a neietance will be felt, and displace it until the image of the ornamental stitch and the white mark of the lever are facing themselves; then release said lever which will catch automatically, remaining in this position. When displacing said lever make sure that the needle is outside the fabric, i. in its upmost position. The stitch width adjusting knob 18 should be set in such a way that it shows on number 4, i.e. to produce the largest stitch width. After threading the machine, ornamental stitching can be started exactly in the same way as with ordinary sewing. 'When switching back to normal zigzag stitching, place switching lever 13 again in front position. Stitch width upon no. 4 Stitch length nearly upon zero Pitmen no. 1• V 3 4 S • 4 7 The fancy stitches of model no. 741 are all marked by means of nn neterisk •. 10 • 11 11 1.1 1 10: 17 1
-
 1
1 -
2
-
3
-
4
-
5
-
6
-
7
-
8
-
9
-
10
-
11
-
12
-
13
-
14
-
15
-
16
-
17
-
18
-
19
-
20
-
21
-
22
-
23
-
24
-
25
-
26
-
27
-
28
-
29
-
30
-
31
-
32
-
33
-
34
-
35
-
36
-
37
-
38
-
39
-
40
-
41
-
42
-
43
-
44
-
45
-
46
-
47
-
 48
48 -
 49
49 -
 50
50 -
 51
51 -
 52
52 -
 53
53 -
 54
54 -
 55
55 -
 56
56 -
 57
57 -
 58
58 -
59
-
60
-
61
-
62
-
63
-
64
-
65
-
66
-
67
-
68
-
69
-
70
-
71
-
72
-
73
-
74
-
75
-
76
-
77
-
78
-
79
 |
 |