Brother International 3034D User Manual - French - Page 17
Threading - needle plate
 |
View all Brother International 3034D manuals
Add to My Manuals
Save this manual to your list of manuals |
Page 17 highlights
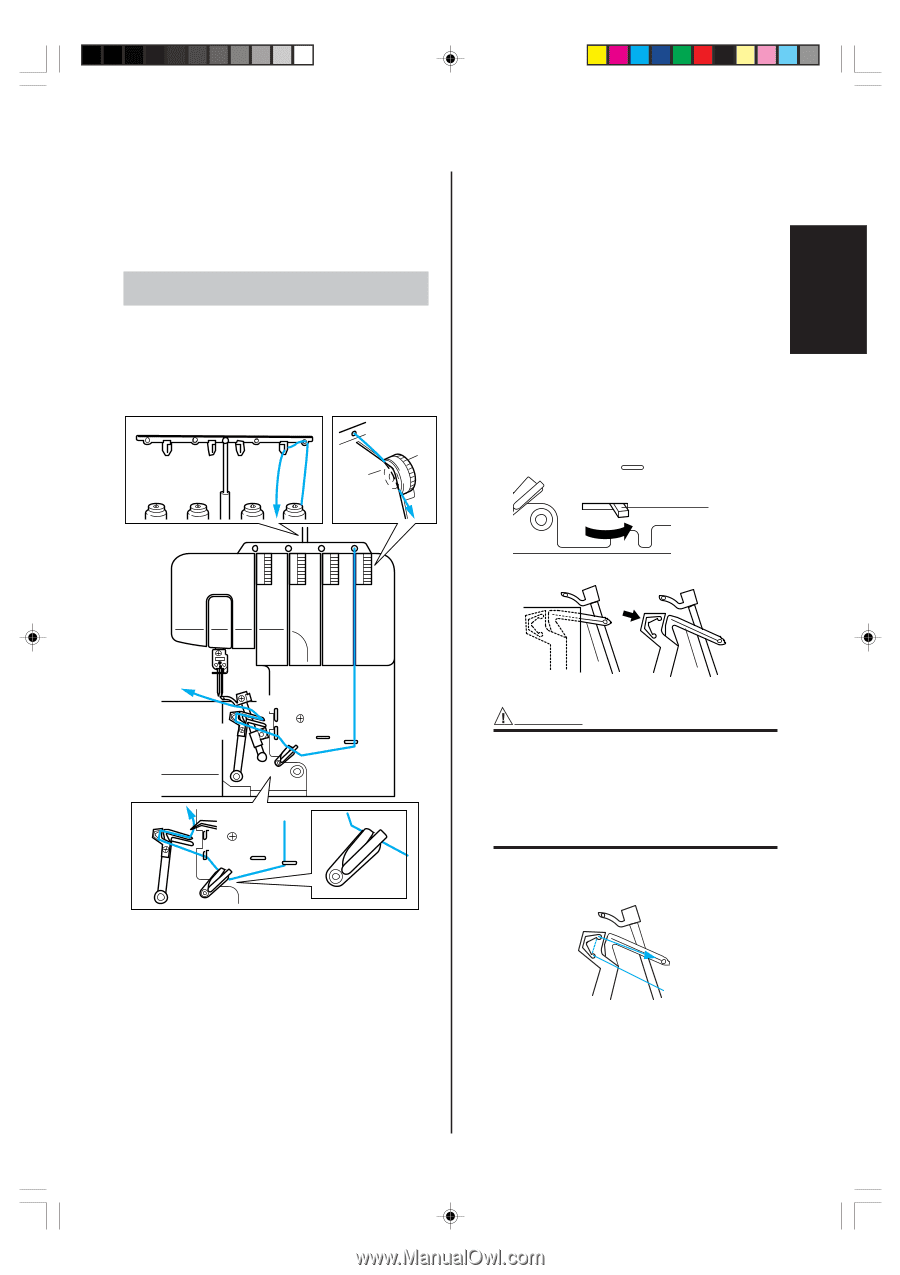
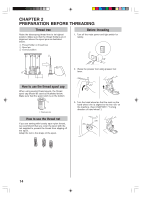
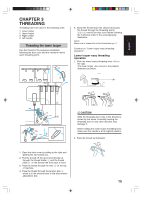
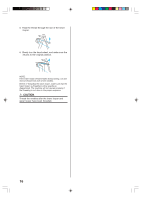
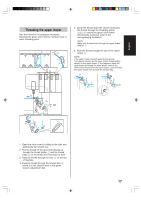
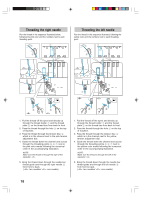
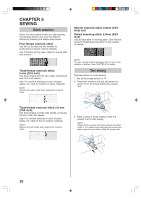
English CHAPTER 3 THREADING Threading has to be done in the following order. 1. Lower looper 2. Upper looper 3. Right needle 4. Left needle Threading the lower looper Run the thread in the sequence illustrated, following the blue color and the numbers next to each threading point. 1 3 2 4 3 4 5 0 9 8 7 6 0 9 8 7 6 5. Guide the thread down the channel and pass the thread through the threading points 5678 next to the blue color marks following the numerical order in the accompanying illustration. NOTE: Make sure to thread both of the thread take ups 7. Continue on "Lower looper easy threading operation". Lower looper easy threading operation 1. Slide the lower looper threading lever to the right. The lower looper moves to the position illustrated as below. CAUTION Slide the threading lever only in the directions shown by the arrow. Forcefully moving the threading lever in any other direction may damage it. Before sliding the lower looper threading lever, make sure the needle is at its highest position. 2. Pass the thread as illustrated. 1. Open the front cover by sliding to the right and guiding the top toward you. 2. Pull the thread off the spool and directly up through the thread holder 1 and the thread plate 2 on the thread tree from back to front. 3. Pass the thread thourgh the hole 3 on the top of machine. 4. Pass the thread through the tension disc 4 which is in the channel next to the blue tension adjustment dial. 15
-
 1
1 -
2
-
3
-
4
-
5
-
6
-
7
-
8
-
9
-
10
-
11
-
 12
12 -
 13
13 -
 14
14 -
 15
15 -
 16
16 -
 17
17 -
 18
18 -
 19
19 -
 20
20 -
 21
21 -
 22
22 -
23
-
24
-
25
-
26
-
27
-
28
-
29
-
30
-
31
-
32
-
33
-
34
-
35
-
36
-
37
-
38
-
39
-
40
-
41
-
42
-
43
-
44
-
45
-
46
-
47
-
48
-
49
-
50
-
51
-
52
-
53
-
54
-
55
-
56
-
57
-
58
-
59
-
60
-
61
-
62
-
63
-
64
-
65
-
66
-
67
-
68
-
69
-
70
-
71
-
72
-
73
-
74
-
75
-
76
 |
 |