Brother International 3034D User Manual - French - Page 23
To remove work, Chaining-off, To start sewing - knife
 |
View all Brother International 3034D manuals
Add to My Manuals
Save this manual to your list of manuals |
Page 23 highlights
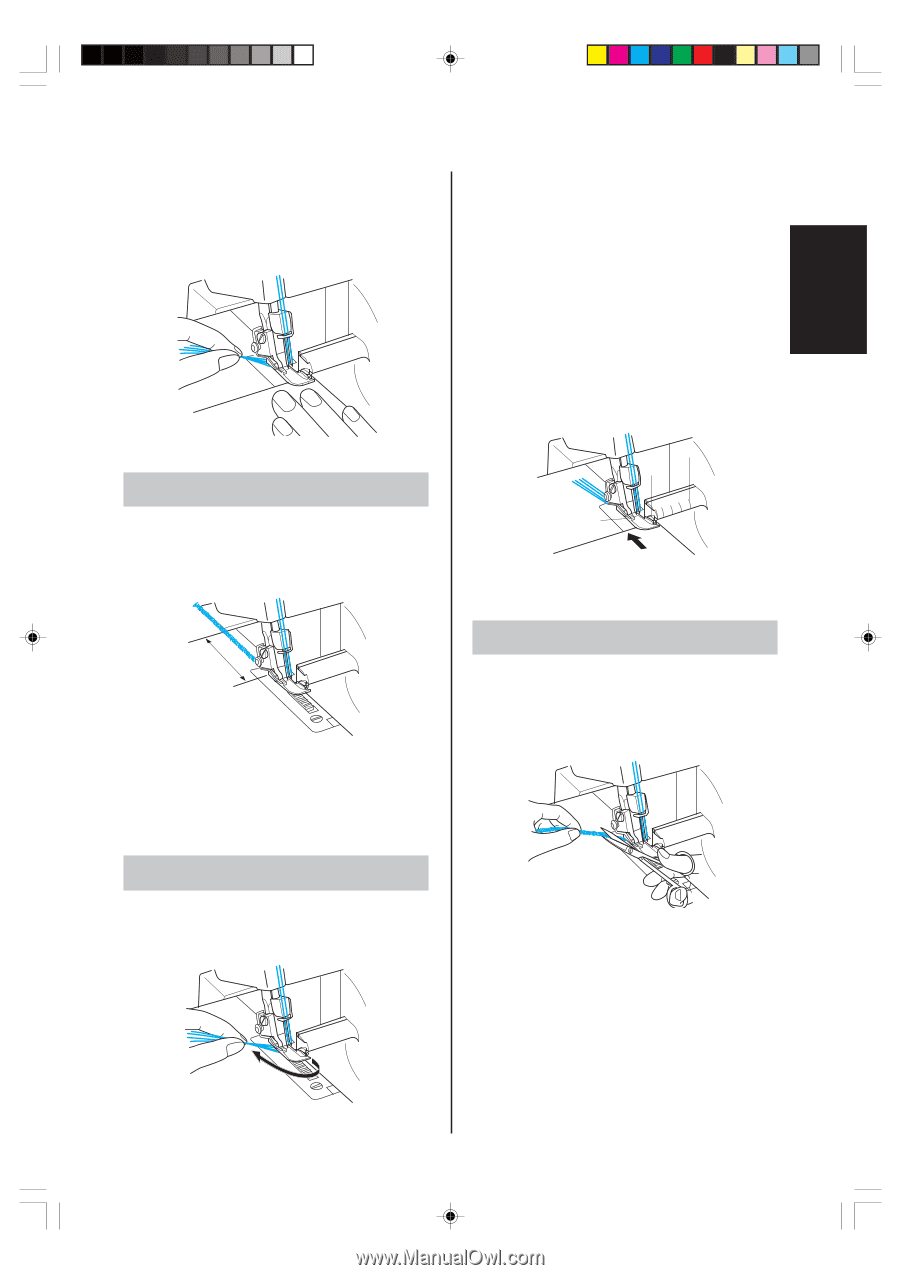
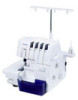
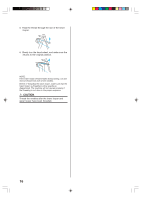
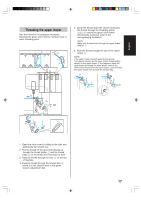
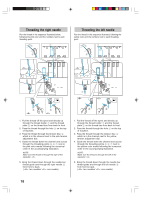
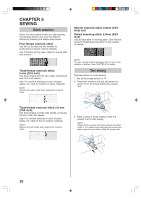
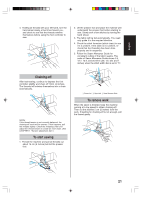
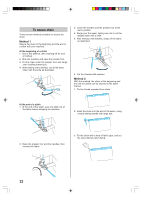
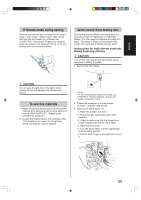
English 4. Holding all threads with your left hand, turn the hand wheel slowly a few times toward you, and check to see that the threads entwine themselves before using the foot controller to sew. Chaining-off After test-sewing, continue to depress the foot controller slightly and chain off 10cm (4 inches). The threads will entwine themselves into a chain automatically. NOTE: If the thread tension is not correctly balanced, the chaining-off result will be uneven. If this happens, pull the threads slightly. Check the threading order and adjust the thread tension to create an even chain. (See CHAPTER 1 "Tension adjustment dial".) To start sewing 1. Thread the machine and pull all threads out about 15 cm (6 inches) behind the presser foot. 2. Lift the presser foot and place the material well underneath the presser foot before starting to sew. Slowly sew a few stitches by turning the hand wheel. 3. The fabric will be fed automatically. You need only guide it in the required direction. 4. Check the stitch formation (stitch chain) to see if it is uniform. If the stitch is not uniform, recheck that the threading has been done properly and in sequence. 5. Follow the Seam Allowance Guide for consistent cutting of the fabric seams. The scale of Seam Allowance Guide shows 9.5, 12.7, 15.9, and 25.4mm (3/8, 1/2, 5/8, and 1 inches) when the stitch width dial is set to "5". 3 2 1 1 Presser foot 2 Upper knife 3 Seam Allowance Guide To remove work When the seam is finished, keep the machine running at a low speed to obtain chaining-off. Then cut the stitches 5 cm (2 inches) from the work. If feeding for chaining-off is not enough, pull the thread gently. 21
-
 1
1 -
2
-
3
-
4
-
5
-
6
-
7
-
8
-
9
-
10
-
11
-
12
-
13
-
14
-
15
-
16
-
17
-
 18
18 -
 19
19 -
 20
20 -
 21
21 -
 22
22 -
 23
23 -
 24
24 -
 25
25 -
 26
26 -
 27
27 -
 28
28 -
29
-
30
-
31
-
32
-
33
-
34
-
35
-
36
-
37
-
38
-
39
-
40
-
41
-
42
-
43
-
44
-
45
-
46
-
47
-
48
-
49
-
50
-
51
-
52
-
53
-
54
-
55
-
56
-
57
-
58
-
59
-
60
-
61
-
62
-
63
-
64
-
65
-
66
-
67
-
68
-
69
-
70
-
71
-
72
-
73
-
74
-
75
-
76
 |
 |