Brother International BAS-341F Instruction Manual - English
Brother International BAS-341F Manual
 |
View all Brother International BAS-341F manuals
Add to My Manuals
Save this manual to your list of manuals |
Brother International BAS-341F manual content summary:
- Brother International BAS-341F | Instruction Manual - English - Page 1
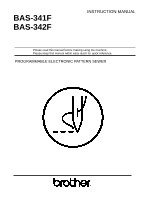
BAS-341F BAS-342F INSTRUCTION MANUAL Please read this manual before making using the machine. Please keep this manual within easy reach for quick reference. PROGRAMMABLE ELECTRONIC PATTERN SEWER - Brother International BAS-341F | Instruction Manual - English - Page 2
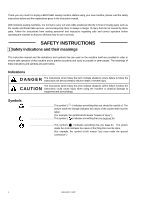
you very much for buying a BROTHER sewing machine. Before using your new machine, please read the safety instructions below and the explanations given in the instruction manual. With industrial sewing machines, it , the symbol at left means "you must make the ground connection".) i BAS-341F, 342F - Brother International BAS-341F | Instruction Manual - English - Page 3
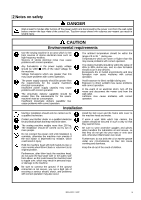
the wall outlet. Lightning may cause problems with correct operation. Installation Machine installation should only be carried out by a qualified technician. Contact your Brother dealer or a qualified electrician for any and diarrhoea. Keep the oil out of the reach of children. BAS-341F, 342F ii - Brother International BAS-341F | Instruction Manual - English - Page 4
Brother dealer or a qualified technician. If the machine develops a problem, contact your nearest Brother qualified technician. Ask your Brother dealer or a qualified proper replacement parts as specified by Brother. If any safety devices have been machine. Any problems in machine operation which - Brother International BAS-341F | Instruction Manual - English - Page 5
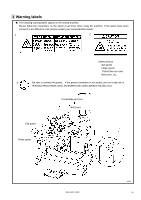
instructions on the labels at all times when using the machine. If the labels have been removed or are difficult to read, please contact your nearest Brother shock, and problems with correct operation may also occur. Thread take-up cover Belt cover Eye guard Finger guard BAS-341F, 342F 1971S iv - Brother International BAS-341F | Instruction Manual - English - Page 6
and Y-SCALE settings ...22 6-8. Using the bobbin thread counter ...23 6-9. Using production counter ...24 6-10. Using single split mode ...25 6-11. Shifting a stitch pattern ...26 BAS-341F, 342F - Brother International BAS-341F | Instruction Manual - English - Page 7
...33 9-4. Adjusting the driver needle guard ...33 9-5. Adjusting the shuttle race thread guide ...33 9-6. Adjusting the movable knife ...34 9-7. Adjusting the presser foot ...36 9-8. THE PROCESSING AND PRODUCTION OF PLATE BLANKS...53 15. TROUBLESHOOTING ...54 16. OPTIONS ...58 BAS-341F, 342F - Brother International BAS-341F | Instruction Manual - English - Page 8
EACH PARTS 1. NAME OF EACH PARTS ■ BAS-341F Thread wiper switch Emergency stop switch Cotton stand Operation panel Programmer Solenoid valve Integrater Presser lifter pedal ■ BAS-342F Power switch Control box Starting pedal 1917S Presser foot 1 BAS-341F, 342F Work clamp Feed plate 1918S - Brother International BAS-341F | Instruction Manual - English - Page 9
formation Single needle lock stitch Sewing machine Lock stitch, pattern tacking sewing machine (with large shuttle hook) Maximum pattern size BAS-341F: 250X 150 mm, BAS-342F: 300 X 200 mm Maximum stitch number 20,000 (one pattern) Stitch length 0.1 - 12.7 mm Maximum sewing speed 2,500 rpm - Brother International BAS-341F | Instruction Manual - English - Page 10
CAUTION Machine installation should only be carried out by a qualified technician. Contact your Brother dealer or a qualified electrician for any electrical work that may need to be done table rear cover (5) with the bolt (6), spring washer (7), flat washer (8) and nut (9). 1919S BAS-341F, 342F 3 - Brother International BAS-341F | Instruction Manual - English - Page 11
of the table and slowly raise the machine (4). Then lock it. 4. When returning the machine to its former position, release lock (5). The gas spring will guide the machine 1922S to its original position. BAS-341F, 342F 4 - Brother International BAS-341F | Instruction Manual - English - Page 12
the motor up or down. 1923S 3-6. Installing the foot switch Insert the connector of the foot switch (2) into the connector (3) of the control box (1). 1924S BAS-341F, 342F 5 - Brother International BAS-341F | Instruction Manual - English - Page 13
stand (1) to the table. 0073Q 3-8. Installing the programmer (option) [Vertical] [Flat] (2) (1(1)) (1) ((22)) 1181S 1182S (4) (3) 1183S 1. Install the programmer support (2) to the work table with the two screws (1). 2. Insert the programmer connector (4) securely into the left side of - Brother International BAS-341F | Instruction Manual - English - Page 14
of the integrator (1), turn the drain cock (3) in the direction indicated by an arrow to drain the water. Note Open the air cock (4) slowly. 1925S BAS-341F, 342F 7 - Brother International BAS-341F | Instruction Manual - English - Page 15
. Be sure to let the machine operate for a while after adding the oil. Use only specified Brother oil (Nisseki Mitsubishi Sewing Lube 10N; VG10) for the machine oil. 4-1. Lubrication points 1926S 1927S using the liquid cooling tank (1), fill it with silicon oil (100 mm2/S). BAS-341F, 342F 8 - Brother International BAS-341F | Instruction Manual - English - Page 16
, press lever (2) down. • After turning the pulley by hand, be sure to press the lever down to return the pulley to the normal operating position. BAS-341F, 342F 9 - Brother International BAS-341F | Instruction Manual - English - Page 17
the needle hole and the end of the thread. If the trailing length of the thread is too long, it may cause the thread to. BAS-341F, 342F 10 - Brother International BAS-341F | Instruction Manual - English - Page 18
shown in A, turn the bobbin winder thread tension stud (2) clockwise; if it winds on as shown in B, turn the bobbin winder thread tension stud (2) counterclockwise. BAS-341F, 342F - Brother International BAS-341F | Instruction Manual - English - Page 19
equivalent 0.5 - 1.0 0.2 - 0.4 6 - 8 mm 0.4 - 0.6 DP X 5 # 16 2000 rpm The sewing conditions given in the above table may need to be changed depending on the article being sewn. BAS-341F, 342F 12 - Brother International BAS-341F | Instruction Manual - English - Page 20
of the thread take-up spring is 8 10 mm Weaker 1939S Adjust the thread take-up spring tension by turning the tension stud (5) with a screwdriver. BAS-341F, 342F 13 - Brother International BAS-341F | Instruction Manual - English - Page 21
misoperation of the thread breakage detector continues, repeat the adjustment procedure above. (Such misoperation is most likely to occur when synthetic fiber yarns are used.) BAS-341F, 342F 14 - Brother International BAS-341F | Instruction Manual - English - Page 22
indicator Illuminates when Y-scale mode has been selected using the menu switch (6). (9) SPEED indicator Illuminates when speed mode has been selected using the menu switch (6). BAS-341F,342F 15 - Brother International BAS-341F | Instruction Manual - English - Page 23
BACK switch Used when winding a fresh bobbin, or when correcting a stitch pattern due to a (RESET switch) broken needle thread. Also used to reset error displays. BAS-341F, 342F 16 - Brother International BAS-341F | Instruction Manual - English - Page 24
these disks. Refer to the programmer instruction manual for details.) • TFD embroidery data can be embroidered after it has been converted by the programmer to BAS-300F and BAS300E data. • Restriction Available Applicable command [668] L [669] L [220] L [230] L [221] L [231] L BAS-341F,342F 17 - Brother International BAS-341F | Instruction Manual - English - Page 25
, the "E.4F" error appears. The error appears because the cleaning disk has no data. This is normal. 4. Cancel the error and eject the cleaning disk. BAS-341F, 342F 18 - Brother International BAS-341F | Instruction Manual - English - Page 26
(when memory switch No. 0d is ON). If memory switch No. 0d is OFF, press the EMERGENCY STOP switch (7) once more to release it. 1941S BAS-341F,342F 19 - Brother International BAS-341F | Instruction Manual - English - Page 27
(17) to advance the work clamp one stitch at a time. 1942S Resuming operation from a stopping poing 6. Sewing will start when the starting pedal (1) is pressed. BAS-341F, 342F 20 - Brother International BAS-341F | Instruction Manual - English - Page 28
again. Press the TEST switch (15) again to stop the machine. 4. After you have reached the desired position, depress the starting pedal to start sewing. BAS-341F,342F 21 - Brother International BAS-341F | Instruction Manual - English - Page 29
setting is displayed as a percentage. (7) 3. The program number will flash, and after the home (8) position is detected the flashing will stop. 1221S (6) (12) (17) 1215S BAS-341F, 342F 22 - Brother International BAS-341F | Instruction Manual - English - Page 30
(14) and replace the bobbin. The alarm will stop, and the number of work pieces set in step 3 will be displayed again in the counter (5). BAS-341F,342F 23 - Brother International BAS-341F | Instruction Manual - English - Page 31
(15) or the MENU switch (6). The TEST indicator (16) will switch off and the contents of each display screen will return to the normal display. BAS-341F, 342F 24 - Brother International BAS-341F | Instruction Manual - English - Page 32
: "1" "2" "3" "1" "2" ... 4. When the starting switch is pressed, only the pattern displayed on the display screen (5) will be sewn. Note As to split sewing, refer to the instruction manual of the "electronic programmable pattern tacker programmer". BAS-341F,342F 25 - Brother International BAS-341F | Instruction Manual - English - Page 33
error will occur during sewing and you will not be able to sew the pattern. Give consideration to the pattern as a whole when moving it. BAS-341F, 342F 26 - Brother International BAS-341F | Instruction Manual - English - Page 34
is completed, an alarm will sound and the indicator will go out, then the PROGRAM NO. display (6) will blink the program number. 1229S 27 1213S BAS-341F,342F - Brother International BAS-341F | Instruction Manual - English - Page 35
after once being turned off, the same pattern of sewing can be continued since the machine will stores the sewing data from the last time. BAS-341F, 342F 28 - Brother International BAS-341F | Instruction Manual - English - Page 36
ends from around the driver (5), the top of the shuttle hook thread guide and the shuttle race. 8-2. Lubrication Note • Fill the machine with the machine operate for a while after adding the oil. • Use only specified Brother oil (Nisseki Mitsubishi Sewing Lube 10N; VG10) for the machine oil. 1926S - Brother International BAS-341F | Instruction Manual - English - Page 37
box will overheat. When this happens, the overheating error code ("E-d") will be displayed and you will not be able to operate the sewing machine. 1948S BAS-341F,342F 30 - Brother International BAS-341F | Instruction Manual - English - Page 38
thinner to clean the eye guard. 1235S 8-6. Checking the needle Always check that the tip of the needle is not broken before starting sewing. 1236S BAS-341F,342F 31 - Brother International BAS-341F | Instruction Manual - English - Page 39
of the sewing machine should only be carried out by a qualified technician. Ask your Brother dealer or a qualified electrician to carry out any maintenance and inspection of the electrical 5 needle, use the second reference line from the top of the needle (reference line b). BAS-341F, 342F 32 - Brother International BAS-341F | Instruction Manual - English - Page 40
the shuttle race thread guide (1) should be aligned with the center of the needle plate hole, and the needle center and section A should be aligned. Note If the shuttle race thread guide is in the wrong position, thread breakages, soiled thread or catching of the thread may occur. BAS-341F, 342F 33 - Brother International BAS-341F | Instruction Manual - English - Page 41
plate (2). Then tear off the auxiliary plate sheet (3). Remove screws (4) and (5), and needle plate (6). Now disconnect the thread cutter connecting rod (7) from stud (8). (Figure is BAS-342F.) BAS-341F, 342F 34 - Brother International BAS-341F | Instruction Manual - English - Page 42
movable knife washer (11) (T=0.4, T=0.5, T=0.6) to adjust the knives so that they cut properly. (Figure is BAS-342F.) 1247S A B C D Cutting (9) fixed knife (10) 0.5 mm away from needle hole plate (12). 1959S BAS-341F, 342F 35 - Brother International BAS-341F | Instruction Manual - English - Page 43
the thread cutter connecting rod (7) on connecting lever pin (8), and install needle plate (6).(Figure is BAS-342F.) * When fitting the connecting rod (7) on the connecting lever pin (8) and before tightening lever down to return the pulley to the normal operating position. 1931S BAS-341F, 342F 36 - Brother International BAS-341F | Instruction Manual - English - Page 44
). 2. Remove the stud screw (11) and re-attach the intermitte connecting rod (12) to the upper screw hole (14) of the intermittent presser arm F (13). BAS-341F, 342F 37 - Brother International BAS-341F | Instruction Manual - English - Page 45
switch No.14 is on). Turn the machine pulley to move the index mark to the correct position and then start the sewing machine. 1965S BAS-341F, 342F 38 - Brother International BAS-341F | Instruction Manual - English - Page 46
turned on in order to check the DIP switch operation. However, the power must always be turned off before DIP switch settings can be changed. BAS-341F, 342F 39 - Brother International BAS-341F | Instruction Manual - English - Page 47
operation causes memory switch settings to be returned to their initial settings, and also clears all contents of the memory such as sewing datas. 1278S (1) BAS-341F, 342F 1279S 40 - Brother International BAS-341F | Instruction Manual - English - Page 48
, presser foot; reverse order when rising. ON ON ON Pneumatic Lowers in the order left and right work clamp, presser foot; reverse order when rising. BAS-341F, 342F 41 - Brother International BAS-341F | Instruction Manual - English - Page 49
ON at the same time, the presser foot will drop at the same time that work clamp drop. B-8 Feeding speed is switched to high speed. BAS-341F, 342F 42 - Brother International BAS-341F | Instruction Manual - English - Page 50
1966S ■ DIP switch C C-1 C-2 C-3 - - - ON - - - ON - ON ON - - - ON ON - ON - ON ON ON ON ON Model setting BAS-311E BAS-326E BAS-343E BAS-341F BAS-342F BAS-311EL SW No. C-4 C-5 C-6 C-7 C-8 When ON Controlled sewing area becomes 1200 mm X 400 mm For pneumatic type, set to ON - Brother International BAS-341F | Instruction Manual - English - Page 51
. As a result, the thread take-up will rise slightly at the sewing start, and this may result in the thread pulling out under certain conditions. BAS-341F, 342F 44 - Brother International BAS-341F | Instruction Manual - English - Page 52
mode and then press the B.T SET switch (7). The buzzer will sound twice, and the current memory switch settings will be written to the floppy disk. BAS-341F, 342F 45 - Brother International BAS-341F | Instruction Manual - English - Page 53
sewing is finished, the work clamp automatically opens and closes once. (practice operation) If memo-0E is ON, the work clamp opens and closes twice. BAS-341F, 342F 46 - Brother International BAS-341F | Instruction Manual - English - Page 54
. (Use option connector P3 on the operation panel.) Program number is changed automatically by using outside switch. (Use optional connector P3 on the operation panel.) BAS-341F, 342F 47 - Brother International BAS-341F | Instruction Manual - English - Page 55
stacking of sewing can be implemented according to various functions of the machine. For detail of the extended option output, please consult with your local Brother Sales Office. BAS-341F, 342F 48 - Brother International BAS-341F | Instruction Manual - English - Page 56
: No automatic correction 0 1 : Read as BAS-311A data 2 : Read as BAS-326A data 3 : Read as BAS-341A, 342A data ex. Read BAS-326A data by BAS-342F / Set memo-37=2 Changes the length of 1 is used. 0- memo-3c - - 0- memo-3d - - 0- memo-3E - - 0- memo-3F - - 0 BAS-341F, 342F 49 - Brother International BAS-341F | Instruction Manual - English - Page 57
Turn off the power, and then turn the machine pulley to Problem with machine motor stopping, or check if the machine has locked back on. If the error appears continually, contact a qualified service technician. Overlapping option output numbers. Change the option output resume. BAS-341F, 342F 50 - Brother International BAS-341F | Instruction Manual - English - Page 58
(malfunction of power Turn off the power and contact a qualified service supply circuit board). technician. E.F1 Bad connection in cable between power qualified service technician. REFERENCE segment LED alphabet Panel display Text display A B C D E F 6 H L O BAS-341F, 342F 51 - Brother International BAS-341F | Instruction Manual - English - Page 59
Shuttle hook assembly W / BOX 0188Q Large shuttle hook 0189Q Tension spring 0191Q Bobbin case assembly 0183Q Needle bar thread guide 1639S Needle 0193Q Feed plate BAS-341F,342F -21 -22 Heavy materials Medium materials Needle hole plate E (Φ2.6) S10212-101 Needle hole plate F (Φ2.2) S10213-001 - Brother International BAS-341F | Instruction Manual - English - Page 60
-section A-A' Use fine sand paper or similar material to acquire a smooth surface for this section. 1969S Point at which to use sand paper, etc. 1970S BAS-341F, 342F 53 - Brother International BAS-341F | Instruction Manual - English - Page 61
15. TROUBLESHOOTING Problem Cause Check 15. TROUBLESHOOTING Remedy Page Presser does not rise. Work clamp sub-tension. 13 Position of shuttle race thread guide is incorrect Position of shuttle race thread guide Adjust the position of the shuttle race thread guide 33 BAS-341F, 342F 54 - Brother International BAS-341F | Instruction Manual - English - Page 62
15. TROUBLESHOOTING Problem Cause Check Remedy Page Upper thread breaks. Upper thread tension . Bent needle Needle moves about. Needle and thread Needle is too thin. Needle and thread BAS-341F, 342F Adjust the needle clearance. the groove is facing forward. 33 Adjust the needle bar - Brother International BAS-341F | Instruction Manual - English - Page 63
Problem Cause Check 15. TROUBLESHOOTING Remedy Page Upper thread is not trimmed. Fixed knife is blunt. Fixed knife blade Movable knife does not pick up the thread. Shuttle race thread guide position Needle bar Adjust the tension and height of the thread takeup spring. 13 BAS-341F, 342F 56 - Brother International BAS-341F | Instruction Manual - English - Page 64
15. TROUBLESHOOTING Problem Cause Check Remedy Page Improper tension and height of thread take-up spring Tension pulley position Adjust the tension of the V belt using the tension pulley 5 Electrical trouble Refer to the details for [E. 22] in the error code table. 50 BAS-341F, 342F 57 - Brother International BAS-341F | Instruction Manual - English - Page 65
and hook attachment device ■ Needle thread presser device 16. OPTION Used to create sewing patterns for the BAS-300E series. It can also be used to display error messages. Used for efficient sewing around labels, placed under the material for the first stitch at the sewing start. BAS-341F, 342F 58 - Brother International BAS-341F | Instruction Manual - English - Page 66
wiper is driven by a pneumatic cylinder. Allows the upper thread tension to be switched between two settings at any position desired by using the programmer. BAS-341F, 342F 59 - Brother International BAS-341F | Instruction Manual - English - Page 67
INSTRUCTION MANUAL 15-1, Naeshiro-cho, Mizuho-ku, Nagoya 467-8561, Japan. Phone: 81-52-824-2177 Printed in Japan 151-V41,42 SA1929-001 2002.11. H (1)
-
 1
1 -
 2
2 -
 3
3 -
 4
4 -
 5
5 -
 6
6 -
 7
7 -
8
-
9
-
10
-
11
-
12
-
13
-
14
-
15
-
16
-
17
-
18
-
19
-
20
-
21
-
22
-
23
-
24
-
25
-
26
-
27
-
28
-
29
-
30
-
31
-
32
-
33
-
34
-
35
-
36
-
37
-
38
-
39
-
40
-
41
-
42
-
43
-
44
-
45
-
46
-
47
-
48
-
49
-
50
-
51
-
52
-
53
-
54
-
55
-
56
-
57
-
58
-
59
-
60
-
61
-
62
-
63
-
64
-
65
-
66
-
67
 |
 |
BAS-341F
BAS-342F
Please read this manual before making using the machine.
Please keep this manual within easy reach for quick reference.
PROGRAMMABLE ELECTRONIC PATTERN SEWER
INSTRUCTION MANUAL