Brother International GX 6750 User Guide - Page 39
Replacing, correction
 |
UPC - 012502523567
View all Brother International GX 6750 manuals
Add to My Manuals
Save this manual to your list of manuals |
Page 39 highlights
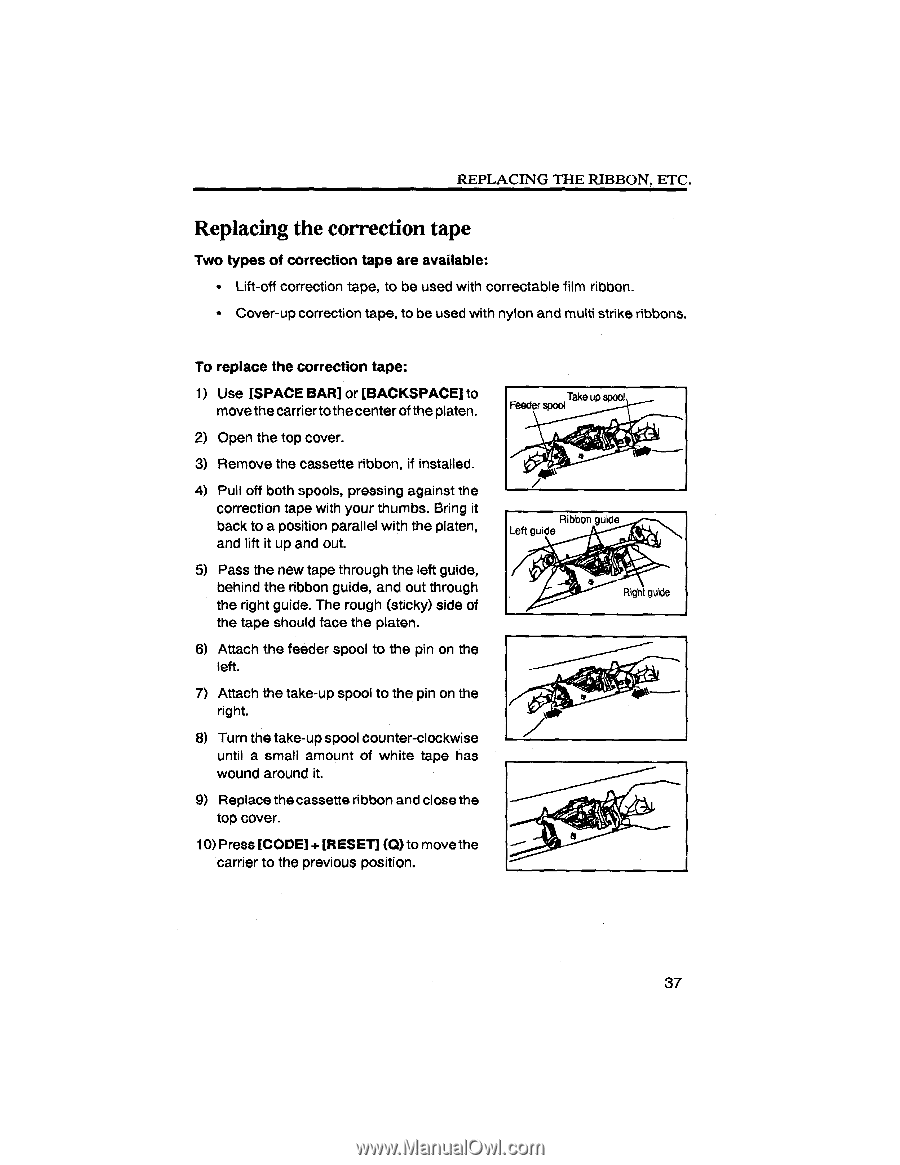
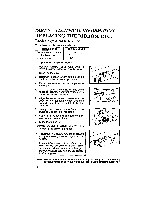
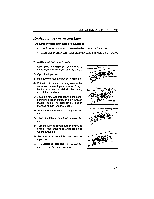
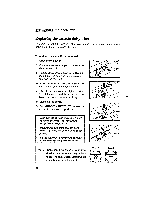
REPLACING THE RIBBON, ETC. Replacing the correction tape Two types of correction tape are available: • Lift-off correction tape, to be used with correctable film ribbon. • Cover-up correction tape, to be used with nylon and multi strike ribbons. To replace the correction tape: 1) Use [SPACE BAR] or [BACKSPACE] to move the carriertothecenter of the platen. 2) Open the top cover. 3) Remove the cassette ribbon, if installed. 4) Pull off both spools, pressing against the correction tape with your thumbs. Bring it back to a position parallel with the platen, and lift it up and out. 5) Pass the new tape through the left guide, behind the ribbon guide, and out through the right guide. The rough (sticky) Side of the tape should face the platen. 6) Attach the feeder spool to the pin on the left. 7) Attach the take-up spool to the pin on the right. 8) Turn the take-up spool counter-clockwise until a small amount of white tape has wound around it. 9) Replace the cassette ribbon and close the top cover. 10)Press [CODE] + [RESET] (a)to movethe carrier to the previous position. Take up spool Feeder spool a Ribbon guide Left guide a Right guide e 37
-
 1
1 -
2
-
3
-
4
-
5
-
6
-
7
-
8
-
9
-
10
-
11
-
12
-
13
-
14
-
15
-
16
-
17
-
18
-
19
-
20
-
21
-
22
-
23
-
24
-
25
-
26
-
27
-
28
-
29
-
30
-
31
-
32
-
33
-
 34
34 -
 35
35 -
 36
36 -
 37
37 -
 38
38 -
 39
39 -
 40
40 -
 41
41 -
 42
42 -
 43
43 -
 44
44 -
45
-
46
-
47
-
48
-
49
-
50
-
51
-
52
-
53
-
54
-
55
-
56
 |
 |