Brother International HL 4040CN Quick Setup Guide - English - Page 14
Installing the toner cartridges, 4 Load paper in the paper tray - black toner
 |
UPC - 012502617785
View all Brother International HL 4040CN manuals
Add to My Manuals
Save this manual to your list of manuals |
Page 14 highlights
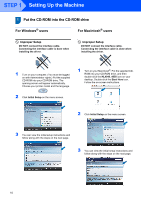
STEP 1 Setting Up the Machine 3 Installing the toner cartridges 1 Unpack the toner cartridges and rock each toner cartridge 5 to 6 times. 5 Put the drum unit into the printer. 2 Remove the protective cover. 6 Close the front cover of the printer. 3 Hold the handle of the toner cartridge and slide it into the drum unit. Make sure that you match the toner cartridge color to the same color label on the drum unit, and make sure that you fold down the toner cartridge handle (1) once the toner cartridge is in place. 1 1 4 Load paper in the paper tray 1 Pull the paper tray completely out of the printer. 2 While pressing the green paper-guide release lever (1), slide the paper guides to fit the paper 1 2 3 size. Make sure that the guides are firmly in the slots. 4 1 C - Cyan 2 M - Magenta 1 3 Y - Yellow 4 K - Black 4 Repeat steps 1 to 3 for the remaining toner cartridges. 12
-
 1
1 -
2
-
3
-
4
-
5
-
6
-
7
-
8
-
 9
9 -
 10
10 -
 11
11 -
 12
12 -
 13
13 -
 14
14 -
 15
15 -
 16
16 -
 17
17 -
 18
18 -
 19
19 -
20
-
21
-
22
-
23
-
24
-
25
-
26
-
27
-
28
-
29
-
30
-
31
-
32
-
33
-
34
-
35
 |
 |
