Brother International MFC-7860DW Users Manual - English - Page 61
Email B&W PDF
 |
UPC - 012502627029
View all Brother International MFC-7860DW manuals
Add to My Manuals
Save this manual to your list of manuals |
Page 61 highlights
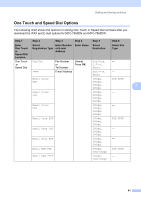
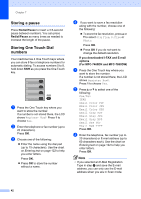
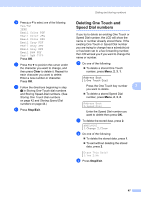
e Do one of the following: If you want to save a fax/scan resolution along with the number, go to the appropriate step as shown in the following table: If you do not want to change the default resolution, press OK, then go to step l. Option selected in Go to step step b Fax/Tel f IFAX g Email Color PDF h Email Color JPG Email Color XPS Email Gray PDF i Email Gray JPG Email Gray XPS Email B&W PDF j Email B&W TIFF Note • When you do a broadcast and you have saved a scan profile along with the number or E-mail address, the scan profile of the One Touch, Speed Dial or Group number you choose first will be applied to the broadcast. • You can also store the number by pressing Menu, 2, 3, 2. • For details about the file format, see the Software User's Guide f Press a or b to select Std, Fine, S.Fine or Photo. Press OK and go to step l. g Press a or b to select Std, Fine or Photo. Press OK and go to step l. Dialing and storing numbers h Press a or b to select 100dpi, 200dpi, 300dpi or 600dpi. Press OK. If you chose Email Color PDF, go to step k. If you chose Email Color JPG or Email Color XPS, go to step l. i Press a or b to select 100dpi, 200dpi or 300dpi. Press OK. If you chose Email Gray PDF, go to step k. If you chose Email Gray JPG or Email Gray XPS, go to step l. j Press a or b to select 200x100dpi or 200dpi. Press OK. 7 If you chose Email B&W PDF, go to step k. If you chose Email B&W TIFF, go to step l. k Select the PDF type from PDF or SPDF (Secure PDF) that will be used to send to your PC. Press OK and then go to step l. l Press Stop/Exit. 45
-
 1
1 -
2
-
3
-
4
-
5
-
6
-
7
-
8
-
9
-
10
-
11
-
12
-
13
-
14
-
15
-
16
-
17
-
18
-
19
-
20
-
21
-
22
-
23
-
24
-
25
-
26
-
27
-
28
-
29
-
30
-
31
-
32
-
33
-
34
-
35
-
36
-
37
-
38
-
39
-
40
-
41
-
42
-
43
-
44
-
45
-
46
-
47
-
48
-
49
-
50
-
51
-
52
-
53
-
54
-
55
-
 56
56 -
 57
57 -
 58
58 -
 59
59 -
 60
60 -
 61
61 -
 62
62 -
 63
63 -
 64
64 -
 65
65 -
 66
66 -
67
-
68
-
69
-
70
-
71
-
72
-
73
-
74
-
75
-
76
-
77
-
78
-
79
-
80
-
81
-
82
-
83
-
84
-
85
-
86
-
87
-
88
-
89
-
90
-
91
-
92
-
93
-
94
-
95
-
96
-
97
-
98
-
99
-
100
-
101
-
102
-
103
-
104
-
105
-
106
-
107
-
108
-
109
-
110
-
111
-
112
-
113
-
114
-
115
-
116
-
117
-
118
-
119
-
120
-
121
-
122
-
123
-
124
-
125
-
126
-
127
-
128
-
129
-
130
-
131
-
132
-
133
-
134
-
135
-
136
-
137
-
138
-
139
-
140
-
141
-
142
-
143
-
144
-
145
-
146
-
147
-
148
-
149
-
150
-
151
-
152
-
153
-
154
-
155
-
156
-
157
-
158
 |
 |