Canon EOS50D ImageBrowser 6.2 for Macintosh Instruction Manual (EOS 50D) - Page 26
Editing an Image, Automatic Adjustment Using IB
 |
View all Canon EOS50D manuals
Add to My Manuals
Save this manual to your list of manuals |
Page 26 highlights
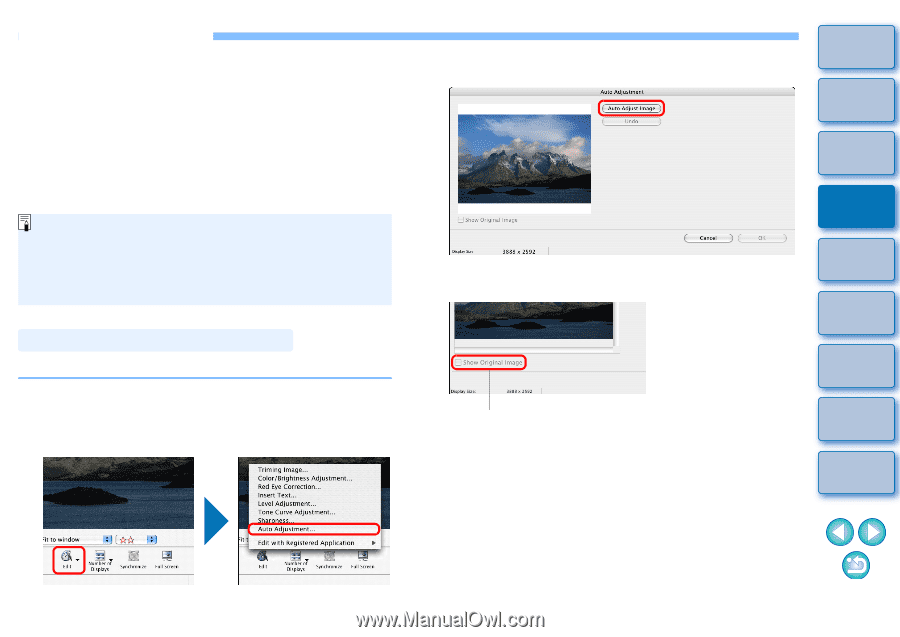
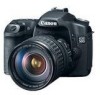
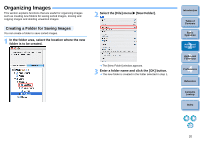
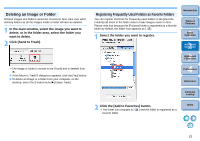
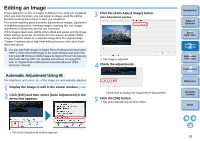
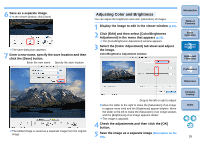
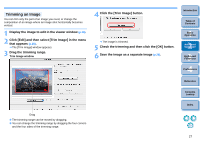
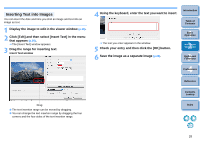
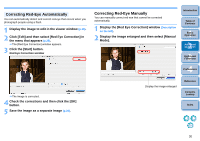
Editing an Image If the brightness or color of images is different from what you visualized when you shot the photo, you can adjust an image using the editing functions to bring them closer to what you visualized. This section explains about automatic adjustment of images, adjustment of brightness/saturation, trimming images, inserting text into images, adjustment of sharpness and red-eye correction. JPEG images deteriorate slightly when edited and saved, and the image before editing cannot be recovered. For this reason, an edited JPEG image should be saved as a separate image from the original image. Chapter 3 explains about high-level editing functions other than those described above. You can edit RAW images in Digital Photo Professional (hereinafter, "DPP"). Select the RAW image in the Main Window and select the [File] menu X [Process RAW Images by Digital Photo Professional], which will start up DPP. For detailed instructions on using DPP, refer to "Digital Photo Professional Instruction Manual" (PDF electronic manual). Automatic Adjustment Using IB The brightness and colors, etc. of the image are automatically adjusted. 1 Display the image to edit in the viewer window (p.16). 2 Click [Edit] and then select [Auto Adjustment] in the menu that appears. 3 Click the [Auto Adjust Image] button. Auto Adjustment window The image is adjusted. 4 Check the adjustments. Checkmark to display the image before adjustments 5 Click the [OK] button. The [Auto Adjustment] window closes. Introduction Table of Contents 1Basic Operation 2Advanced Operation 3High-Level Functions 4 Preferences Reference Contents Lookup Index The [Auto Adjustment] window appears. 25
-
 1
1 -
2
-
3
-
4
-
5
-
6
-
7
-
8
-
9
-
10
-
11
-
12
-
13
-
14
-
15
-
16
-
17
-
18
-
19
-
20
-
 21
21 -
 22
22 -
 23
23 -
 24
24 -
 25
25 -
 26
26 -
 27
27 -
 28
28 -
 29
29 -
 30
30 -
 31
31 -
32
-
33
-
34
-
35
-
36
-
37
-
38
-
39
-
40
-
41
-
42
-
43
-
44
-
45
-
46
-
47
-
48
-
49
-
50
-
51
-
52
-
53
-
54
-
55
-
56
-
57
-
58
-
59
-
60
-
61
-
62
-
63
-
64
-
65
-
66
-
67
-
68
-
69
-
70
 |
 |