Canon PIXMA MP640R MP640 series Getting Started - Page 12
Close the Scanning Unit Cover E., Install all the other ink tanks in the same way., lamps light red.
 |
View all Canon PIXMA MP640R manuals
Add to My Manuals
Save this manual to your list of manuals |
Page 12 highlights
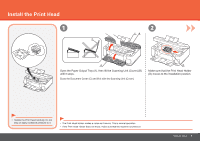
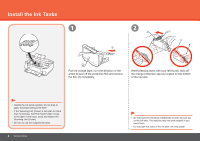
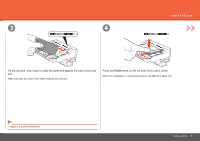
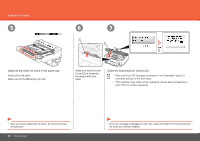
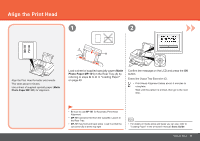
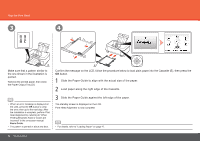
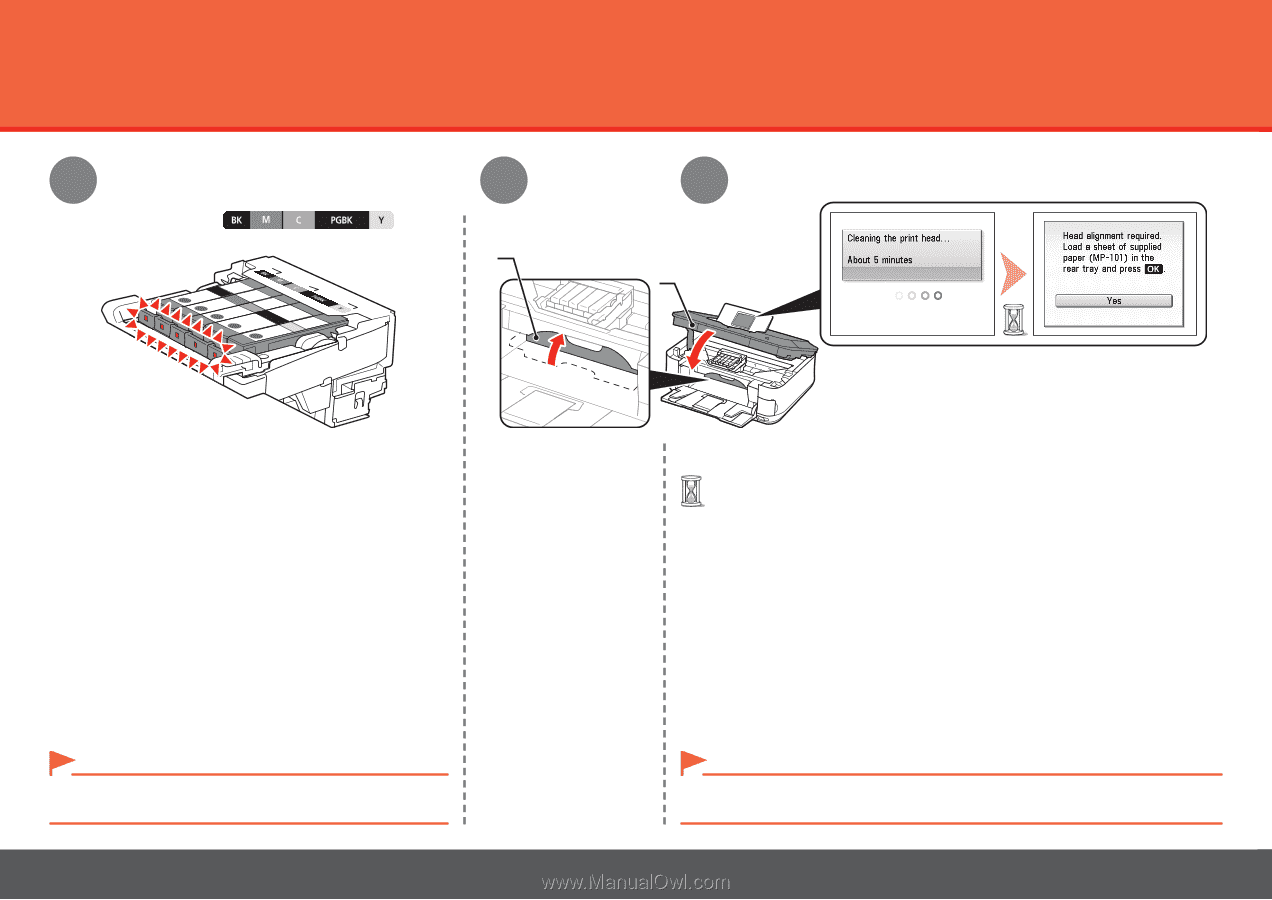
Install the Ink Tanks 5 6 7 D E Install all the other ink tanks in the same way. Install all the ink tanks. Make sure all the Ink lamps light red. Make sure that the Inner Cover (D) is closed by touching it with your hand. Close the Scanning Unit (Cover) (E). • Wait until the LCD changes as shown in the illustration (about 5 minutes) and go to the next step. • The machine may make some operating noises when preparing to print. This is normal operation. • Once you have installed the ink tanks, do not remove them unnecessarily. 10 Hardware Setup • If an error message is displayed on the LCD, make sure that the Print Head and the ink tanks are correctly installed.
-
 1
1 -
2
-
3
-
4
-
5
-
6
-
 7
7 -
 8
8 -
 9
9 -
 10
10 -
 11
11 -
 12
12 -
 13
13 -
 14
14 -
 15
15 -
 16
16 -
 17
17 -
18
-
19
-
20
-
21
-
22
-
23
-
24
-
25
-
26
-
27
-
28
-
29
-
30
-
31
-
32
-
33
-
34
-
35
-
36
-
37
-
38
-
39
-
40
-
41
-
42
-
43
-
44
-
45
-
46
-
47
-
48
-
49
-
50
-
51
-
52
-
53
-
54
-
55
-
56
-
57
-
58
-
59
-
60
-
61
-
62
-
63
-
64
 |
 |
±0
6
5
E
D
7
Hardware Setup
Install the Ink Tanks
If an error message is displayed on the LCD, make sure that the Print Head and the
ink tanks are correctly installed.
•
Close the Scanning Unit (Cover) (E).
Wait until the LCD changes as shown in the illustration (about 5
minutes) and go to the next step.
•
The machine may make some operating noises when preparing to
print. This is normal operation.
•
Install all the other ink tanks in the same way.
Once you have installed the ink tanks, do not remove them
unnecessarily.
•
Make sure all the
Ink
lamps light red.
Install all the ink tanks.
Make sure that the Inner
Cover (D) is closed by
touching it with your
hand.