Canon PIXMA MP640R MP640 series Getting Started - Page 14
Basic Guide, Confirm the message on the LCD
 |
View all Canon PIXMA MP640R manuals
Add to My Manuals
Save this manual to your list of manuals |
Page 14 highlights
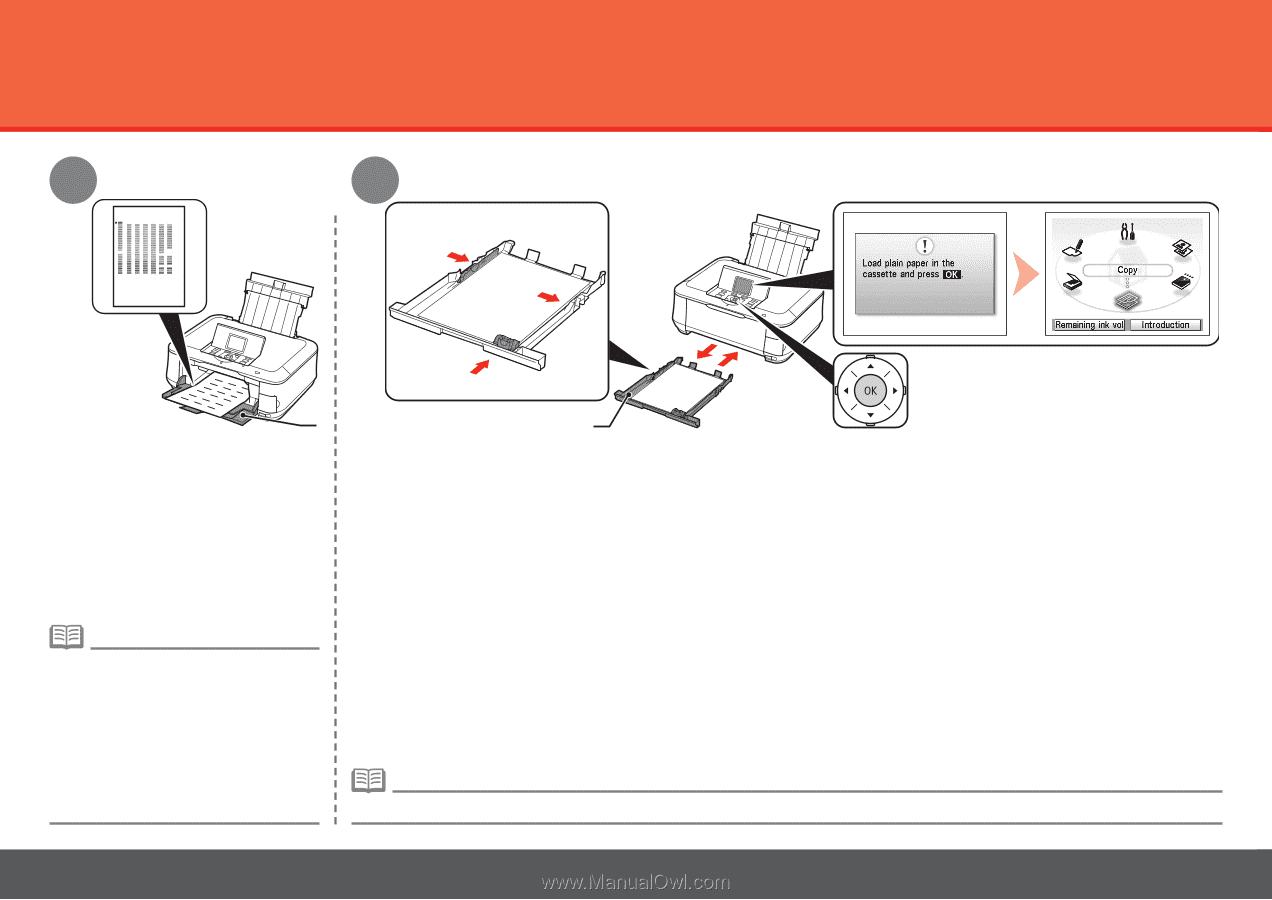
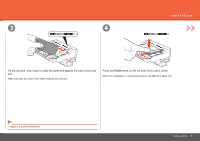
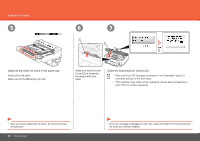
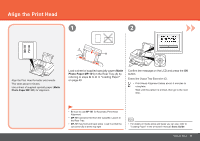
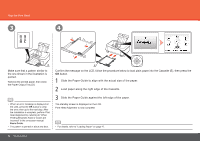
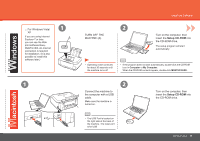
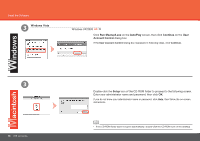
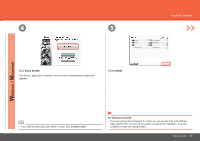
Align the Print Head 3 4 3 2 1 D Make sure that a pattern similar to the one shown in the illustration is printed. Remove the printed paper, then close the Paper Output Tray (D). • When an error message is displayed on the LCD, press the OK button to clear the error, then go to the next step. After the installation is complete, perform Print Head Alignment by referring to "When Printing Becomes Faint or Colors are Incorrect" in the on-screen manual: Basic Guide. • The pattern is printed in black and blue. E Confirm the message on the LCD, follow the procedure below to load plain paper into the Cassette (E), then press the OK button. 1 Slide the Paper Guide to align with the actual size of the paper. 2 Load paper along the right edge of the Cassette. 3 Slide the Paper Guide against the left edge of the paper. The standby screen is displayed on the LCD. Print Head Alignment is now complete. • For details, refer to "Loading Paper" on page 47. 12 Hardware Setup
-
 1
1 -
2
-
3
-
4
-
5
-
6
-
7
-
8
-
 9
9 -
 10
10 -
 11
11 -
 12
12 -
 13
13 -
 14
14 -
 15
15 -
 16
16 -
 17
17 -
 18
18 -
 19
19 -
20
-
21
-
22
-
23
-
24
-
25
-
26
-
27
-
28
-
29
-
30
-
31
-
32
-
33
-
34
-
35
-
36
-
37
-
38
-
39
-
40
-
41
-
42
-
43
-
44
-
45
-
46
-
47
-
48
-
49
-
50
-
51
-
52
-
53
-
54
-
55
-
56
-
57
-
58
-
59
-
60
-
61
-
62
-
63
-
64
 |
 |