Canon PowerShot A570IS ZoomBrowser EX 5.8 Software User Guide - Page 92
Rotating Images
 |
UPC - 013803078442
View all Canon PowerShot A570IS manuals
Add to My Manuals
Save this manual to your list of manuals |
Page 92 highlights
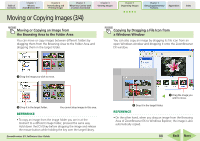
Table of Contents Chapter 1 What is ZoomBrowser EX? Chapter 2 Downloading and Printing Images Chapter 3 What You Can Do with a Camera Connected Chapter 4 Viewing Images Chapter 5 Organizing Images Chapter 6 Using Supplementary Features Appendices Index Rotating Images This topic explains the procedures for rotating images. Under Windows Vista and Windows XP, movies can also be rotated. How to rotate an image 1. Select an image to rotate. 2. Click (Rotate). The rotation settings window will display. A symbol similar to that at the right will display for images that are rotated in the display only. The image data itself is not rotated for these images. REFERENCE • You can rotate the original image to match the orientation of the displayed image by clicking the [Edit] menu and selecting [Rotate According to Rotation Information] (Still images only). • If a movie cannot be rotated, rotate it using the Task Area [Export] button and [Export Movie] option. 3. Set the rotation direction and angle and click [OK]. Selects the direction and angle of rotation. Place a check mark here to change the orientation of the image data itself. (Still images only) Other ways of rotating images ■ Rotating multiple images You can select multiple images by pressing and holding the [Ctrl] key and clicking on successive images or by pressing and holding the [Shift] key while clicking on images. You can rotate multiple images at once by selecting them and carrying out the rotation procedure. ■ Using the Menu to Rotate Images Rotate images by selecting the image, clicking the [Edit] menu and selecting [Rotate] from the submenu and a direction of rotation. ZoomBrowser EX Software User Guide 92 Back Next
-
 1
1 -
2
-
3
-
4
-
5
-
6
-
7
-
8
-
9
-
10
-
11
-
12
-
13
-
14
-
15
-
16
-
17
-
18
-
19
-
20
-
21
-
22
-
23
-
24
-
25
-
26
-
27
-
28
-
29
-
30
-
31
-
32
-
33
-
34
-
35
-
36
-
37
-
38
-
39
-
40
-
41
-
42
-
43
-
44
-
45
-
46
-
47
-
48
-
49
-
50
-
51
-
52
-
53
-
54
-
55
-
56
-
57
-
58
-
59
-
60
-
61
-
62
-
63
-
64
-
65
-
66
-
67
-
68
-
69
-
70
-
71
-
72
-
73
-
74
-
75
-
76
-
77
-
78
-
79
-
80
-
81
-
82
-
83
-
84
-
85
-
86
-
 87
87 -
 88
88 -
 89
89 -
 90
90 -
 91
91 -
 92
92 -
 93
93 -
 94
94 -
 95
95 -
 96
96 -
 97
97 -
98
-
99
-
100
-
101
-
102
-
103
-
104
-
105
-
106
-
107
-
108
-
109
-
110
-
111
-
112
-
113
-
114
-
115
-
116
-
117
-
118
-
119
-
120
-
121
-
122
-
123
-
124
-
125
-
126
-
127
-
128
-
129
-
130
-
131
-
132
-
133
-
134
-
135
-
136
-
137
-
138
-
139
-
140
-
141
-
142
-
143
-
144
-
145
-
146
-
147
-
148
-
149
-
150
-
151
-
152
-
153
-
154
-
155
 |
 |
